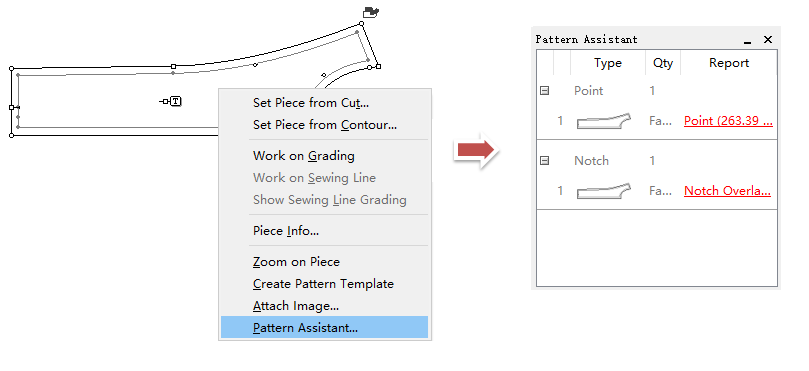
Right-click the piece to open the menu, facilitate user to set piece, work on grading, open Pattern Assistant and so on, improving the efficiency of pattern-making.
Set Piece from Cut
User can set piece from some part.
For example:
Set part A as a piece:
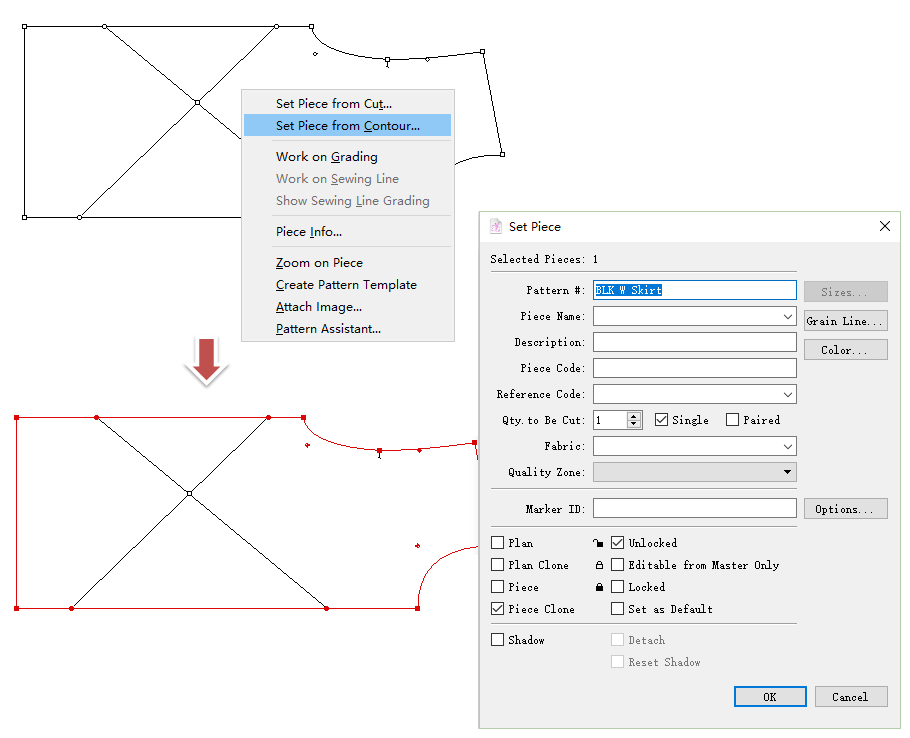
- Right-click the desired part, menu appears, click [Set Piece from Cut];
- The contour of the part is in color, which means it is selected, in the meanwhile, Set Piece Dialog Box appears;
- Enter piece information or select desired options in the dialog box, click [OK] to save it.

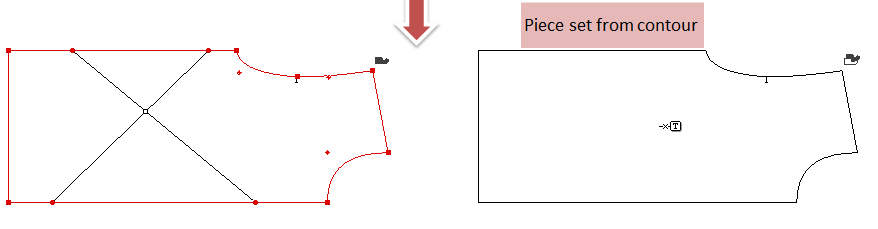
[Set Piece from Contour]
User can set the piece from the outmost contour.
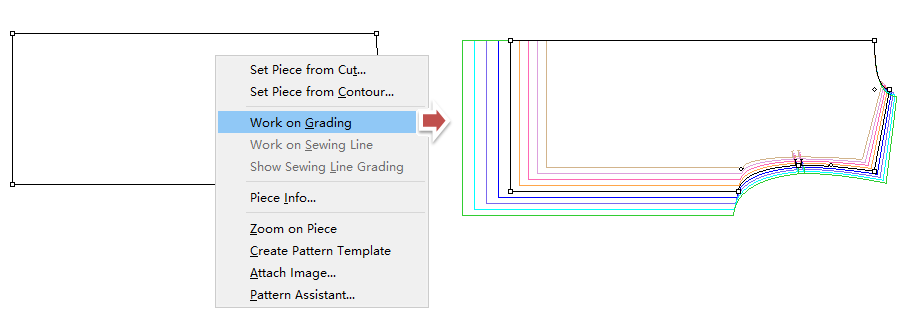
Work on Grading
User can view the grading nest or operate grading on the desired piece.
View grading nest:
Meanwhile, the grading tools appear:
備註
For more information about grading, please refer to Chapter 4.

Work on Sewing Line
This function is the same as [Work on Sewing Line] in [View] Menu.
User can refer to the corresponding section in the manual.
Show Sewing Line Grading
This function is the same as [Show Sewing Line Grading] in [View] Menu.
User can refer to the corresponding section in the manual.
Piece Info
This function is the same as [Piece Info] in [Treatment] Menu.
User can refer to the corresponding section in the manual.
Zoom on Piece
Enlarge the view of the desired piece to the central working area, facilitate user to view or modify the piece.
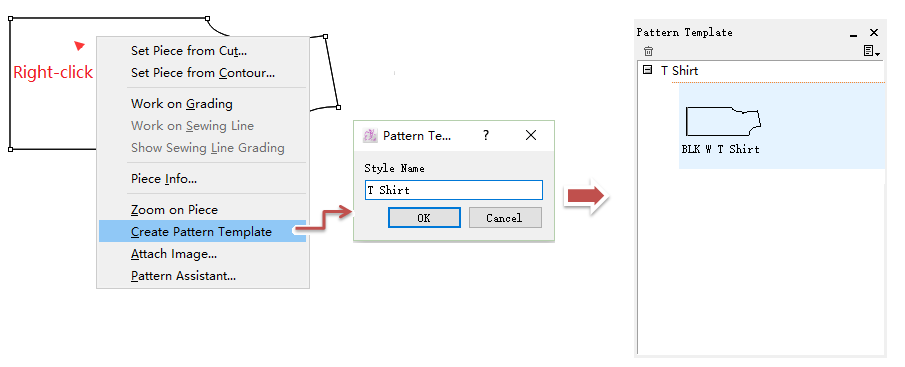
Create Pattern Template
Allow user to add the desired piece into the pattern template list.
- Right-click the piece, select [Create Pattern Template];
- Enter name, click [OK];
- Then this piece is added to the template list.
備註
For more information about Pattern Template, please refer to the introduction of Menu [View] - [Show Pattern Template].
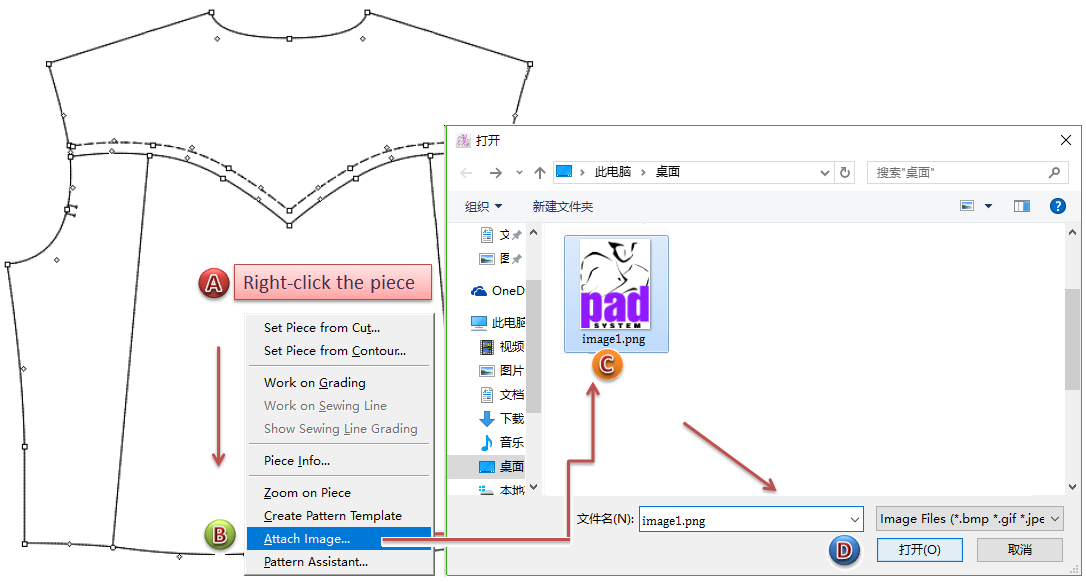
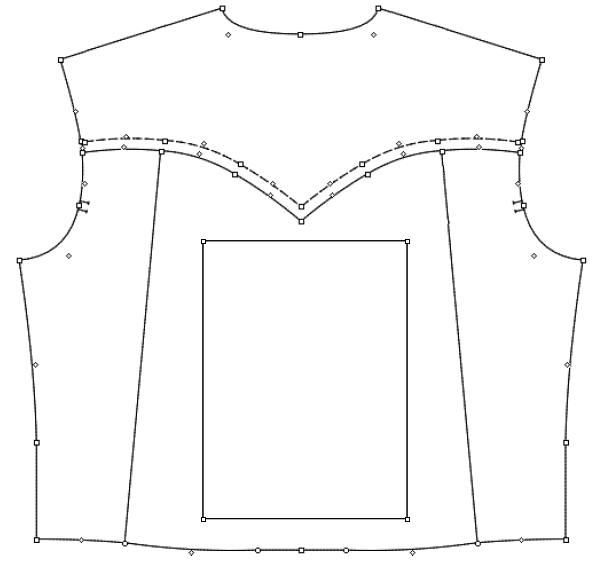
Attach Image
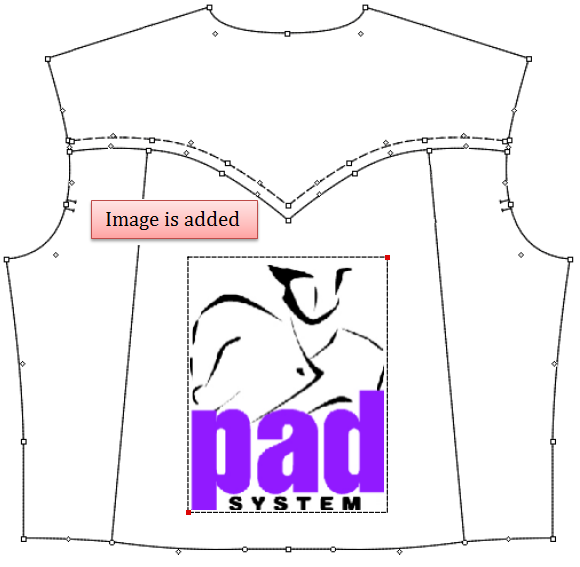
Allow user to add image on the piece directly, like the printing, embroidery and other images. User can plot them directly and does not have to stick the image by manual after printing the piece, which wastes time.
Available image format:

How to add image on the piece
Right-click on the desired position, pull-down menu appears, click [Attach Image...];
Dialog box appears, go to the desired path to select the image file, then click [OK].
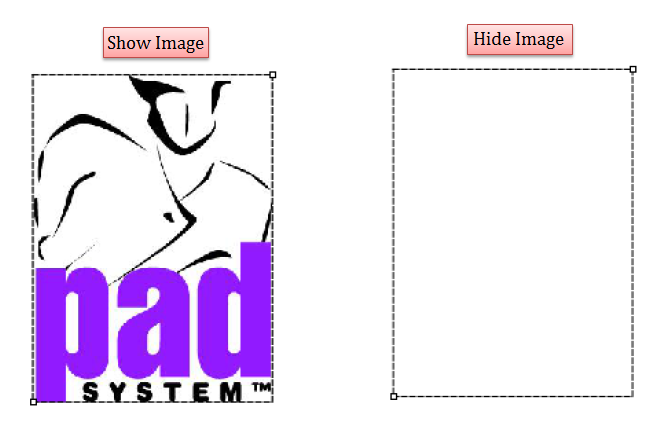
How to show/hide image
Click menu [View] - [Show] -[Image] to show or hide image on the working area:
Select [Image] to show image;
Unselect it to hide image.

How to move the image
If the image doesn’t locate on your desired position, you can:
- Select [Pointer] tool, choose the image, hold down the left mouse button to drag the image to your desired position.
- Select [Pointer] tool, choose the image, press arrow keys on your keyboard to move the image to your desired position.
備註
How to rotate the image
Rotate the image by freehand, or rotate it at N° round angle(N° is mutiples of 15°), or rotate it at precise angle value.
Rotate image by freehand
- Select desired image;
- Select
tool;
- Click the fixed pivot point, then click anywhere you want, drag the pointer to rotate;
- Release the mouse button.
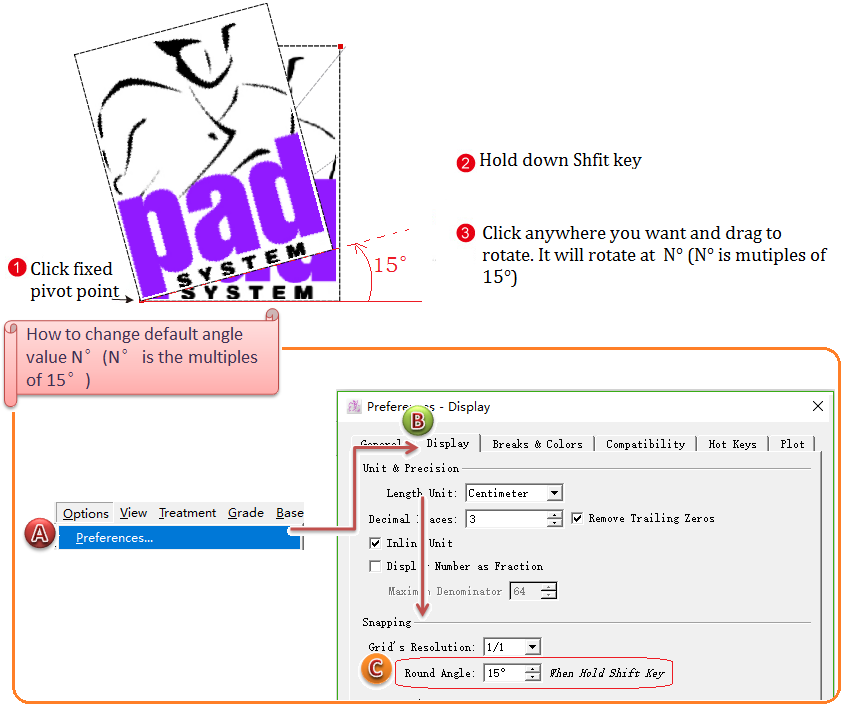
Rotate image at N° round angle
Select desired image;
Select
Click fixed pivot point, press Shift key without releasing it, then click anywhere you want and drag to rotate. It will rotate at N° (N° is mutiples of 15°).
Release Shift key and mouse button.
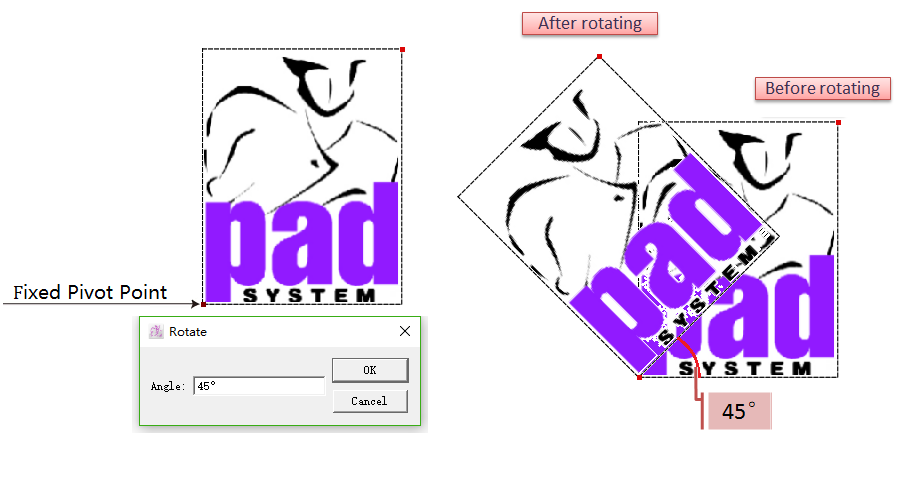
Rotate image at precise angle
- Select desired image;
- Click
- Holding down Alt key (Windows) or Option key (Macintosh), click the fixed pivot point;
- Dialog box appears, enter desired value, click [OK].
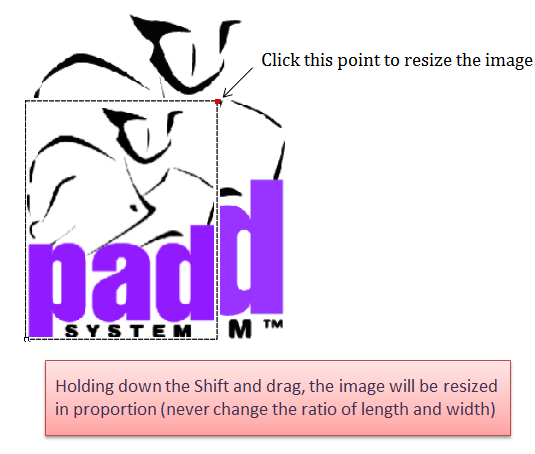
How to resize the image
- Select
tool;
- Select the desired image;
- Left-click the point at the upper left corner, drag it to resize the image.
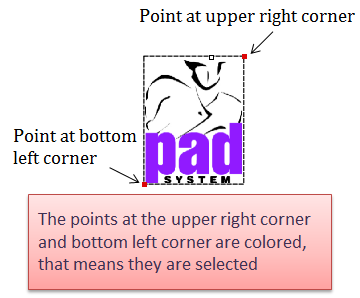
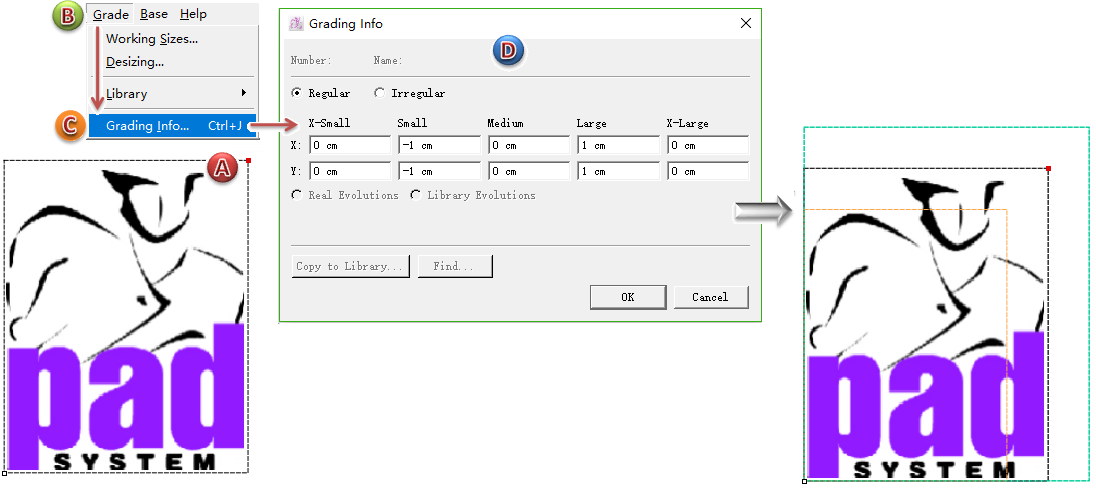
How to manipulate grading on the image
Allow manipulate grading on the regular points at the buttom-left corner and upper-right corner.
How to do:
Select the desired point (for example, the regular point at the upper-right corner);
Click menu [Grade] - [Grading Info...] to open grading info dialog box;
Enter values, click [OK].
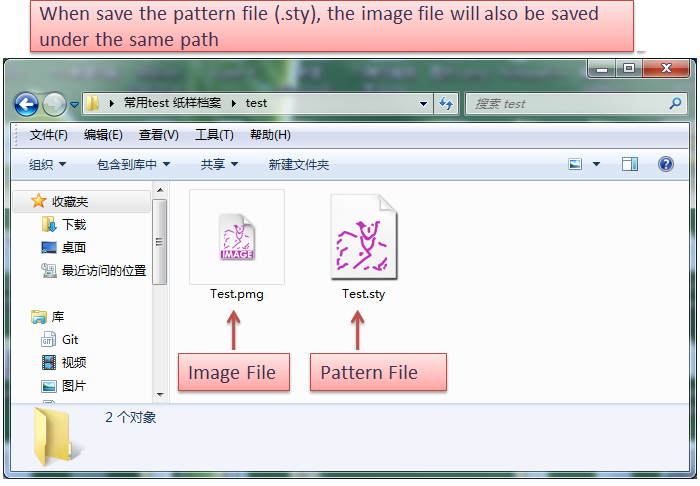
Save image file
When you save the pattern file (.sty), the image will also be save under the same path (pattern file and image file are saved in the same directory). Image format is .pmg, shown as following picture:
Lost image file
If:
- change the name of pattern file (.sty);
- change the name of image file (.pmg);
- the pattern file (.sty) and image file (.pmg) are in different path (Error moving file or lost sending file);
then it will lost the image file (that’s to say, fail to read corresponding image file while open the pattern file), dialog box appears:
Continue - select image file manually;
Cancle - close dialog box, and replace the image with a rectangle shape.

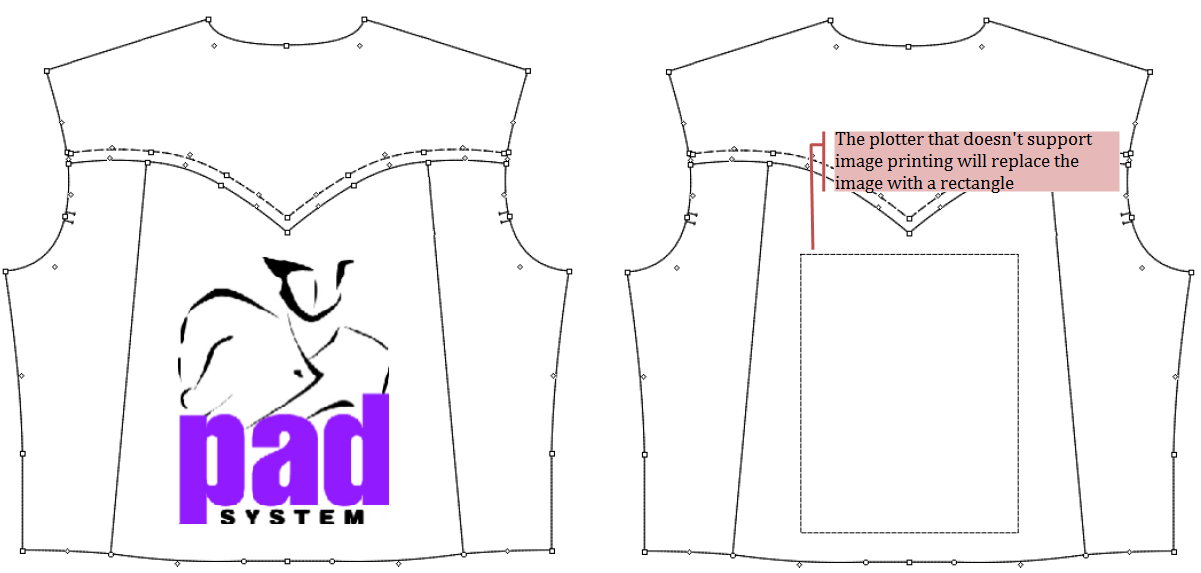
Print image
Print the image while print the pattern file.
備註
Now PAD OEM Plotter & HP (Hewlett Packard) Printer can print the pattern piece and its images. Other printer or plotter can print its frame only.

Export the pattern file with images as other formats
Export the pattern file with images as other formats, like DXF-AAMA, DXF-ASTM, Illustrator (.txt), Plotting File (.plt). Then the image will be shown as a rectangle:
Pattern Assistant
To check if there is any error on the desired piece.
備註
For more information about Pattern Assistant, please refer to the section of [Treatment] Menu - [Pattern Assistant].