Chapter 5 - New Features
Send files through WAN
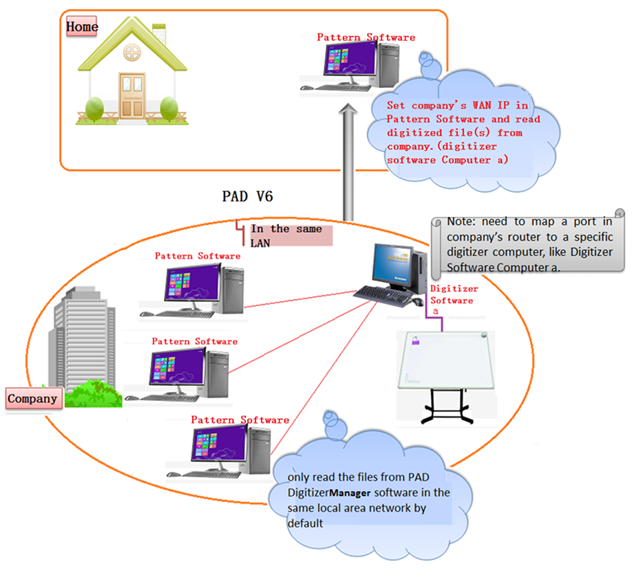
Facilitate users whose network is not local area network ( LAN ) to send digitizer files through wide area network IP.
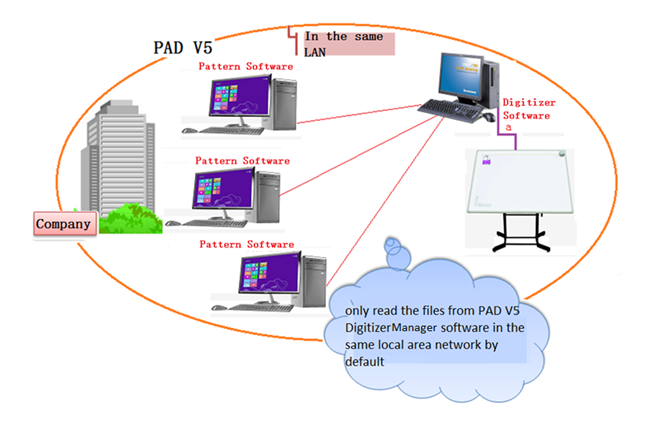
Old way: only read files in the same LAN. That is to say, PAD V5 Pattern Design can only read the files from PAD V5 Digitizer Manager in the same LAN.
New Feature: Now users can read files through wide area network ( WAN ) IP. They don’t have to be in the same LAN. That means PAD V6 Pattern Design and PAD V6 Digitizer Manager can read files in different LAN or do it through WAN IP. (For example, User A is working with PAD V6 Software at home while User B is digitizing a file in company. User A can set WAN IP of User B’s company in his PAD V6 Pattern Software, then read the digitized file directly from User B’s Company.
How to set:
Open
Digitizer Manager in company’s computer;
Click menu Option - Connection Settings;
Dialog box appears, it shows company’s WAN IP in IP Address, remember the IP address and the password you set ( or leave it blank), then click OK;
Open
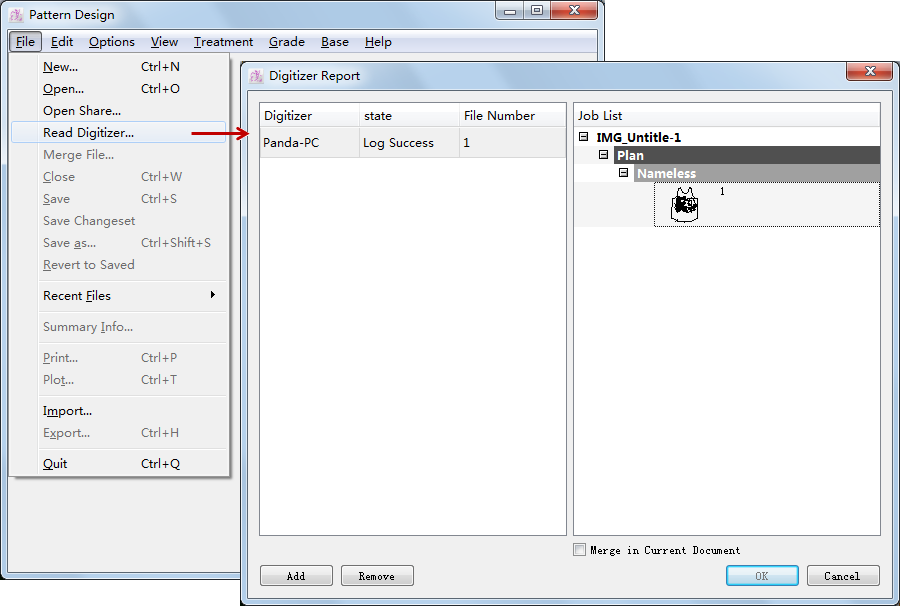
Pattern Design in home’s computer, click menu File - Open Digitizer;
Dialog box Digitizer Report appears, click Add button;
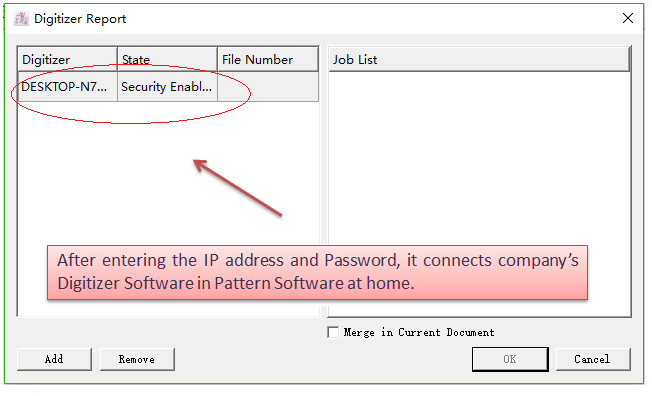
Enter the IP address and password from Digitizer Manager, click OK;
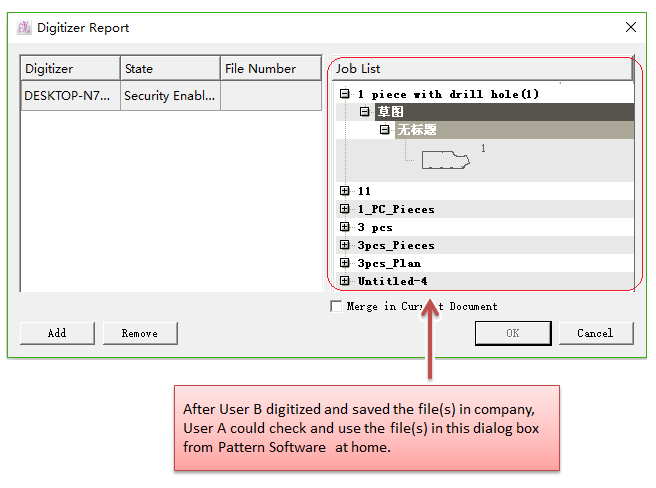
It shows the information of connected digitizer and files in Digitizer Report Dialog box. Select the required file(s) shown under Job List.

PAD V7.0 Digitizer Manager New Features
Add [Load Picture]
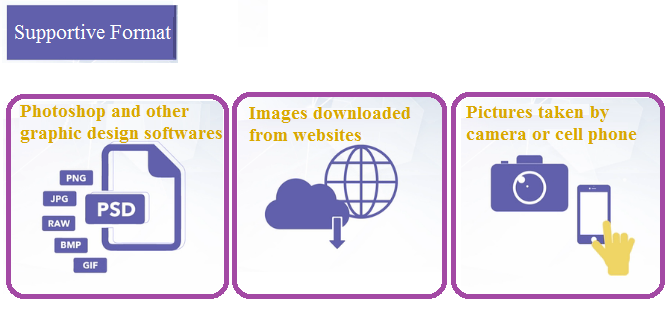
The image/picture loaded into Digitizer Manager can be converted to a pattern piece.
Supportive image formats: PNG,JPEG,BMP and so on:
How to use this function:
Click the icon
or the item [Load Picture] under the menu [File];
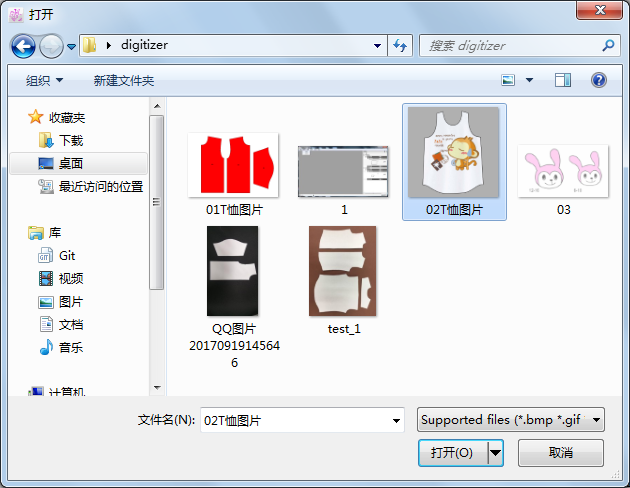
Select and open the desired image file from the right path in the dialog box:
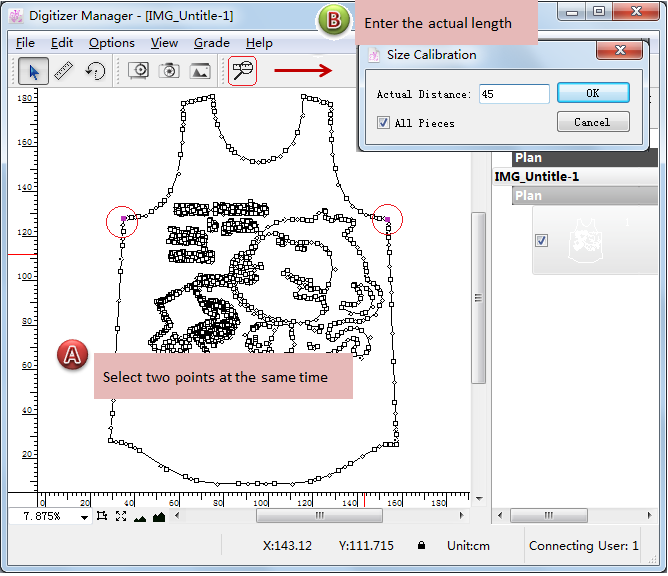
The image is converted into a pattern piece and shown in the job list; you can calibrate size of the pattern piece according the actual size:
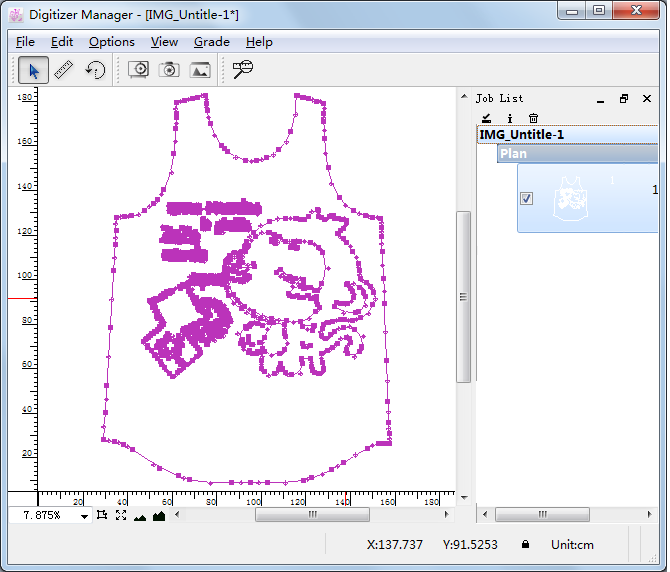
After calibration, select the piece:
Open Pattern Design, and select the digitizer, the selected pattern piece is shown in the list on the right side:
Select the pattern piece and click [OK] button, the pattern piece is open in Pattern Design, now you can modify it as you want and save it as a .sty file.