Pants
Draw two rectangles with length values of front hip, back hip and pants.
Select
 , hold down Option (Mac) or Alt (Windows) key, left-click desired area, enter value in the dialog box.
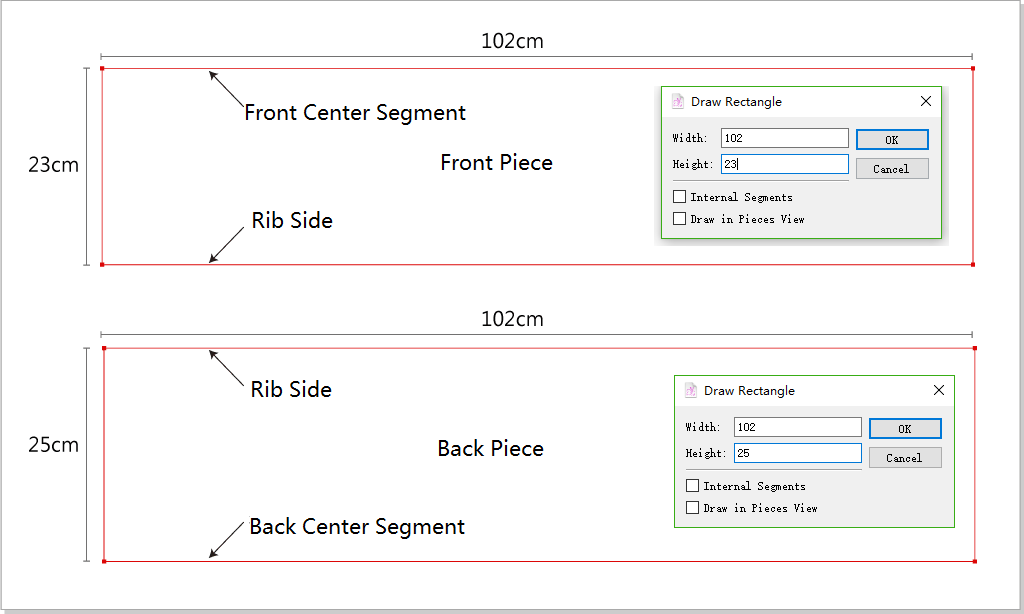
Draw a parallel line (crotch line) 24cm from the waist line.
Select waist line, choose
 , click inside the rectangle, enter value 24 cm.
Select
 , hold down Option (Mac) or Alt (Windows) key, draw segments from A point and B point.
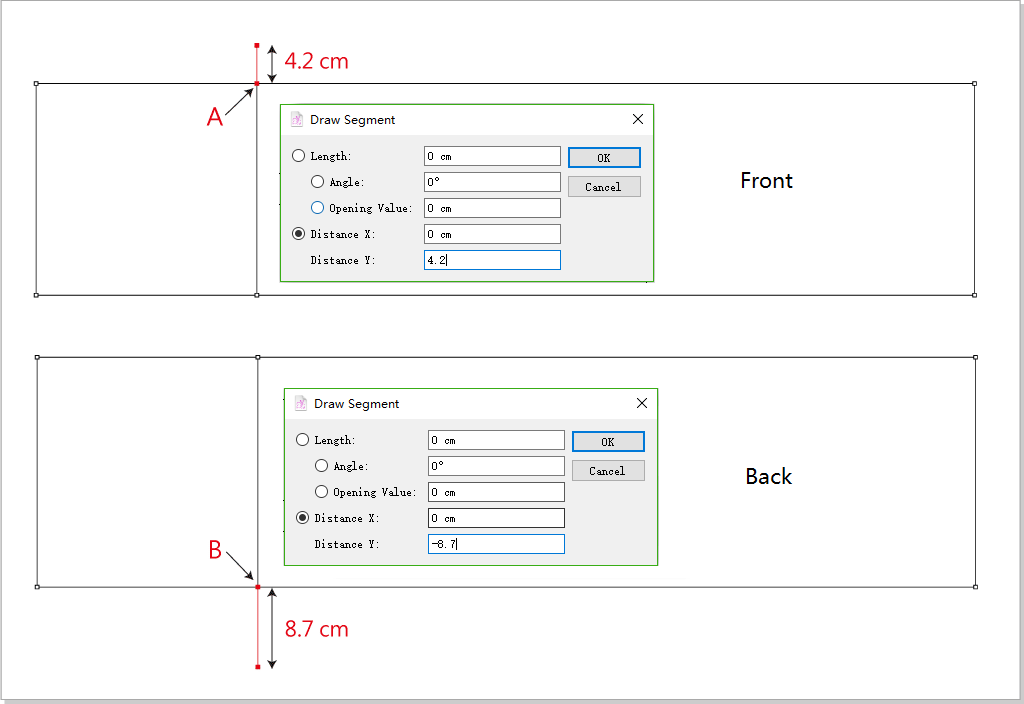
Draw a parallel line (hip line) 20cm from the waist line.
Select waist line, choose
, click inside the rectangle, enter 20 cm in the dialog box.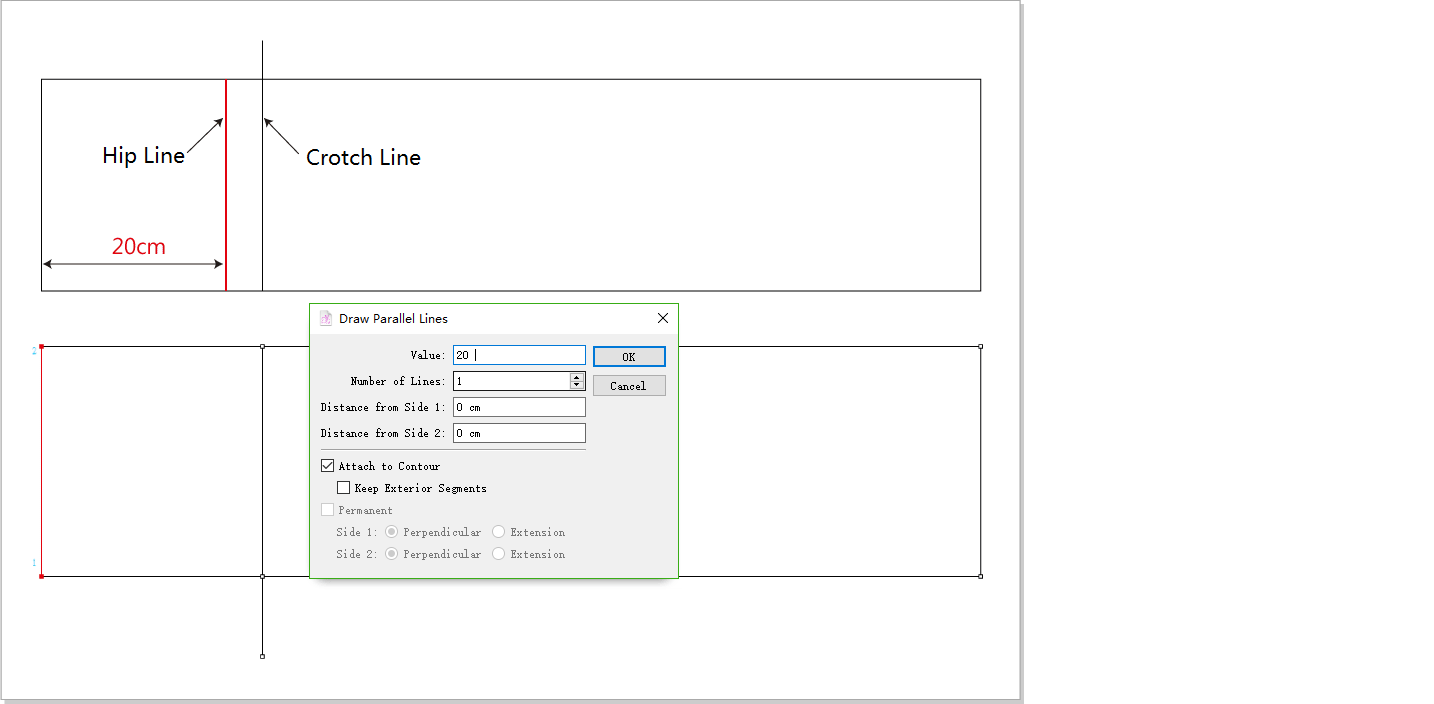
Draw a parallel line (knee) 57cm from the waist line.
elect waist line, choose
, click inside the rectangle, enter 57 cm in the dialog box.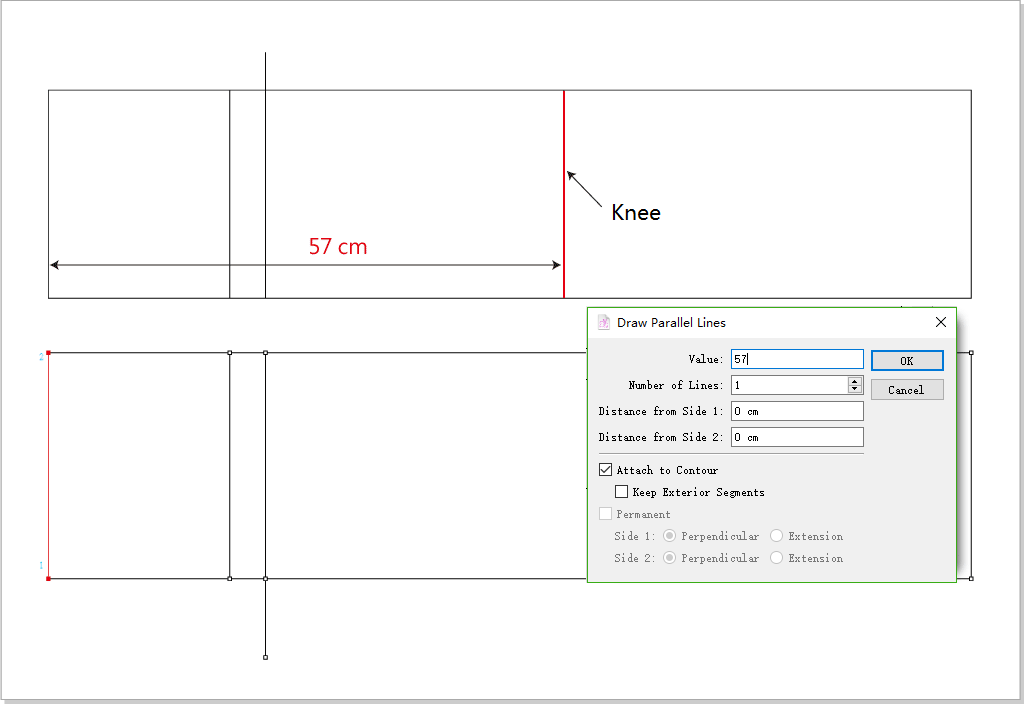
Draw the fold line.
Select the crotch line, choose
 , divide the line into two parts.
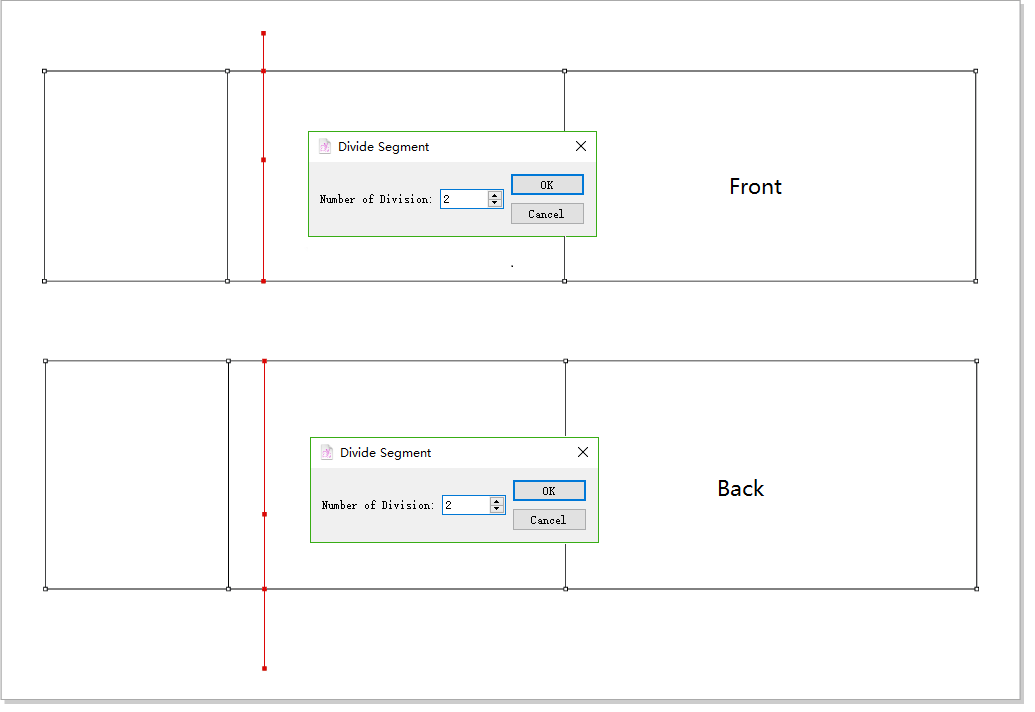
Select the rectangle, choose
 , hold down Option (Mac) or Alt (Windows) key, left-click Point A (B), enter value as follows.
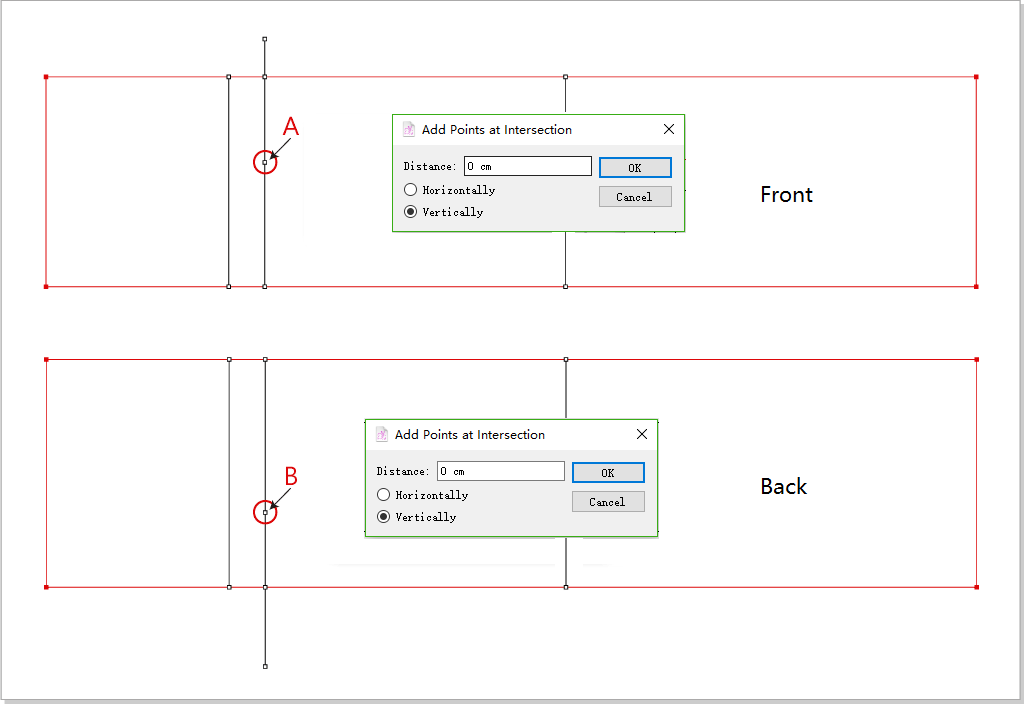
Activate the front (back) piece, select
, draw the fold line.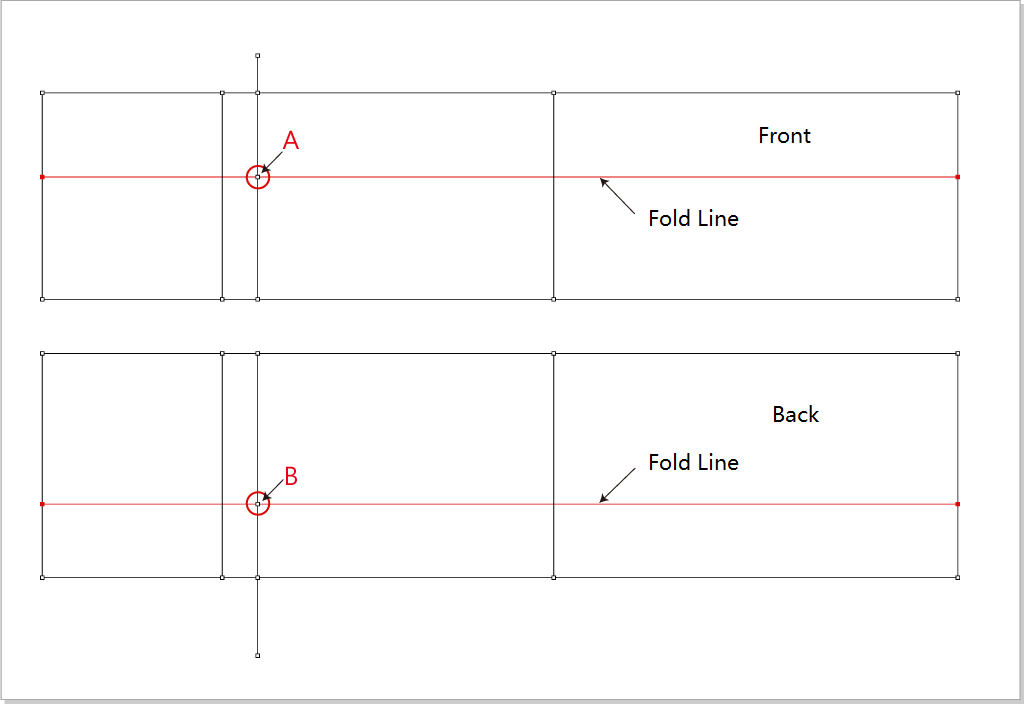
Draw waist point on side seam. Connect waist point on side seam with hip point on side seam.
Select the waist line, choose
 , left-click Point A (B), enter value in the dialog box.
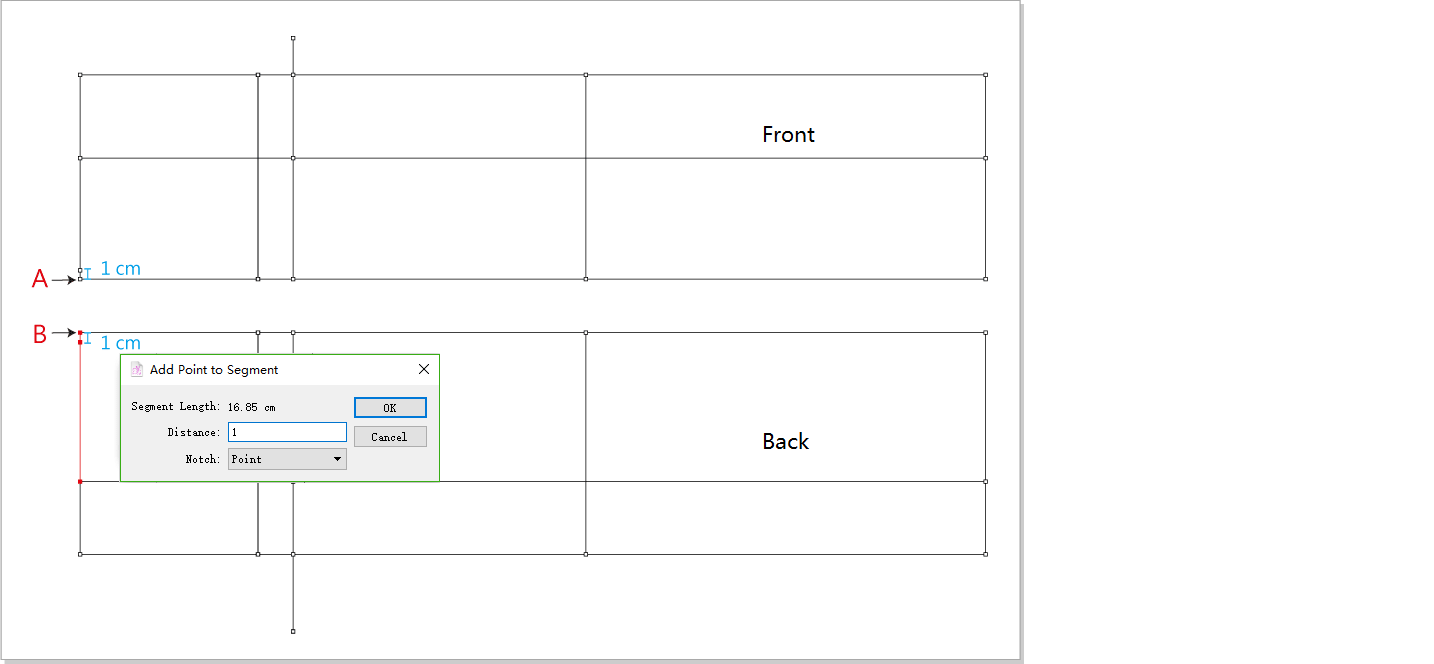
Select
 , connect point A and B, then Point C and D.
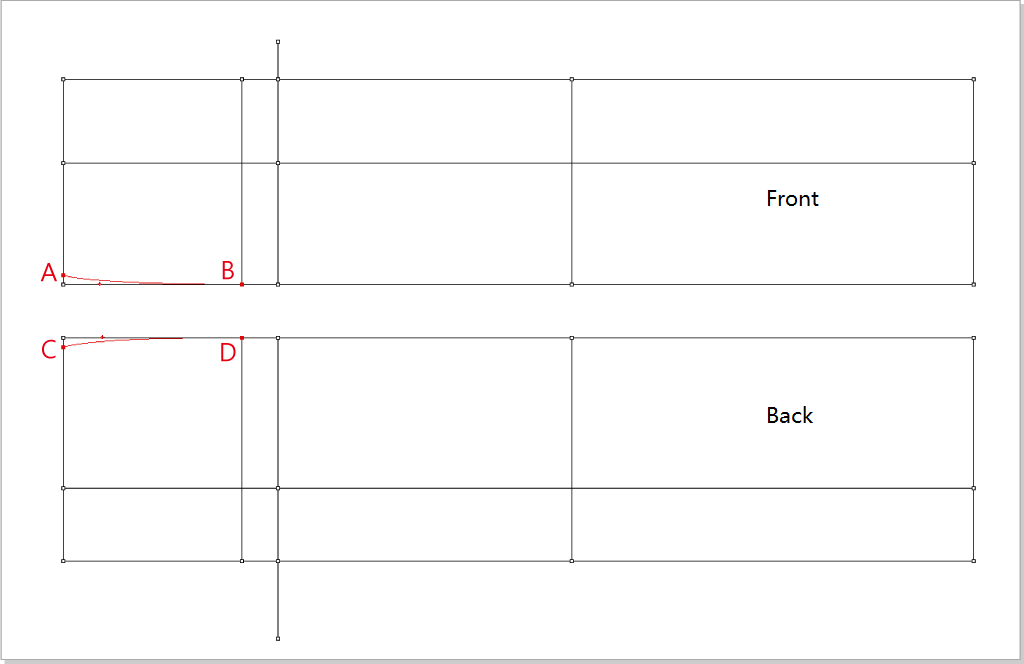
Draw the front waist and front crotch.
Select
 , hold down Option (Mac) or Alt (Windows) key, left-click Point A, enter value in the dialog box.
Select the hip line, choose
 , left-click Point B, enter value in the dialog box.
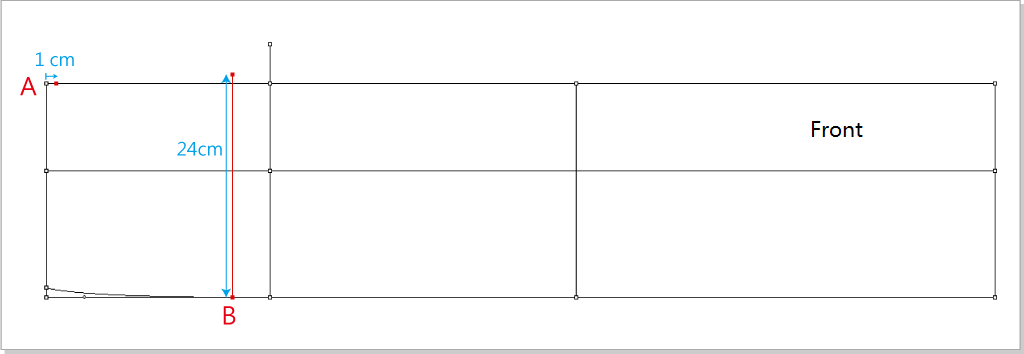
Select
, connect point A and B, Point C and D; choose , connect Point B and C.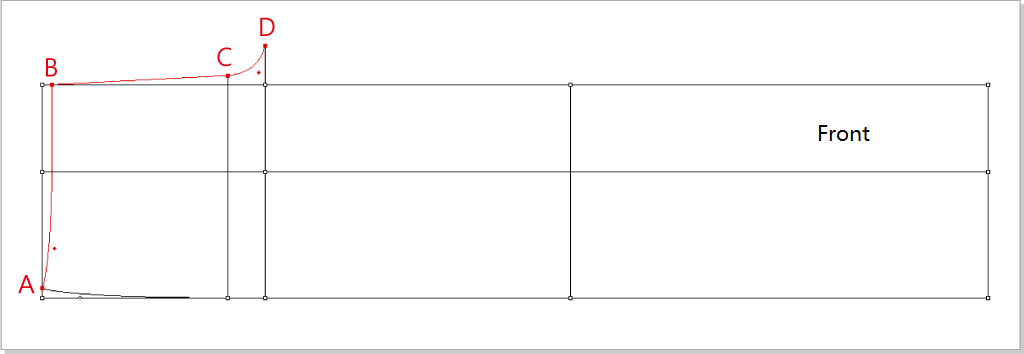
Draw the back waist and back crotch.
Select
, hold down Option (Mac) or Alt (Windows), enter value as follows.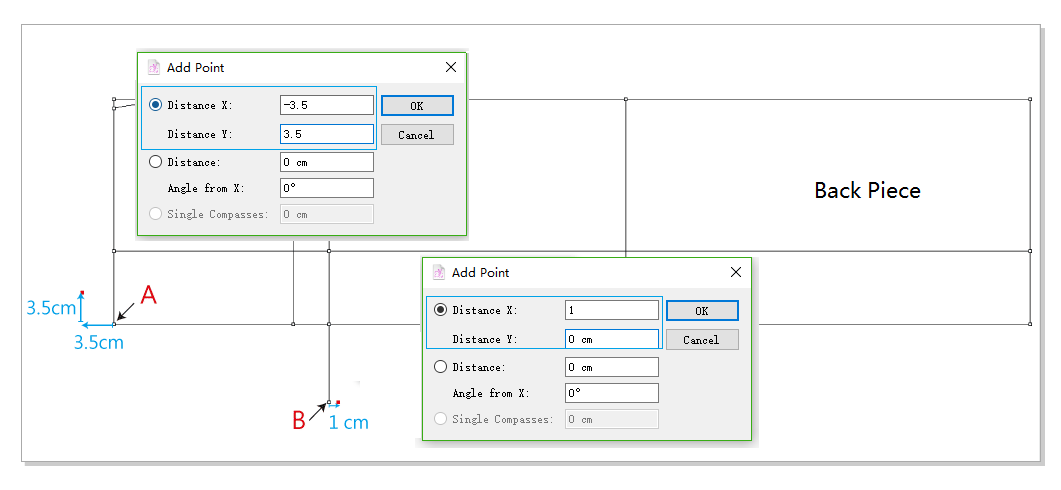
Select
, connect point A and B, then Point B and D.
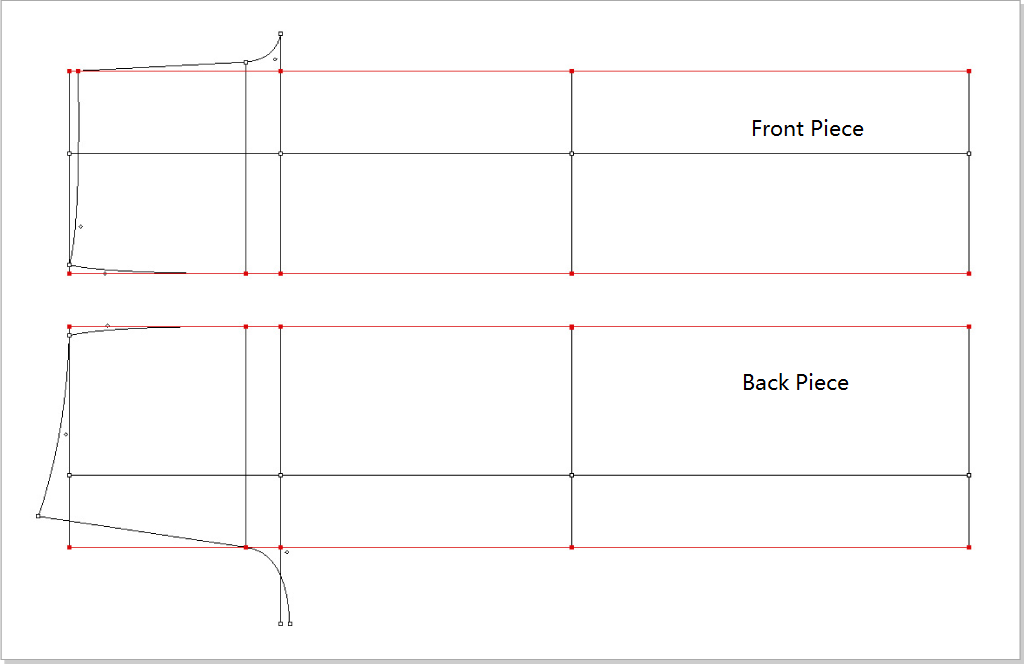
Select front center line, front side seam, back side seam and back center line, press Delete (Mac) or Backspace (Windows) key to remove segments.
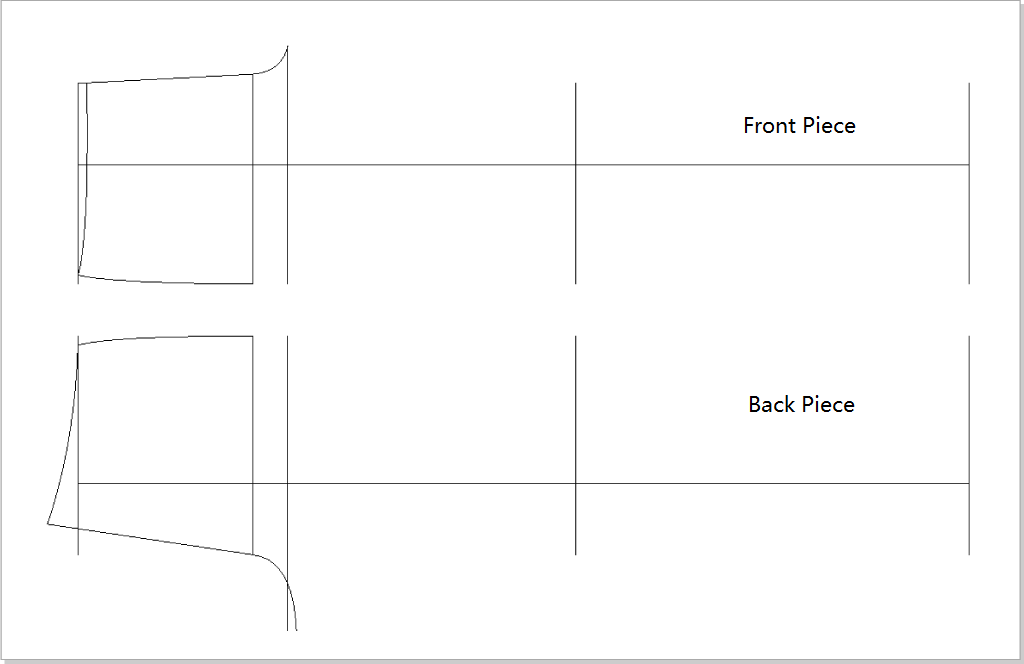
Modify the width of knee and cuff in front piece, and connect knee and cuff with outer side seam line and inner side seam line.
Select the knee line, click
, left-click Point A, enter value in the dialog box.Select the cuff line, click
,left-click Point B, enter value in the dialog box.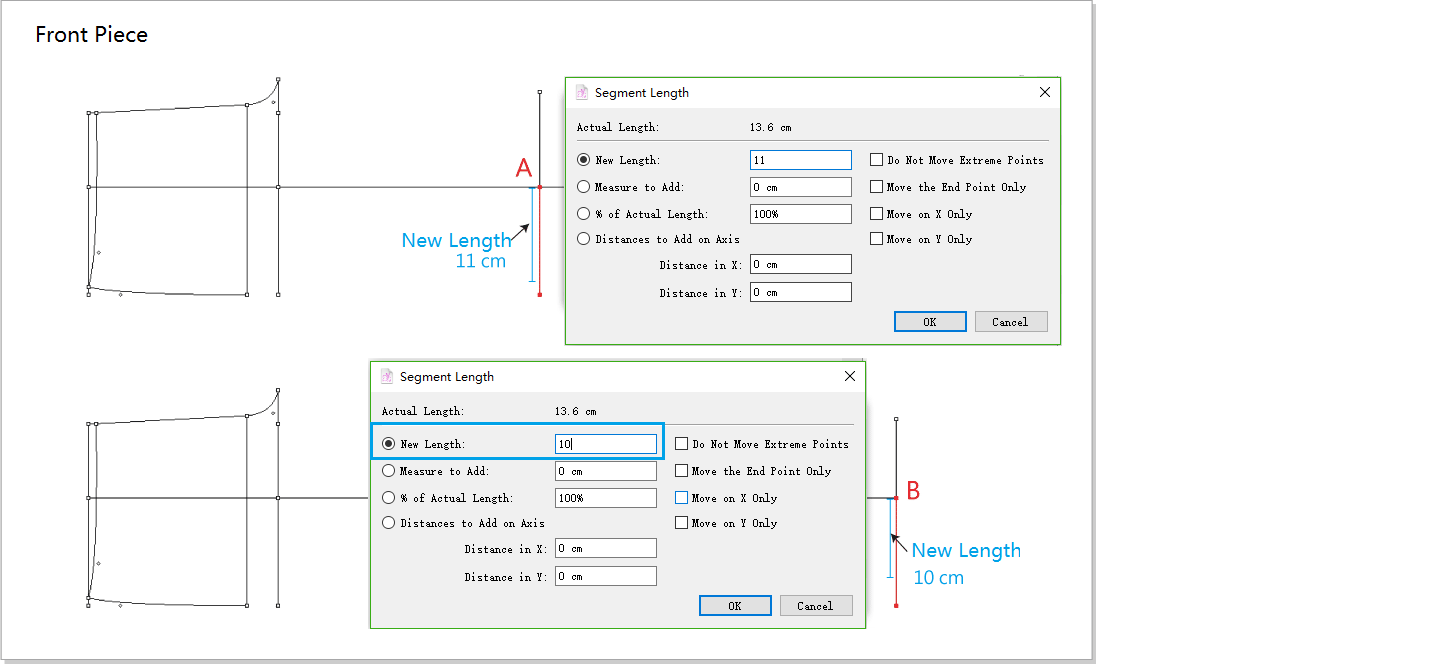
Select
, connect Point A and B, then Point E and F; select , connect Point B and C, Point F and G.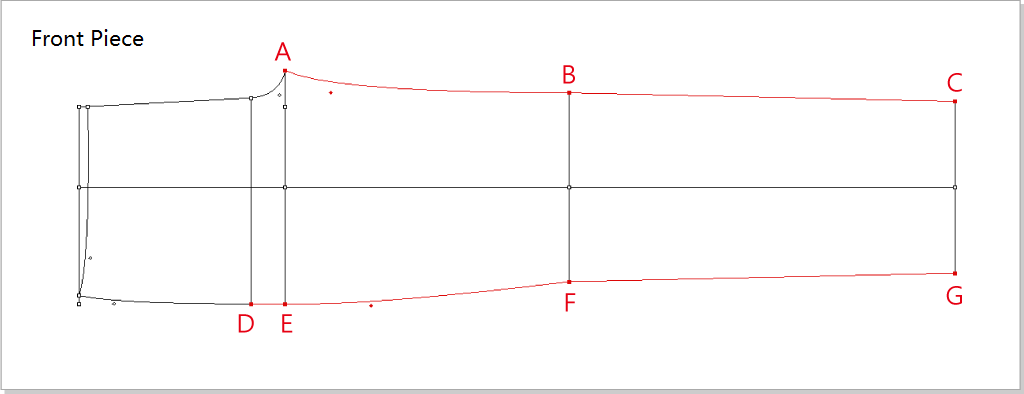
Modify the width of knee and cuff in back piece, and connect knee and cuff with outer side seam line and inner side seam line.
Select the knee line, click
, left-click Point A, enter value in the dialog box.Select the cuff line, click
,left-click Point B, enter value in the dialog box.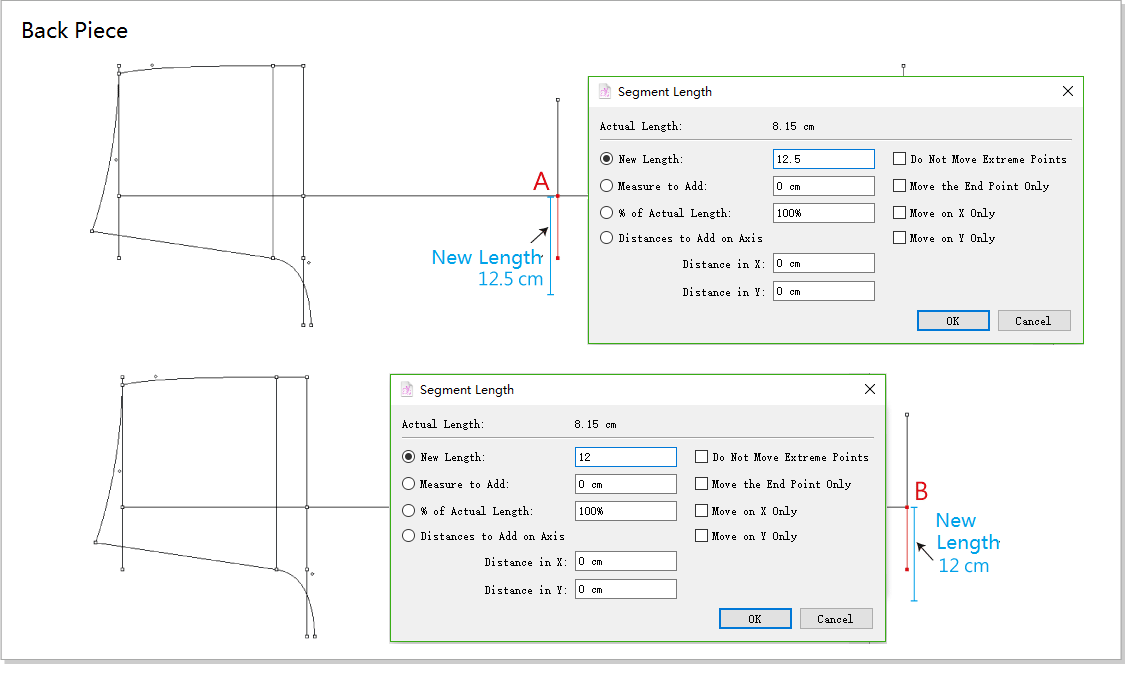
Select
, connect Point A and B; Point B and C; Point C and D; Point E and F; Point F and G.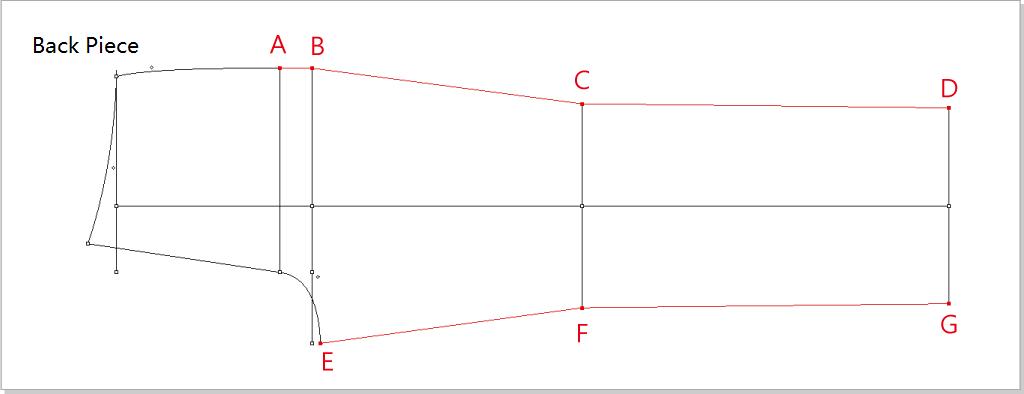
Select Segment BC, choose
to divide BC into two parts; Select Segment BH, HC and EF, choose , curve three selected segments.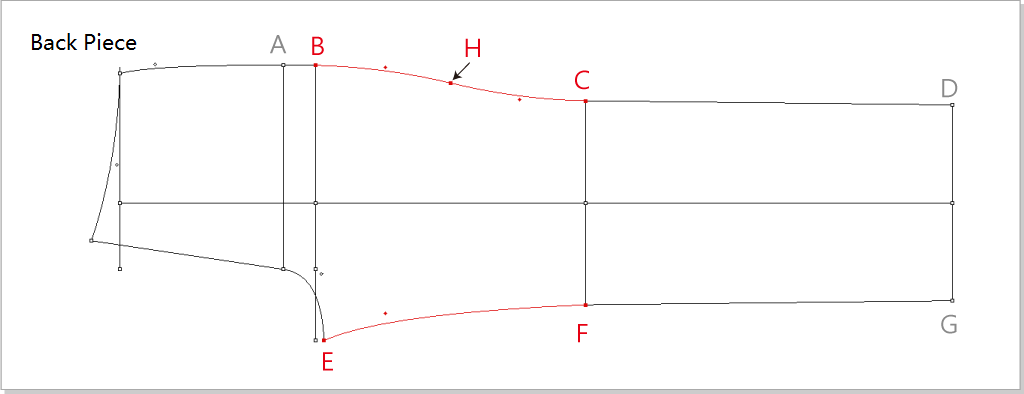
Select the redundant points and segments, press Delete (Mac) or Backspace (Windows) key to remove them.
Draw the segment where the dart is located in the front piece.
Select front waist line, choose
, left-click Point A. Enter value.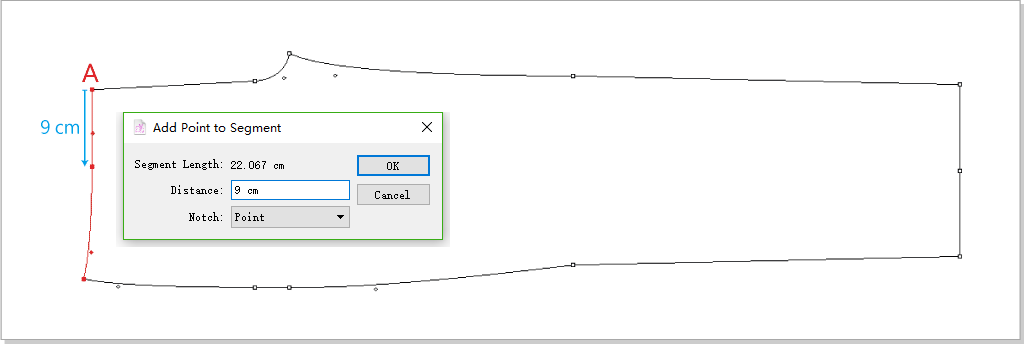
Select
, hold down Option (Mac) or Alt (Windows) key, left-click Point B. Enter value.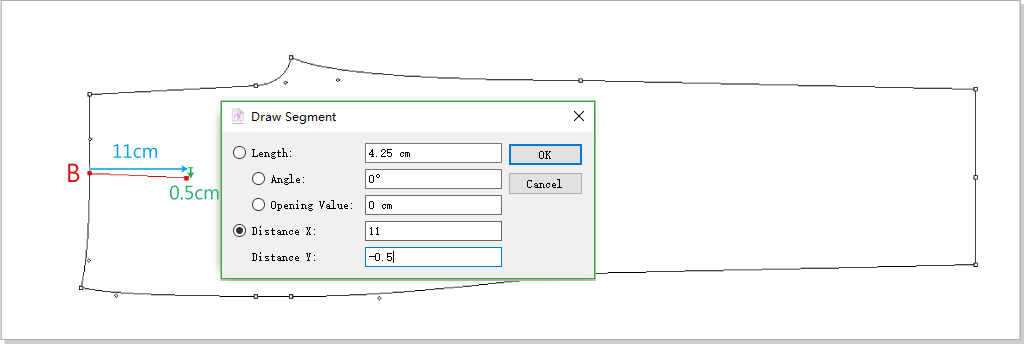
Select the second part of the waist line, choose
, left-click Point B. Enter value.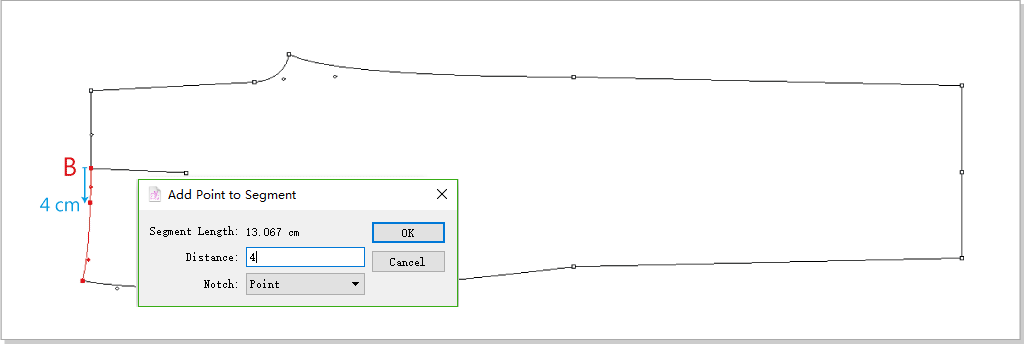
Select
, hold down Option (Mac) or Alt (Windows) key, left-click Point C. Enter value.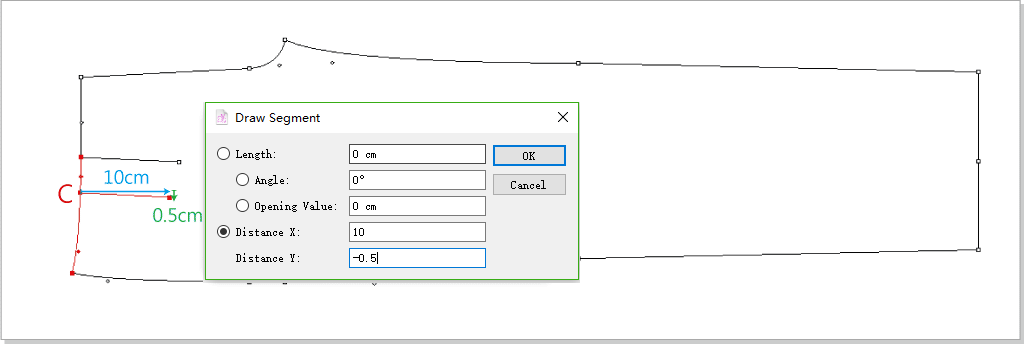
Draw the segment where the dart is located in the back piece.
Select back waist line, select
to divide the waist line into two part.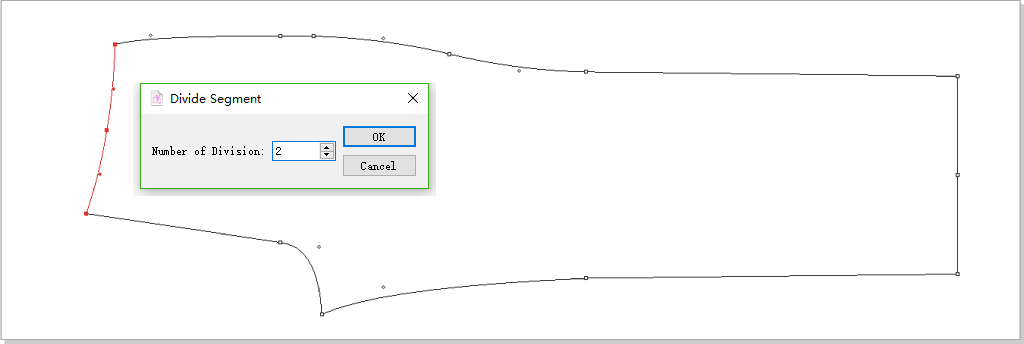
Select
, hold down Option (Mac) or Alt (Windows) key, left-click Point A. Enter value.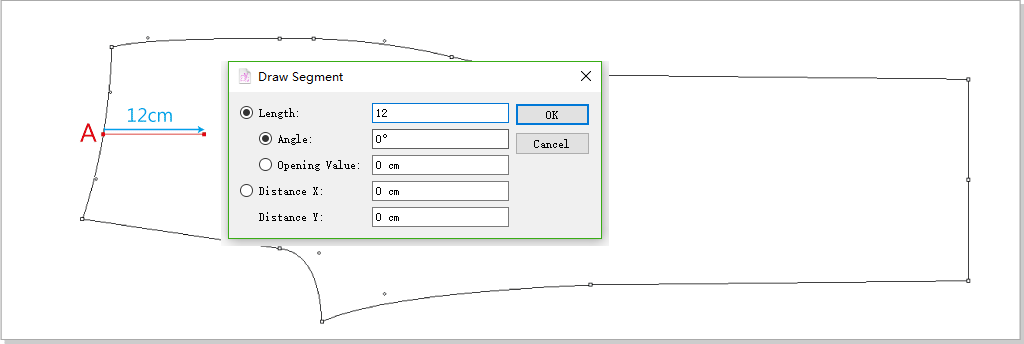
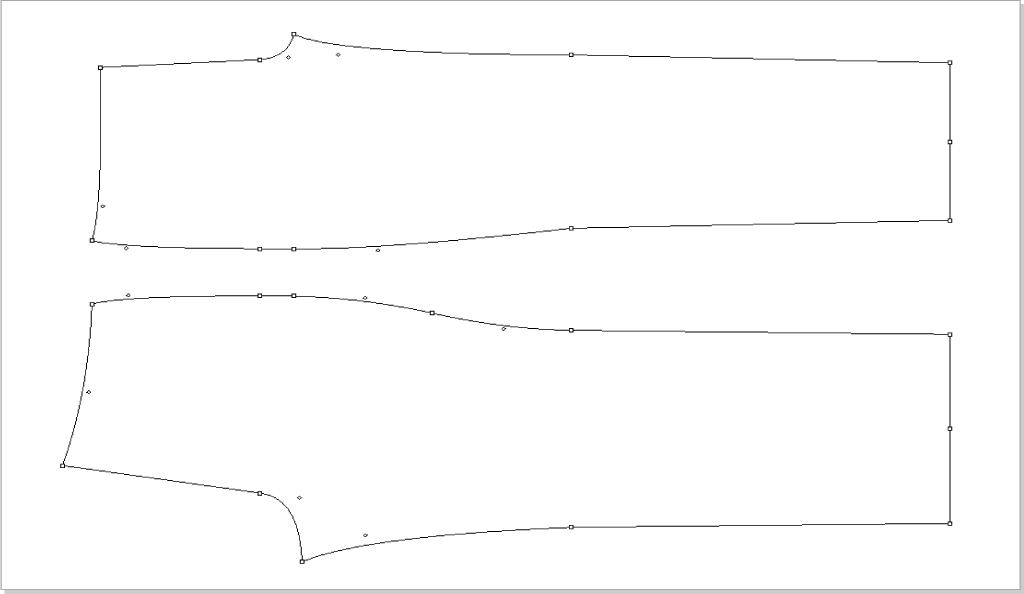
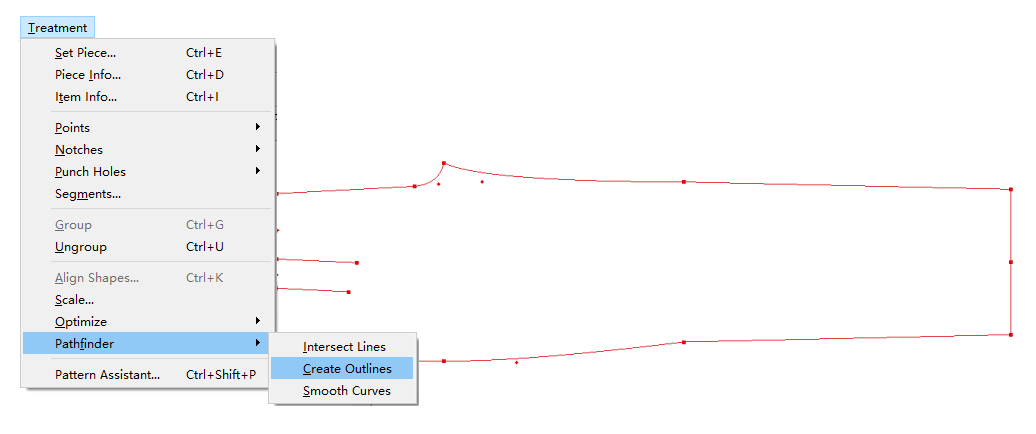
Selct front piece, click menu [Treatment] - [Pathfinder] - [Create Outlines]. Repeat the former operation for the back piece.
Develop a dart by using Dart tool.
Select the center segment of the dart, select
 , click the start point of the segment. Dialog appears. Enter value.
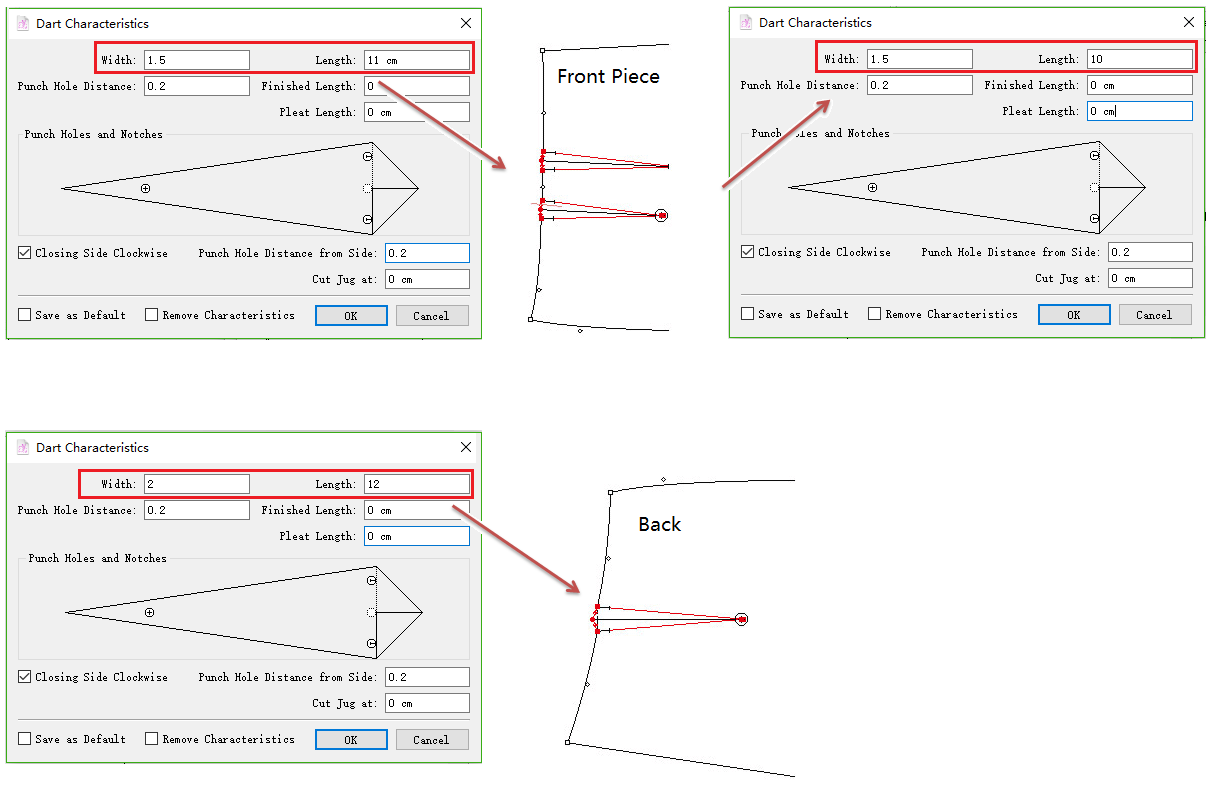
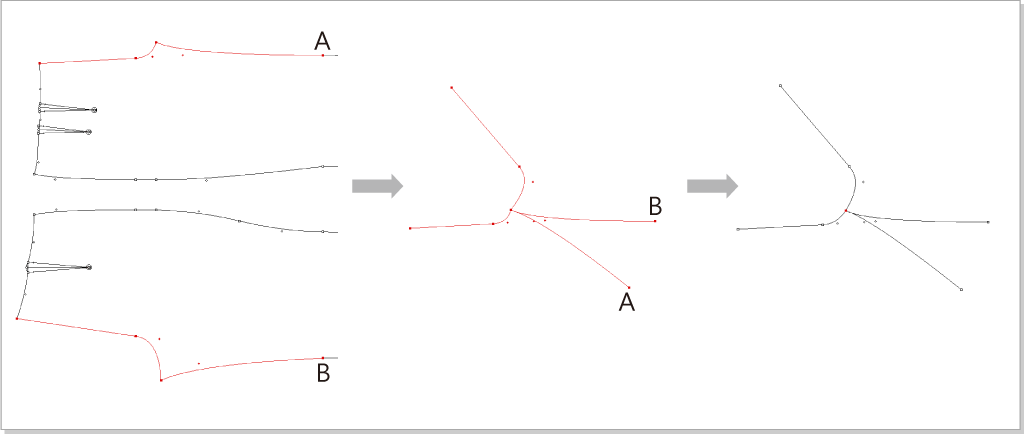
Modify the segments by using Segment Sync tool.
Select the red lines and dart. Select
 . Click Point A. After modifying the segments, right click once. Repeat the former operation for the back piece.
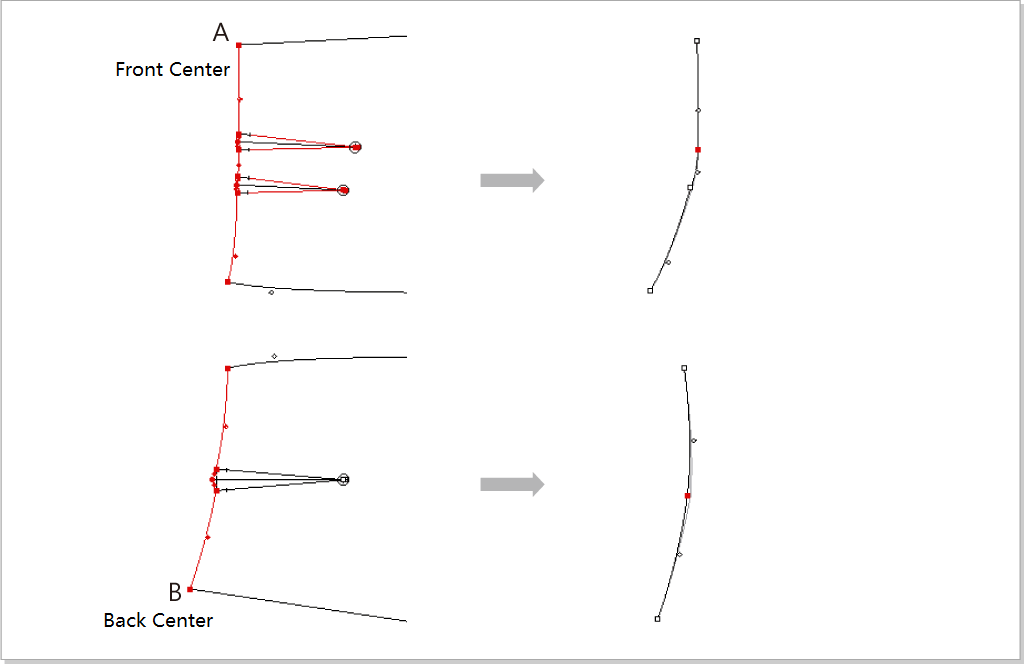
Select the red segment. Select
, click Point A then Point B. After modifying the segment, right click once. Repeat the operation for the cuff and crotch segments.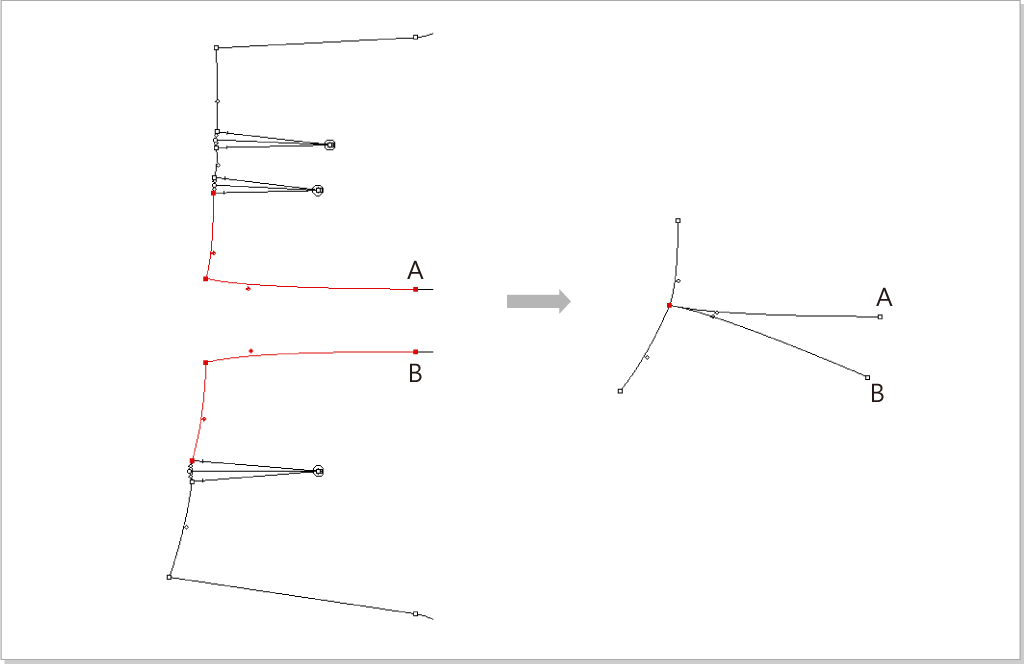
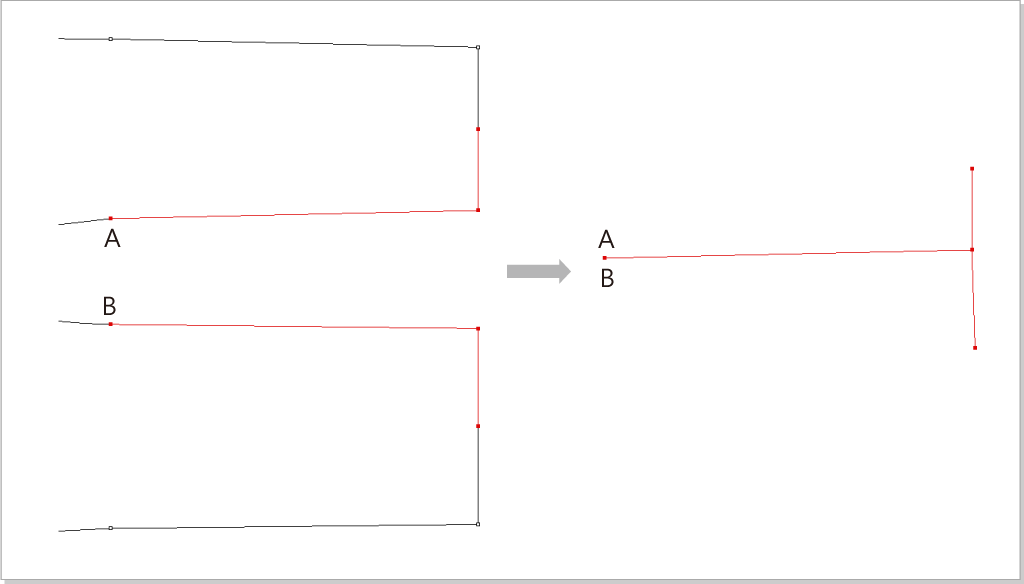
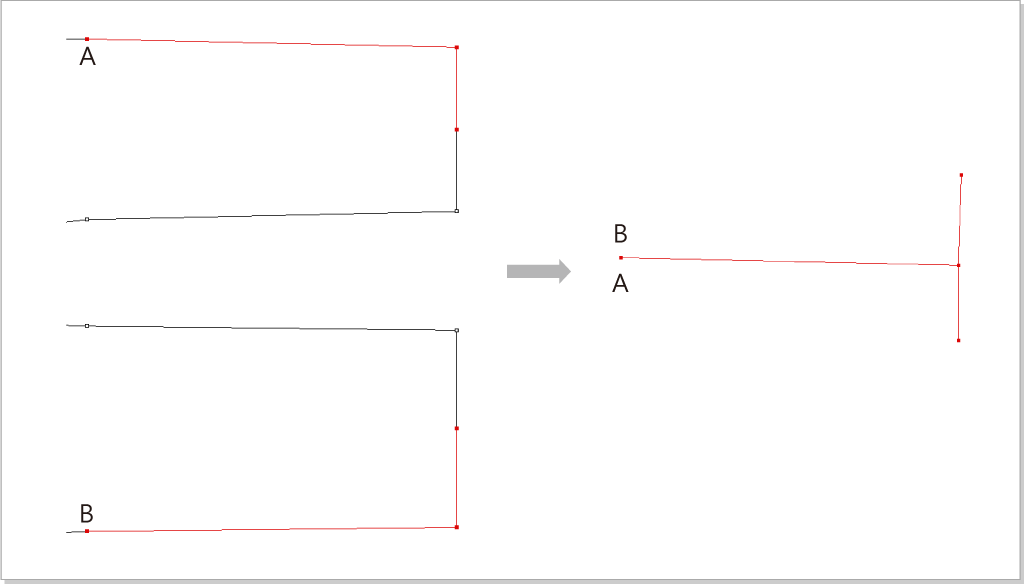
Check the length of the pieces by using Walking Piece.
elect the side seams from front piece and back piece. Select
 . Click Point A then B. A dialog box appears after simulating sewing. Double click the value to change. Then click [OK]. Repeat the former operation for the inner side seam.
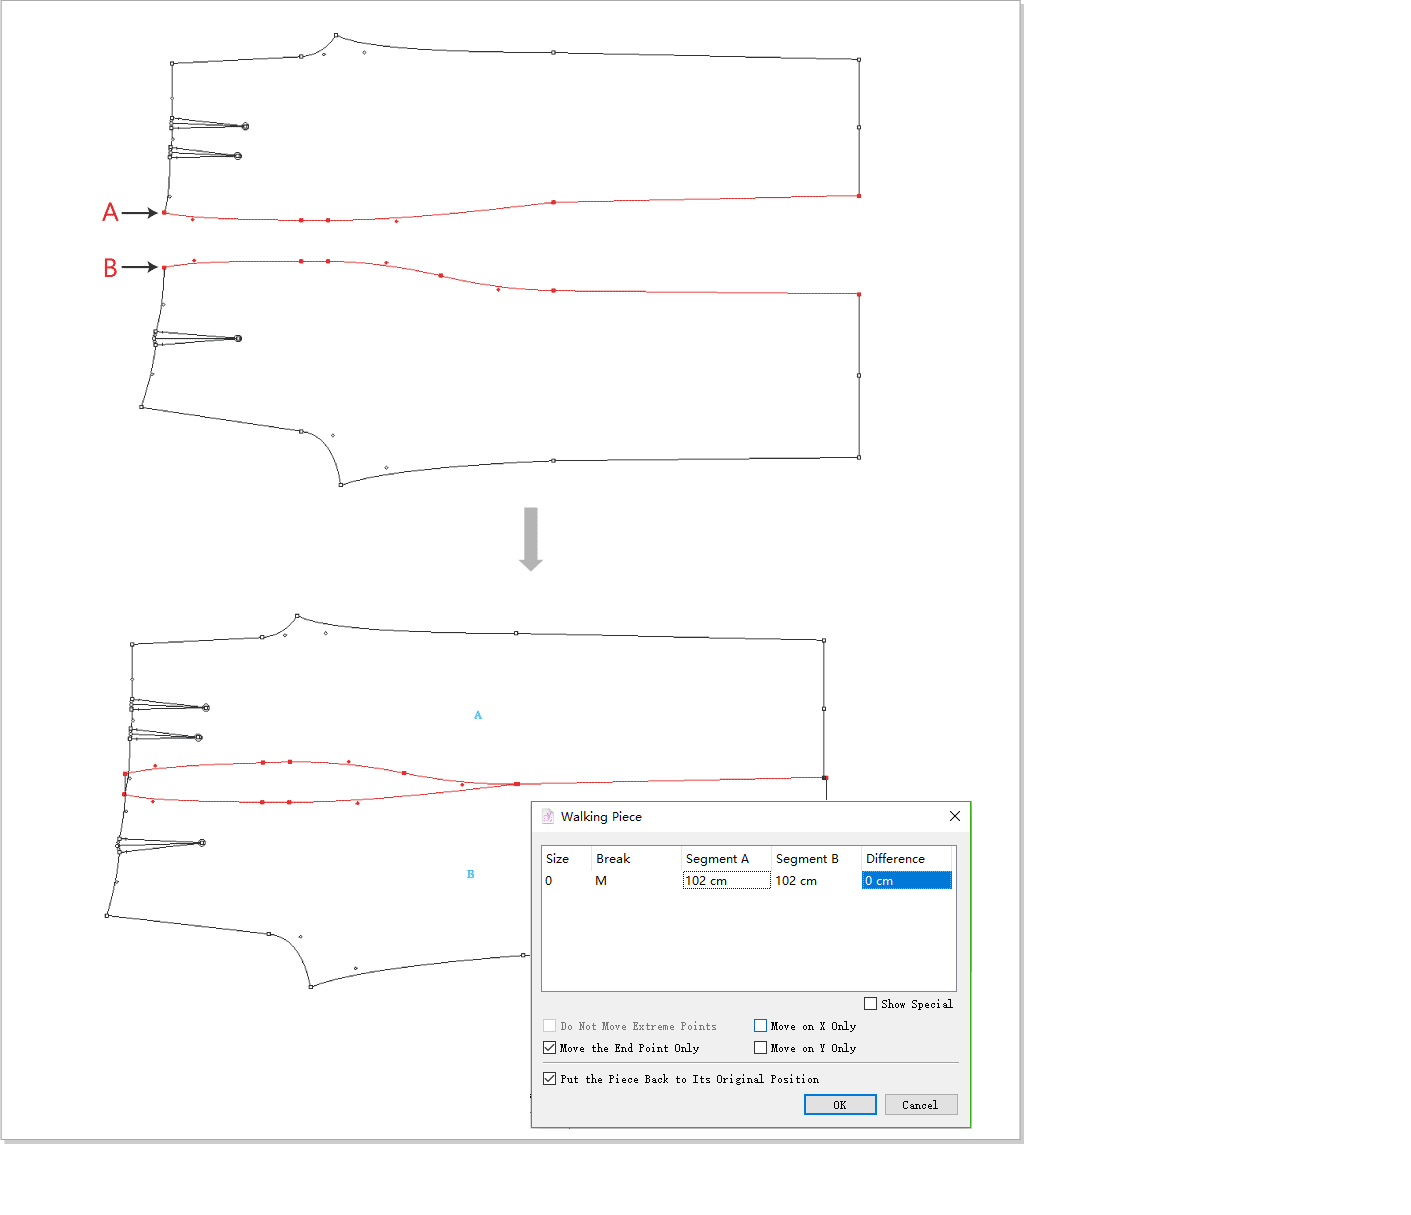

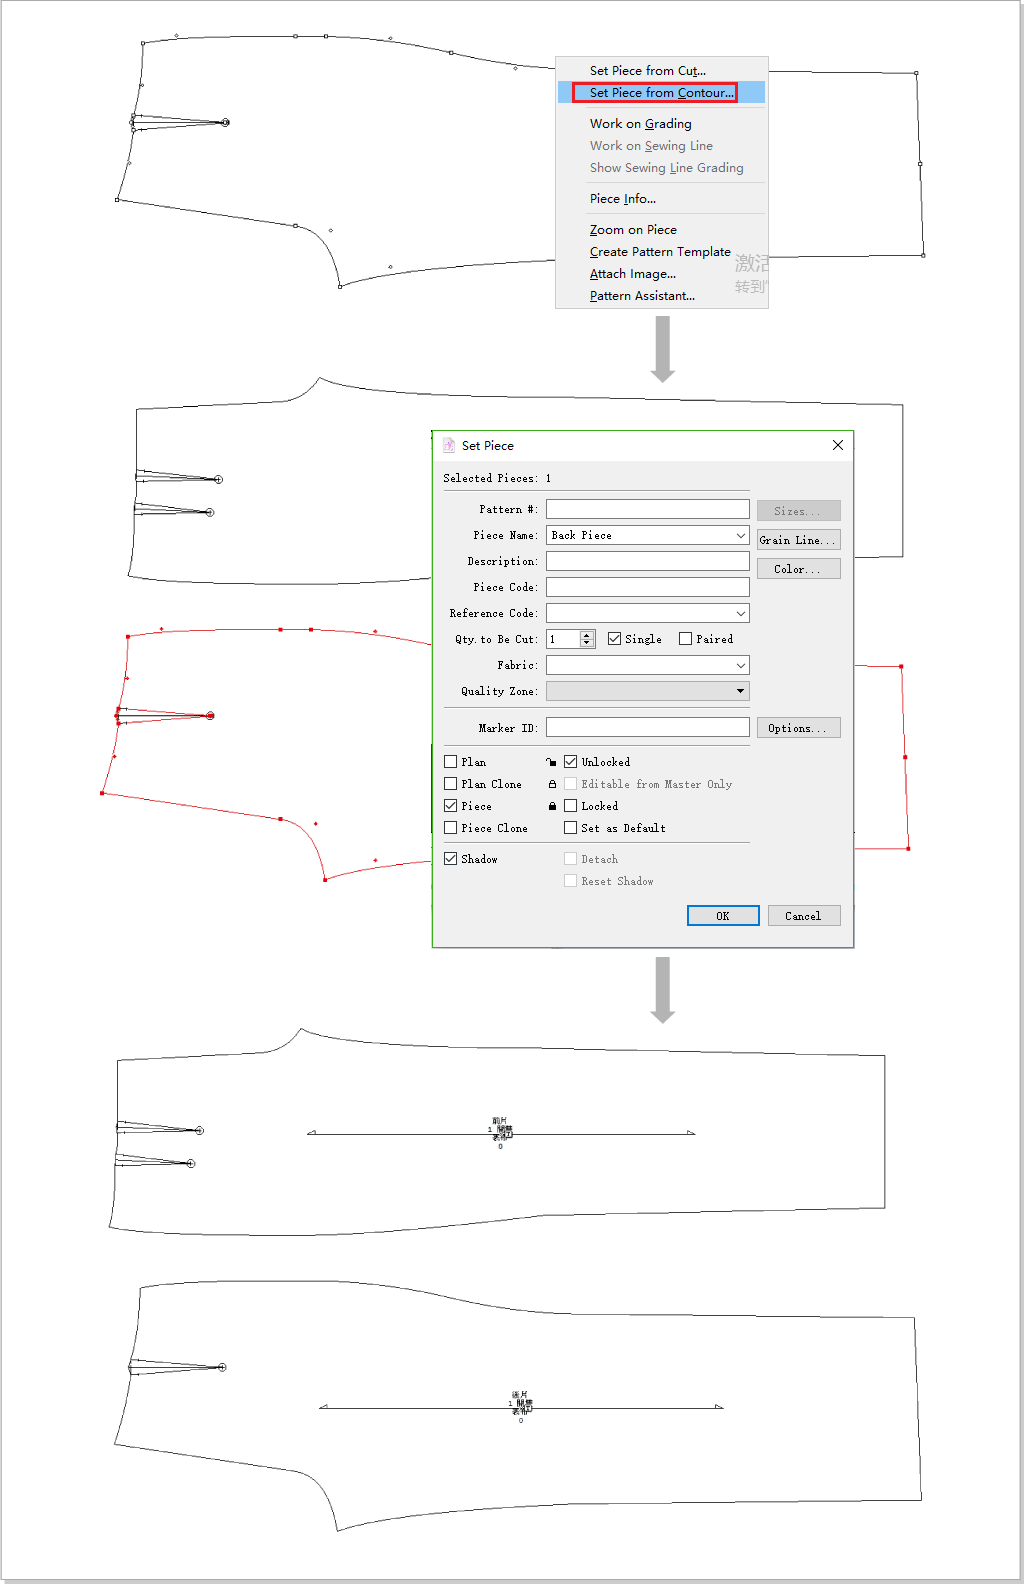
Set pattern piece.
Right-click the piece, a pull-down menu appears. Click [Set Piece From Contour] to open the window, enter desired information and click [OK].
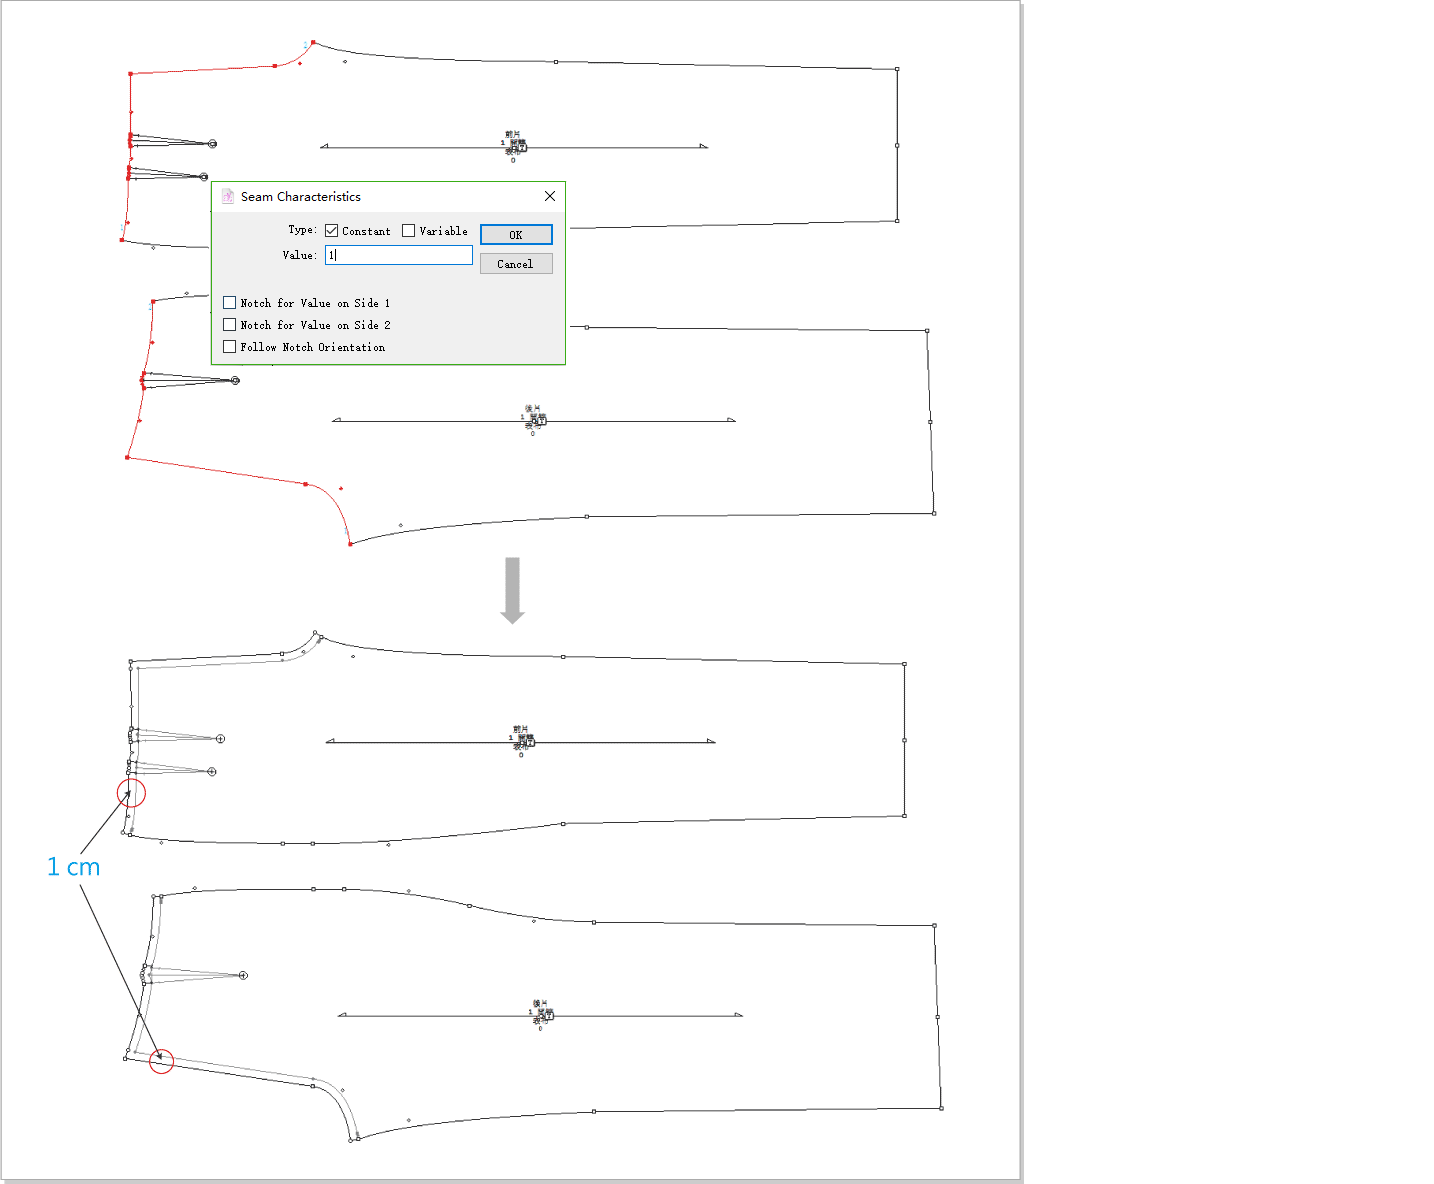
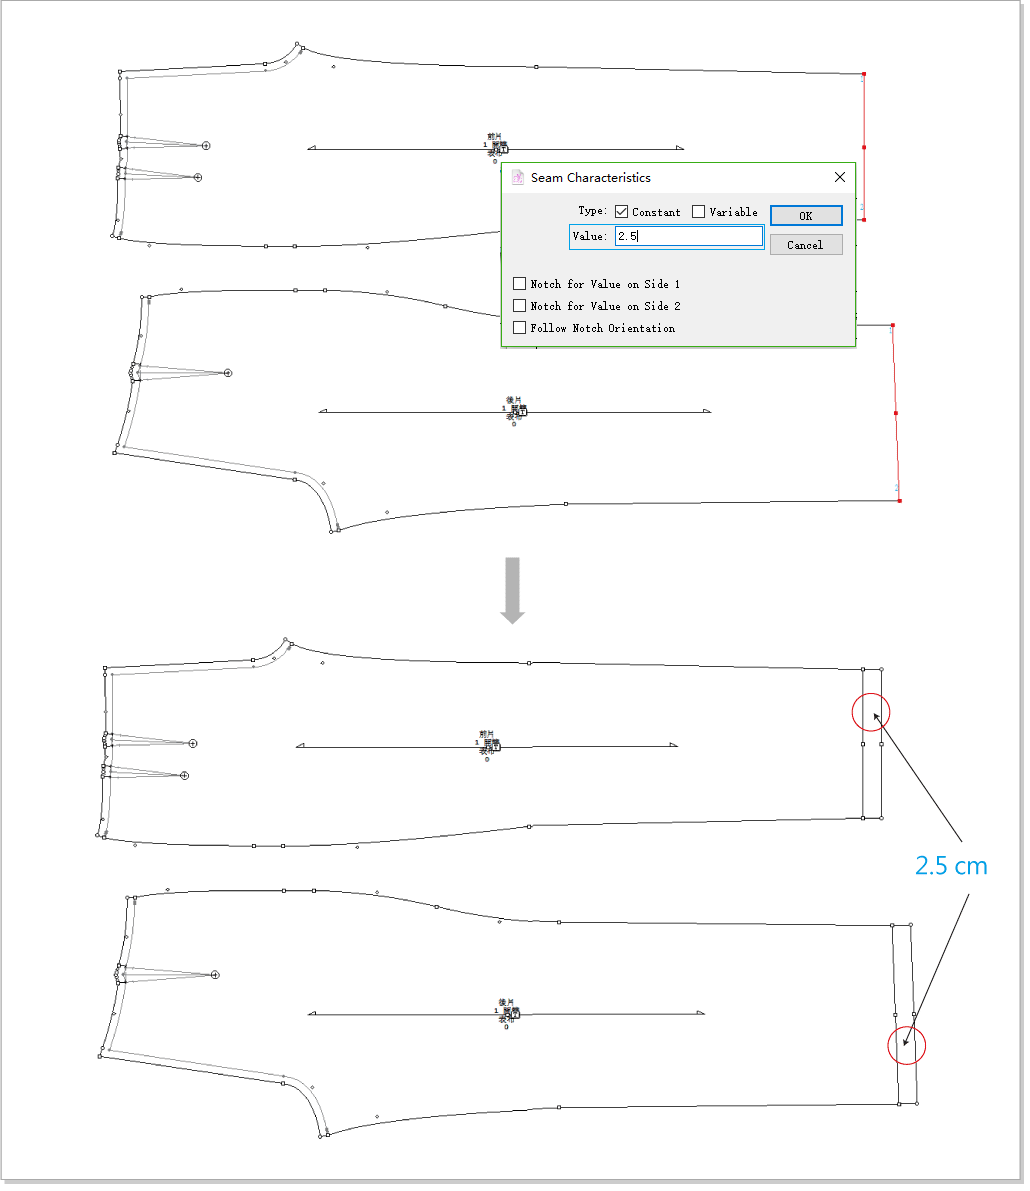
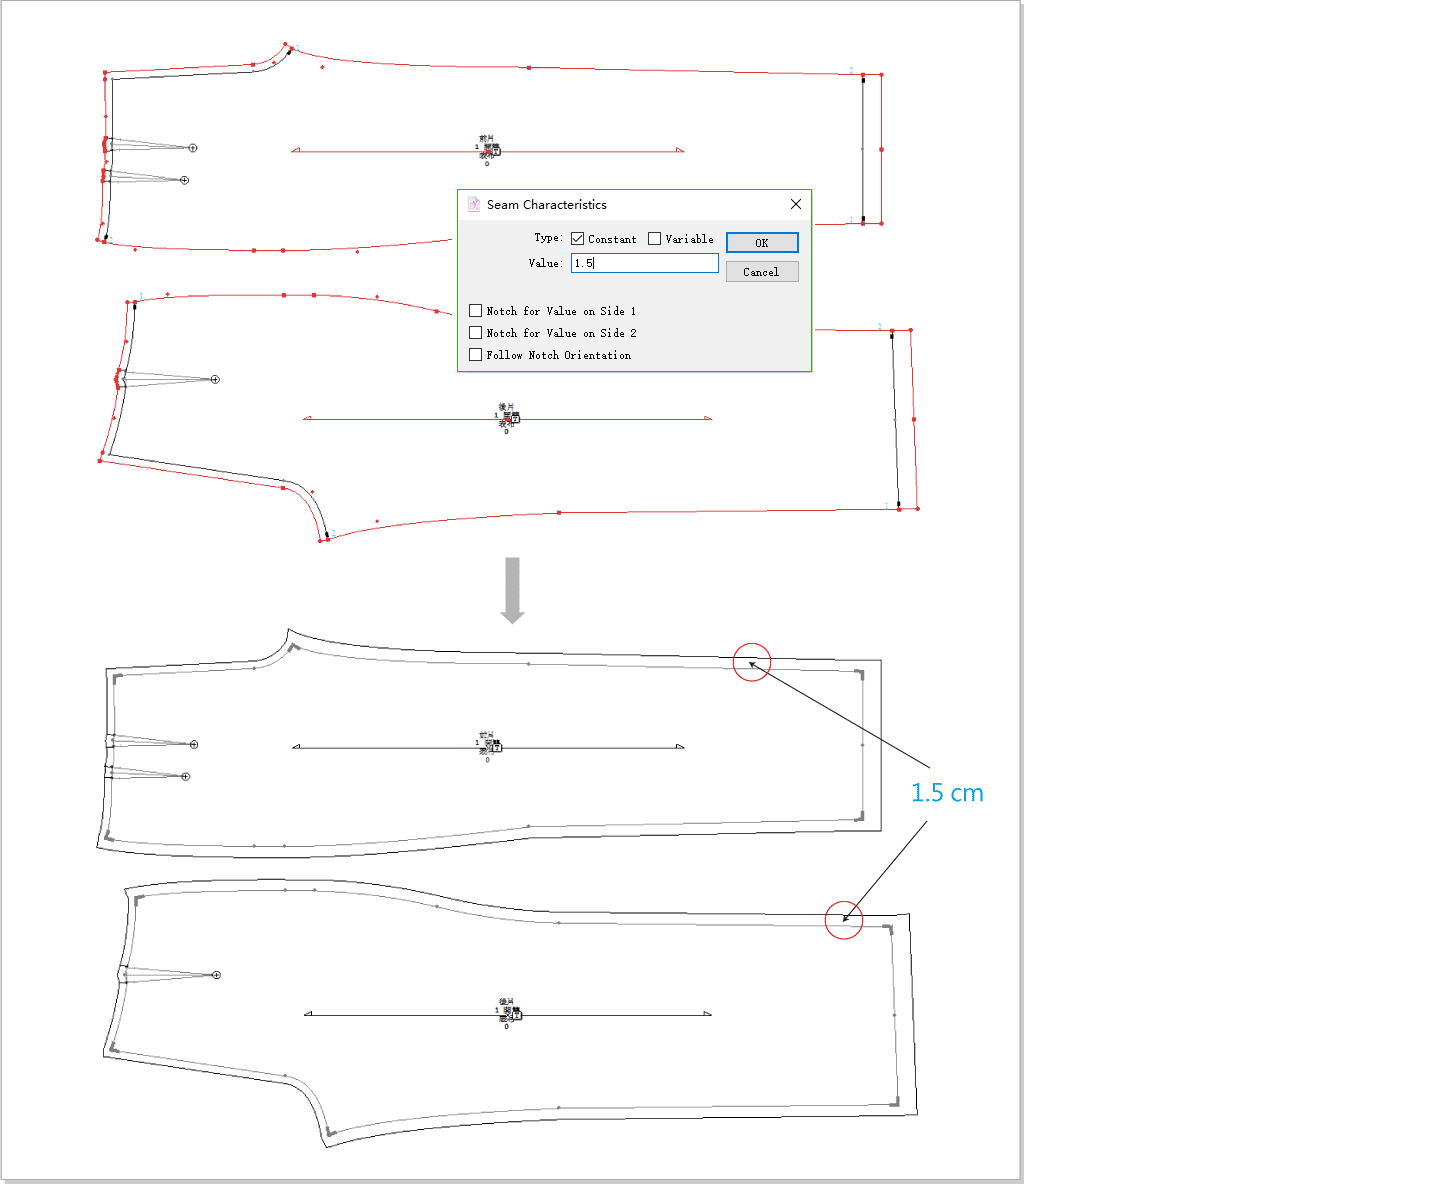
Add seam allowance.
Select the desired segment in the pattern piece. Select
 . Click the segment. Enter value.