Chapter 4: Illustrating The Usage Process
How to use the Nesting Manager?
To do so:
Insert the key in the computer with installing Nesting Manager(so you need to install the application and the engine drive, and the computer should be able to read the key)
Add nesting engine in the Nesting Manager: open the application Nesting Manager
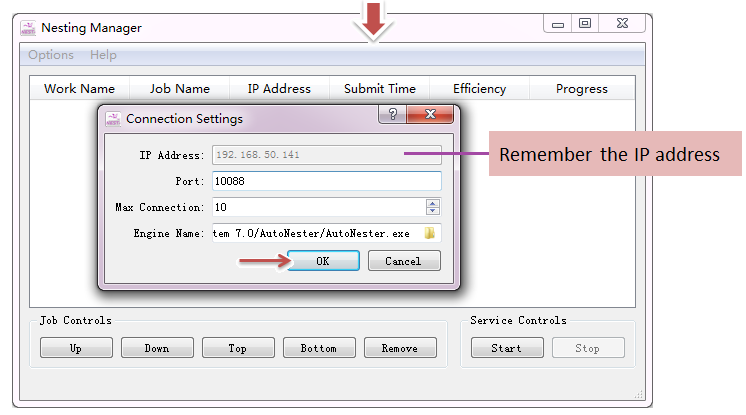
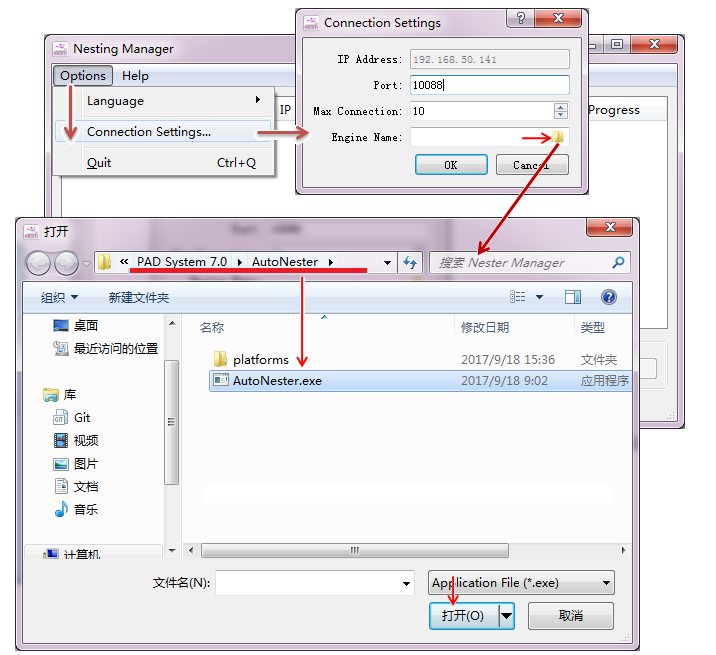
open Nesting Manager → open Options menu → select “connection settings…” → add the engine in the Engine Name bar → Click “OK” button (remember the IP Address before click OK button):
Select the engine:
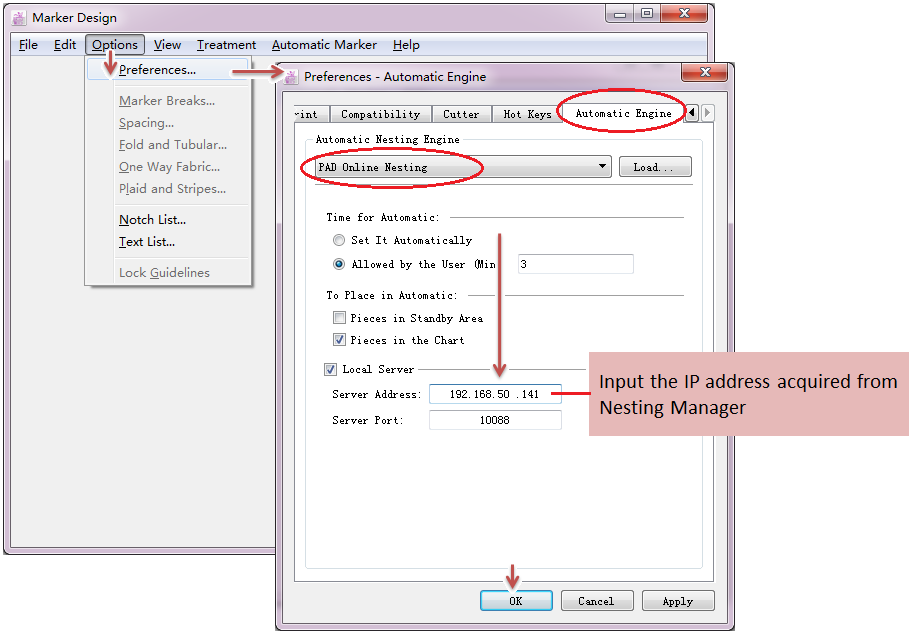
Open Marker Design → open Options menu → “Preferences…” → select engine in the “Automatic Engine” page:
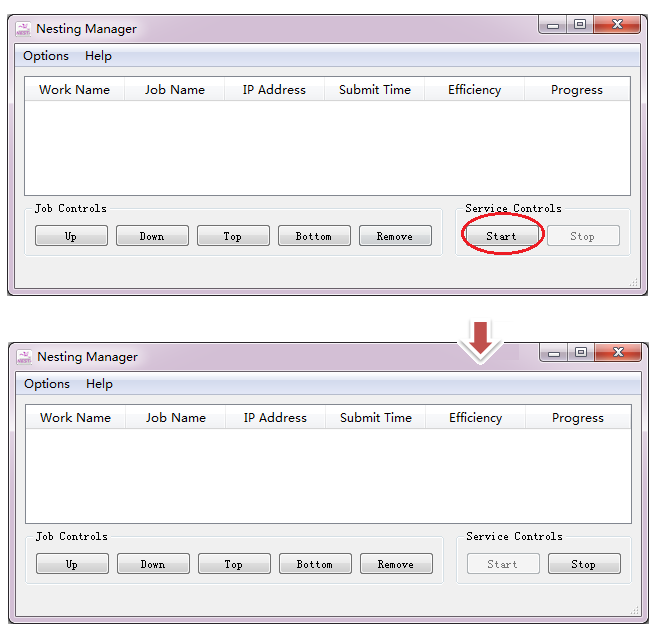
Start Nesting Manager: click “Start” button
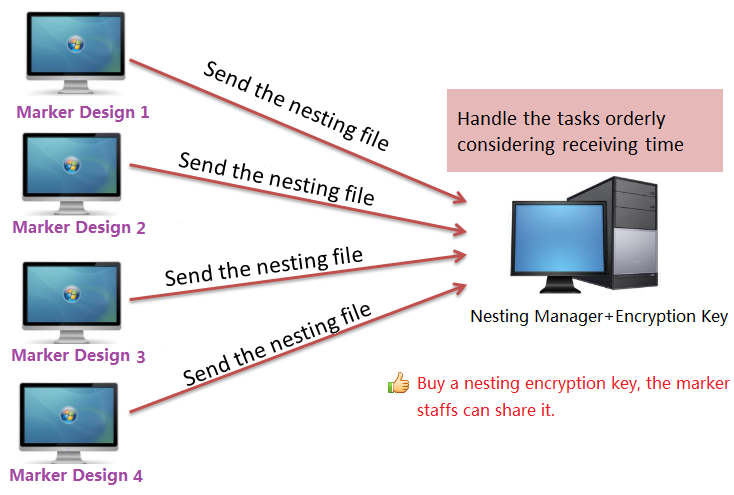
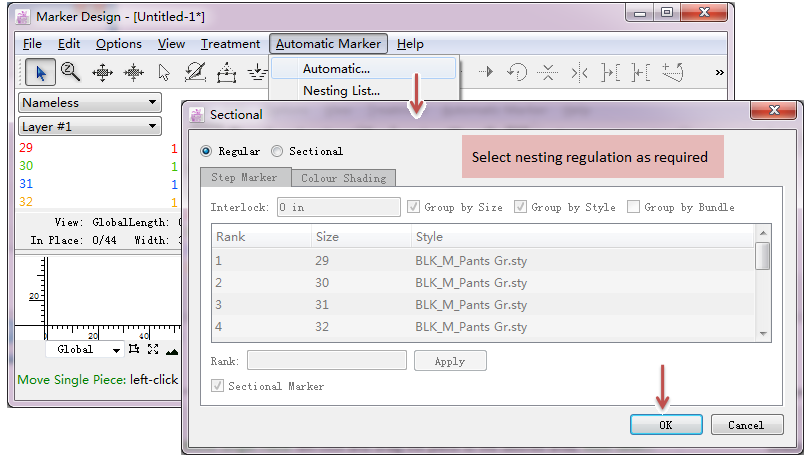
Send marker files from Marker Design to Nesting Manager, then the Nesting Manager arranges the nesting tasks
Note
The file can be closed after being sent out, and you can open other files to continue to send; thus, you can continuously transfer a plurality of discharging tasks to sort and arrange the nesting tasks.
Then open the files in Step 6 to save.
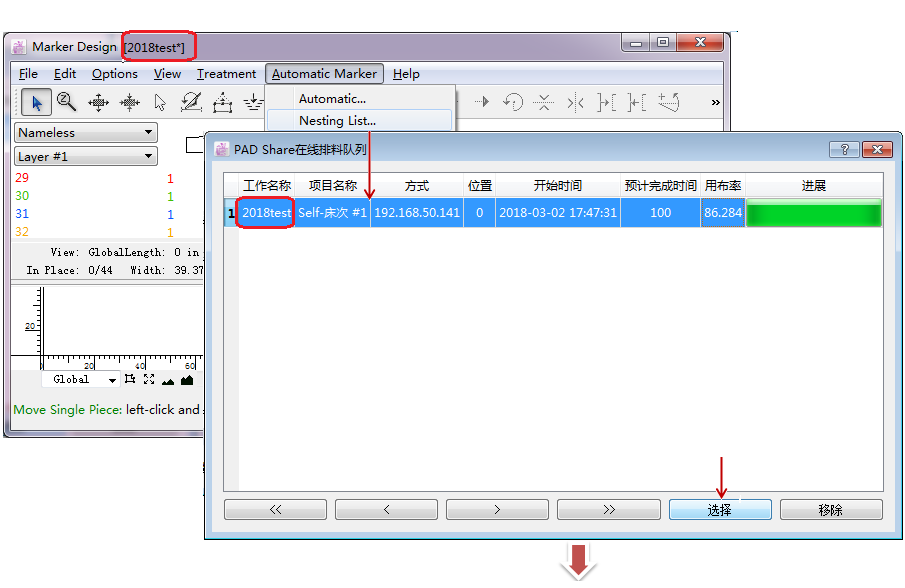
How to take the finished nesting tasks: open marker file → Open menu “Automatic” → “Padshare Online Nesting…” → select the desired task in the list → click “Select” button to take it → save the marker file