Chapter 2: Functions of Menu
[Options] Menu
You can customize the parameters in [Options] menu.
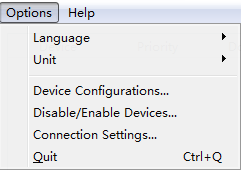
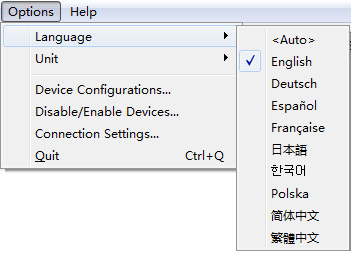
Language
You can select the displayed language for your software. When you select <Auto>, the software displays the language according to the computer.
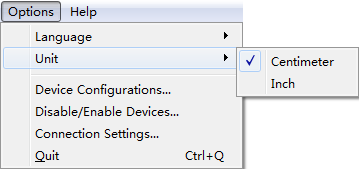
Unit
You can select the desired unit (cm or in) in [Options] menu.
Device Configuarations
You can select the plotter drive program to connect the plotter as deisred in [Options] menu.
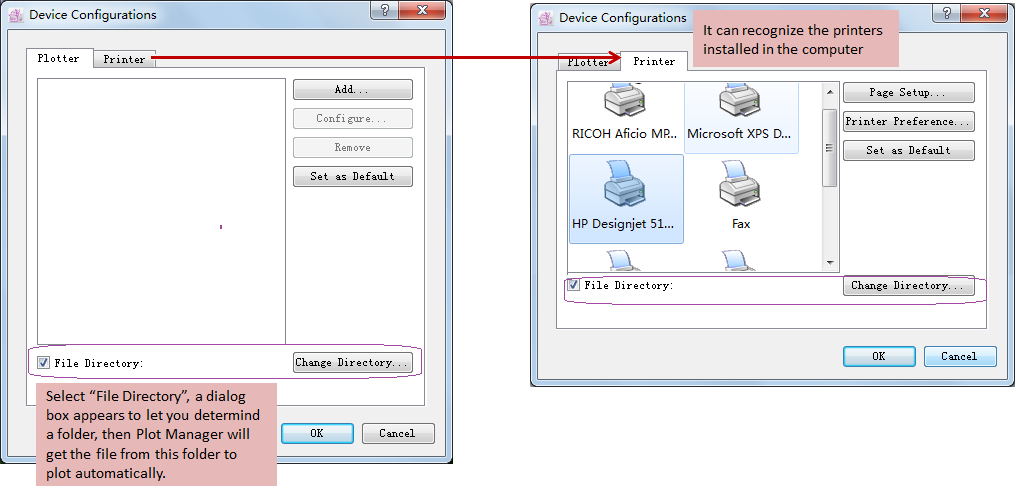
Device Configuarations Dialog Box:
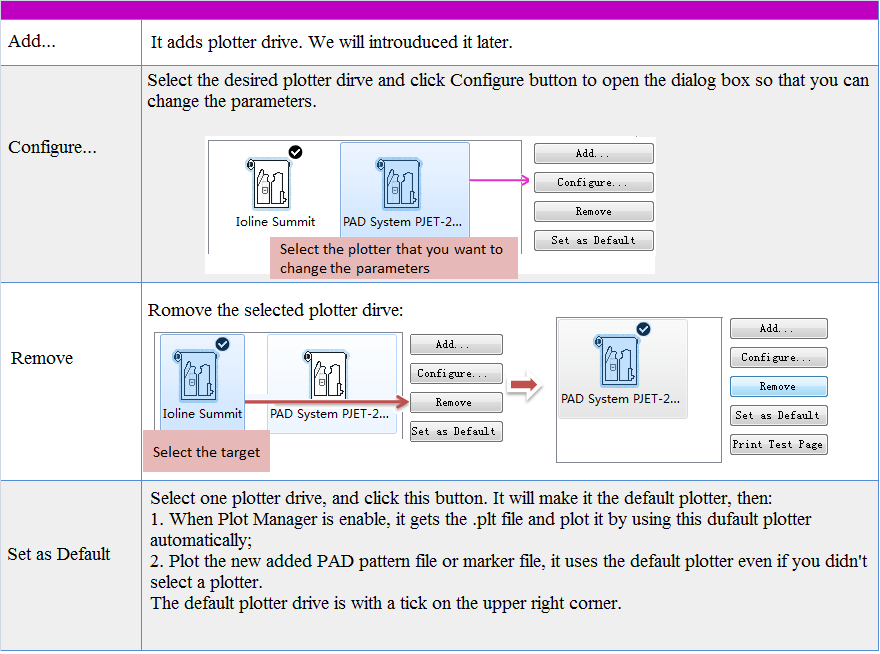
Click the “Plotter” on the upper left corner in the [Device Configurations] dialog box;
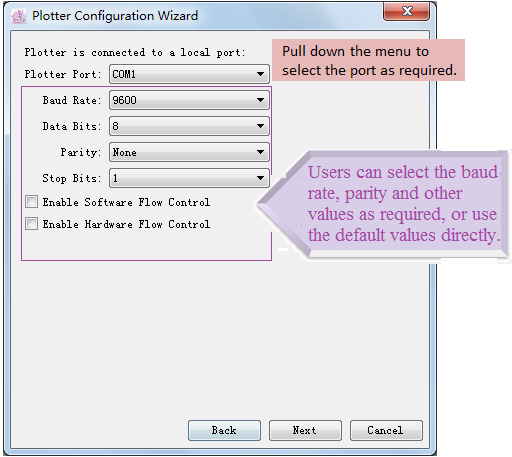
Click [Add] button to open the Plotter Configuration Wizard Dialog Box:
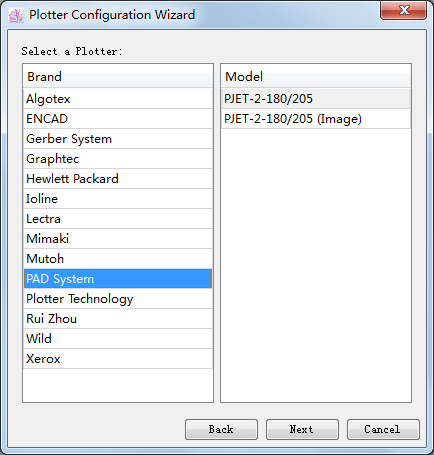
Click “Next” button. Select the desired plotter drive: select the brand and then the model:
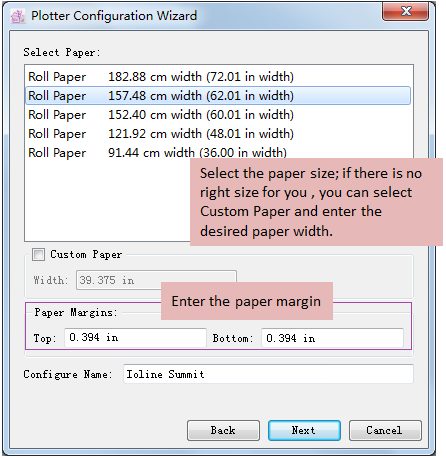
Click “Next” button to select the paper:
Click [Finish] button to complete the setting. Then you can test the plotter.
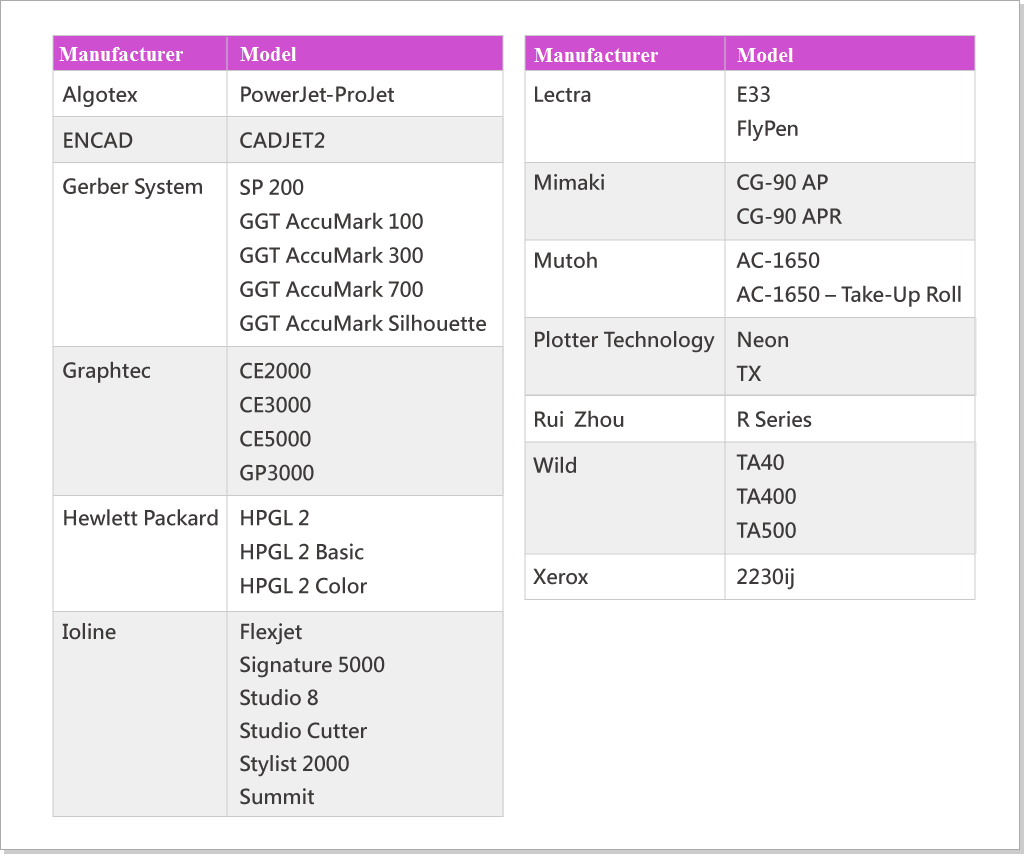
The plotter drive for PAD Plot Manager are:
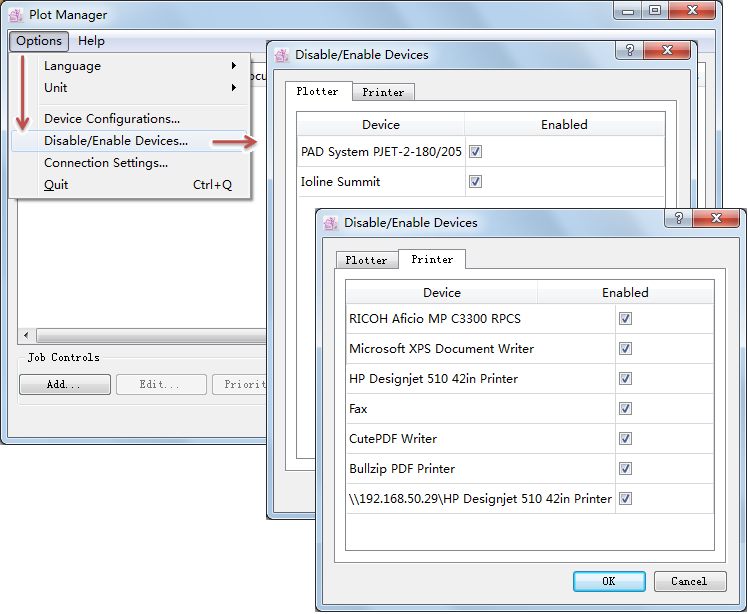
Disable/Enable Devices…
In Disable/Enable Devices Dialog Box, you can determind which plotter the task is sent to or which plotter you don’t want to use. Disable the device without tick or enable it with a tick.
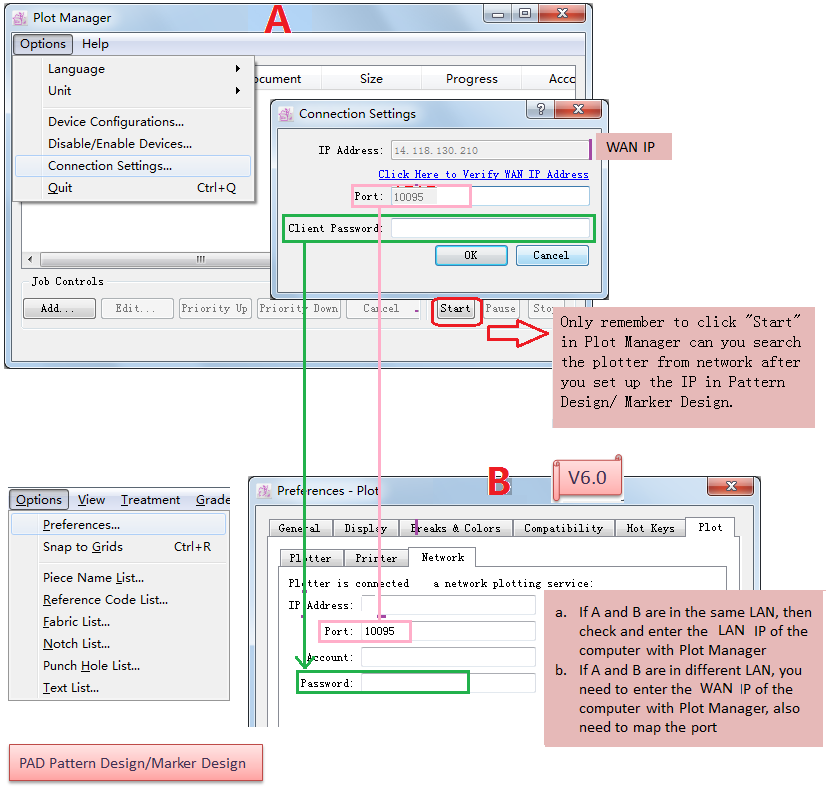
Connection Settings…
You can check the IP Address (WAN IP),port and set the clicent password. These informations are used for connecting the computer with PAD Pattern Design or PAD Marker Design to transfer files.
After setting, PAD Pattern Design or PAD Marker Design can recognize the plotter connecting with Plot Manager (V6.0: File-Plot-The plotter it recognizes; V7.0:File-Plot-The plotter it recognizes), and then click [Plot] button. The task will be sent to Plot Manager by network.
Input the information from Plot Manager to the corresponding positions of the Plot dialog box in PAD Pattern Design or PAD Marker Design:
The position of network plotting setting in PAD Pattern Design V7.0 or PAD Marker Design V7.0:

Quit
Click “Quit” to close the application.