Chapter 5: Example about how to connect PAD Plotter and plot
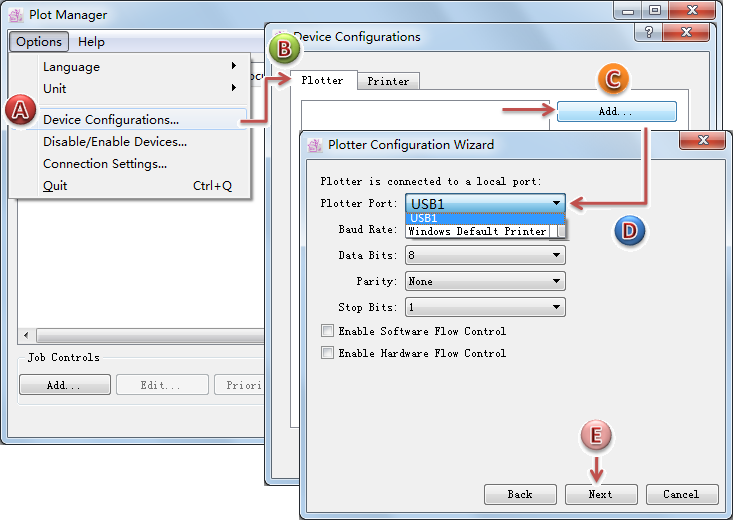
How to connect PAD Plotter in Plot Manager:
Note
before setting connection:
1.ensure that the PAD Plotter Drive is installed
2.ensure that the plotter is connected to the computer, and the plotter is switched on.
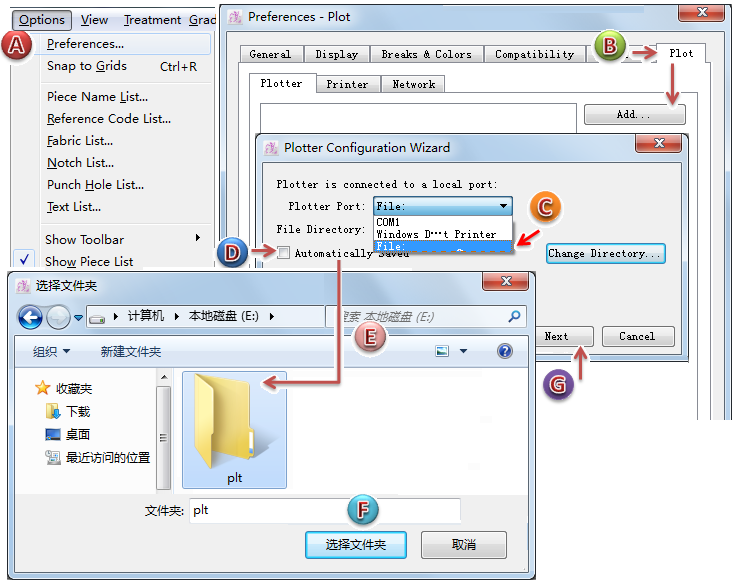
Add PAD Plotter Drive:
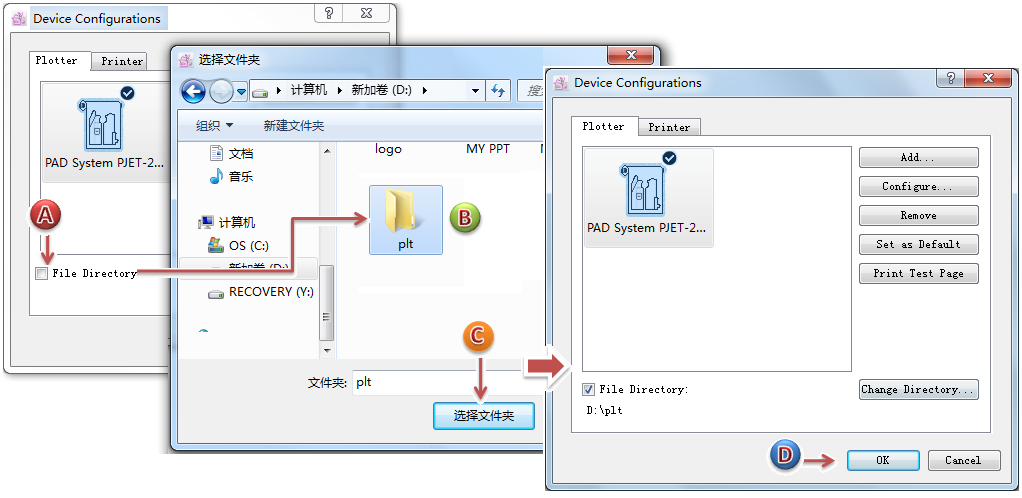
Creates a new folder
in the computer for receiving plot files
Set the plot path: determind the path of the folder
After finishing setting the plotting paramenters in Plot Manager, you need to set corresponding paramenters in PAD Pattern Design & Marker Design.
Set the plotting parameters in PAD Pattern Design & Marker Design:
Take V6.0 as an example:
Note
The way to set the plotting paramenters in V7.0 is the same as V6.0, but the position is different:
In V6.0 : [Options] - [Preferences] - [Plot]
In V7.0 : [File] - [Plot]
After finishing all the settings, click [File]-[Plot] in PAD Pattern Design&Marker Design, open the plot dialog box. If it shows ” Hewlett Packard HPGL 2“ as default plotter drive, then click Plot button. It will save the file in the folder
At that point, if Plot Manager and PAD Plotter are enable, it will get the file from the folder