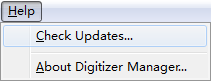
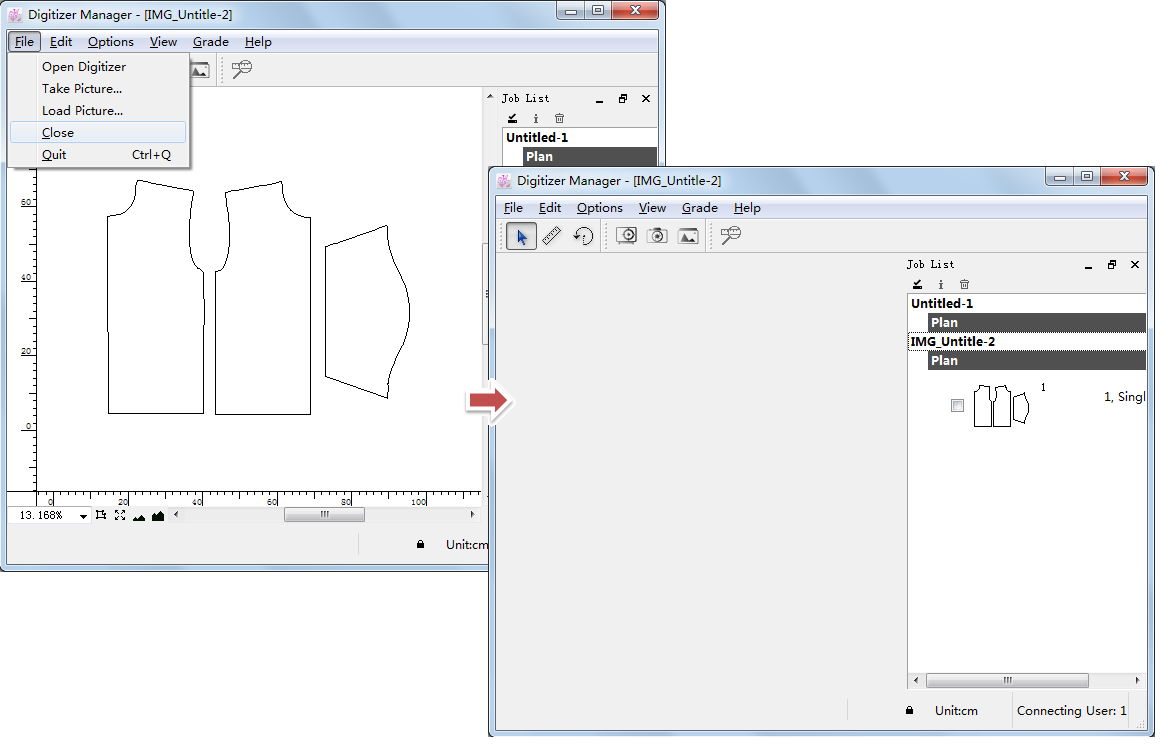
File
Open Digitizer...
Click [Open Digitizer...], the cursor in the working area of Digitizer Manager converted into “+” means it starts to digitize pattern pieces. Now you can operate your digitizer to start digitizing.
PAD Digitizer:[DrawingBoard III] 4-Button Puck、[DrawingBoard III 16] 16-Button Puck、[PAD System 4] 4-Button Puck、[PAD System 16] 16-Button Puck、Algotex Digi-Pen. For more information about the digitizer mentioned above, please refer to Execute section of V6.0 Digitizer Manager Manual.
For the example of how to digitize pattern pieces, please refer to Chapter 3 Example of Digitizing
Take Picture
Cooperate with the camera to photograph the pattern pieces. For more information, please refer to the section of image capture.
Load Picture
This is a new function in Digitizer Manager v7.0: the image/picture loaded into Digitizer Manager v7.0 can be converted to a pattern piece.
For more information, please refer to Chapter 5 in PAD Digitizer Manager V7.0 Release Note.
Close
Close the visable working area.
Edit
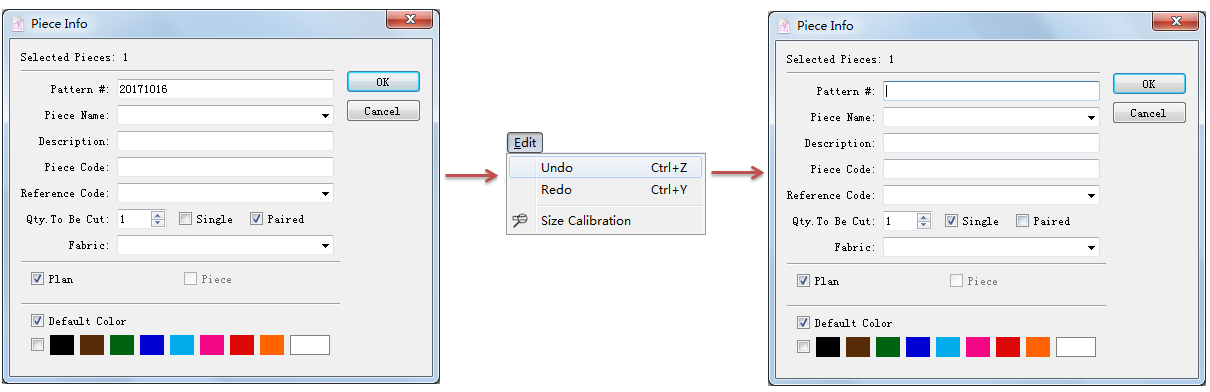
Undo
Go back to the edition of last time, recover the status before modifying.
For example: Add a piece number for a piece and now you click [Undo] to cancel adding:
If you delete any piece item in the Piece List, you can’t undo the deleting operation. So beware of deleting pieces.
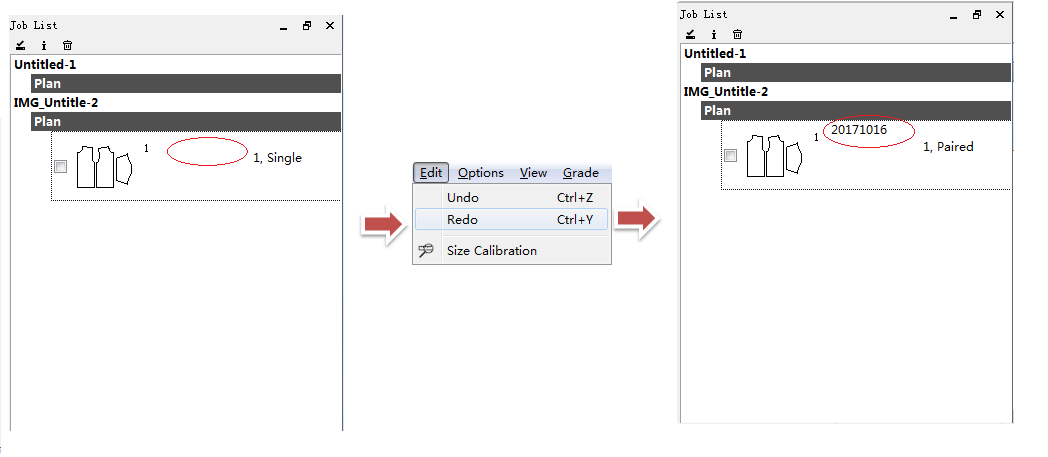
Redo
Revert any move cancelled by Undo command.
For example: Revert the operation of canceling adding pattern piece number. Revert the number for the piece.
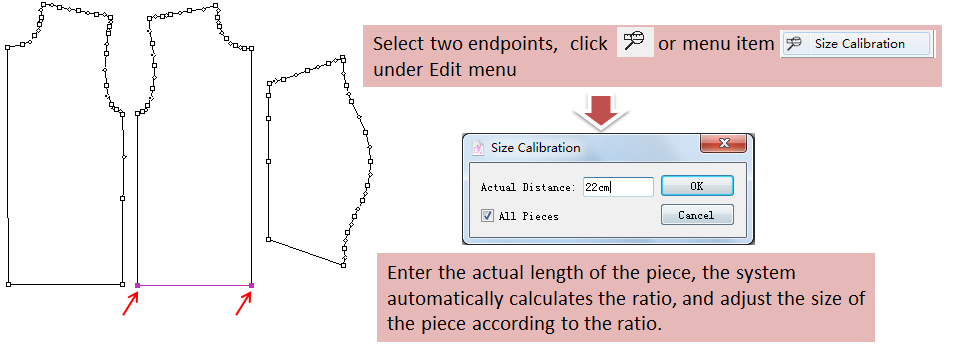
Size Calibration
This function can be used to calibrate the new loaded pattern piece.
Options
Language
Select the display language.
Select < Auto >, it displays language according to the system display language.
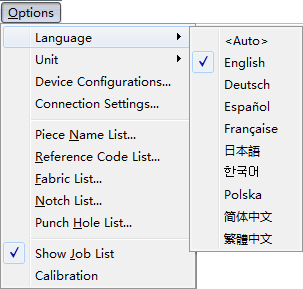
Unit
The user can select the required units. The optional unit is centimeter or inch.

Device Configurations
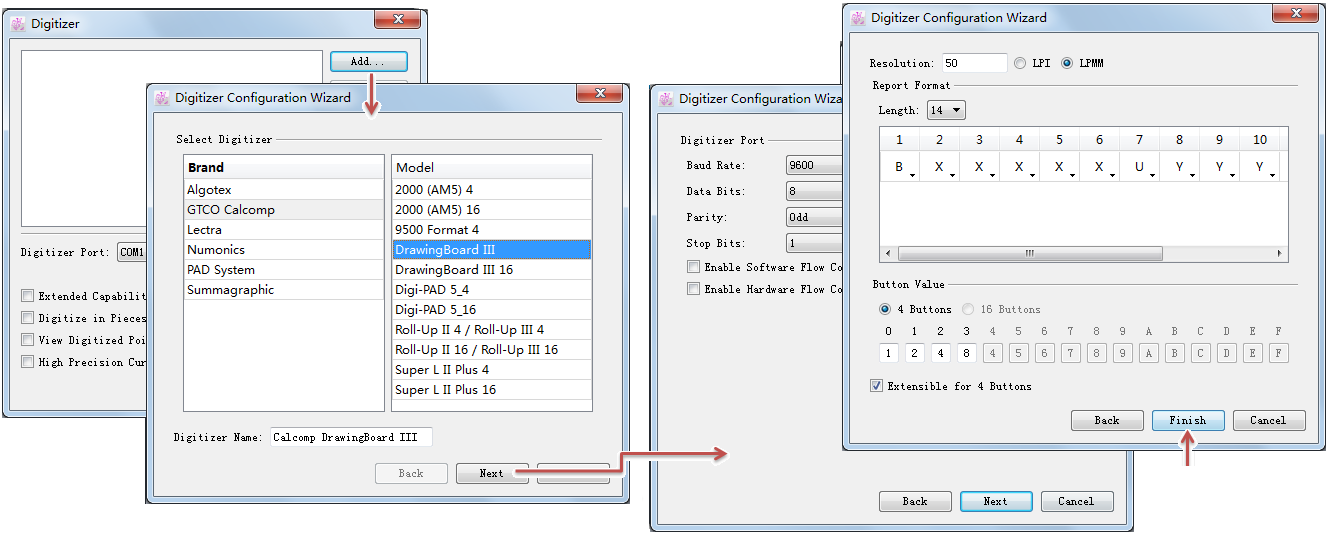
Add the digitizer drive or modify the parameters.
Add digitizer drive:
Click [Add] button, select the digitizer from the list in the dialog box;
- Click [Next], set the digitizer port parameters;
- Click [Next], set the parameters like report format,button value, then click [Finish] to finish adding a new drive.
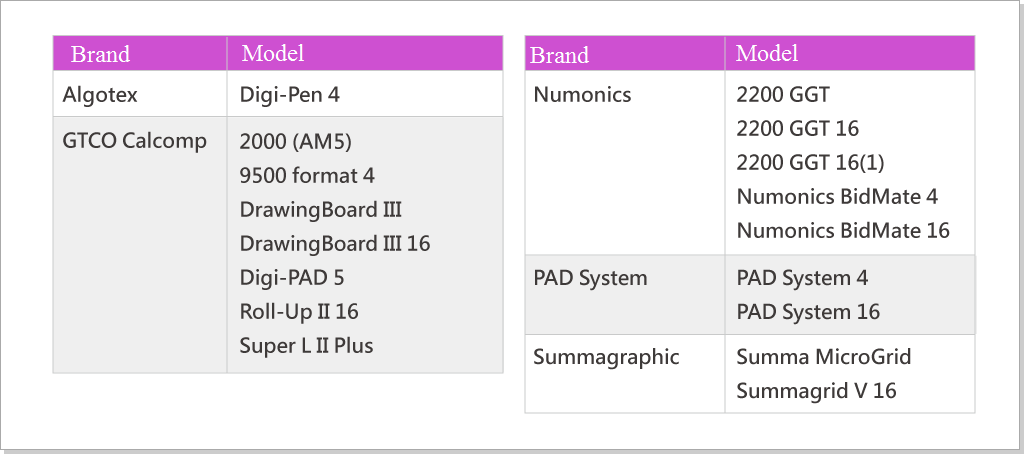
Supportive digitizer drives:
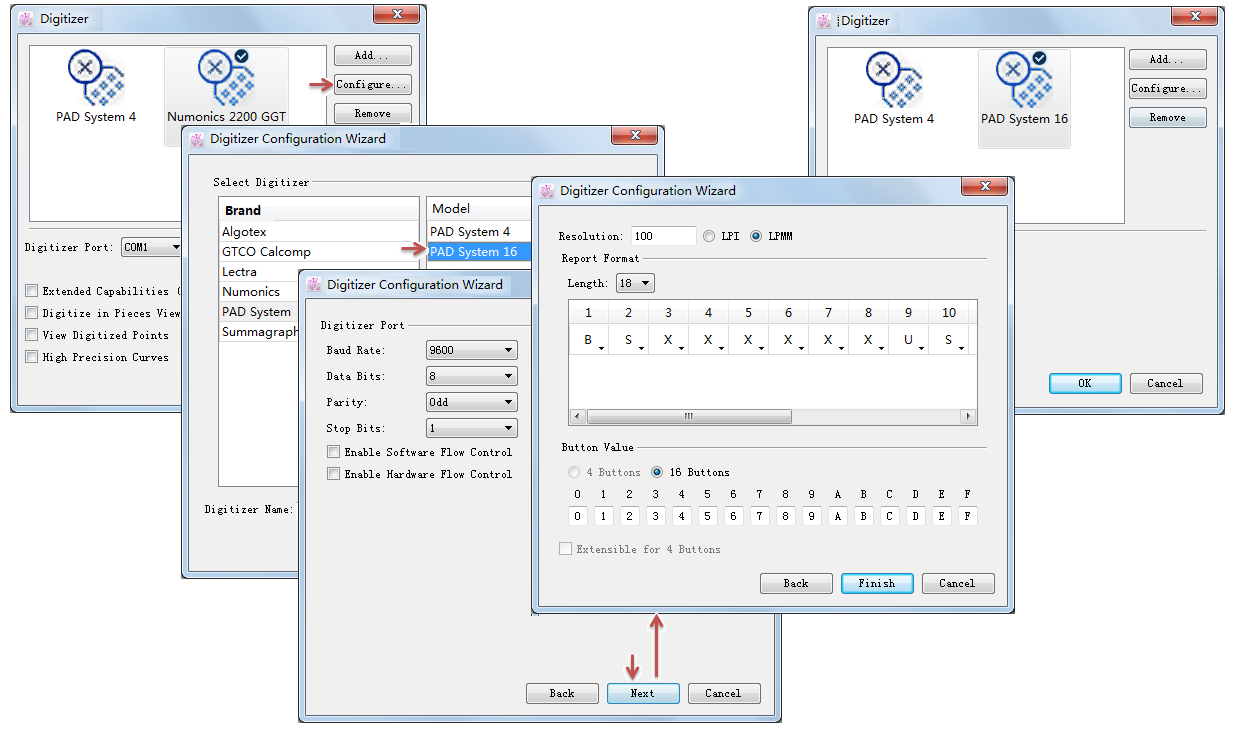
Modify the parameters of a drive:
Select the existing drive icon, then click [Configure...] button;
- Change the parameters as you want, then click [Finish] button;
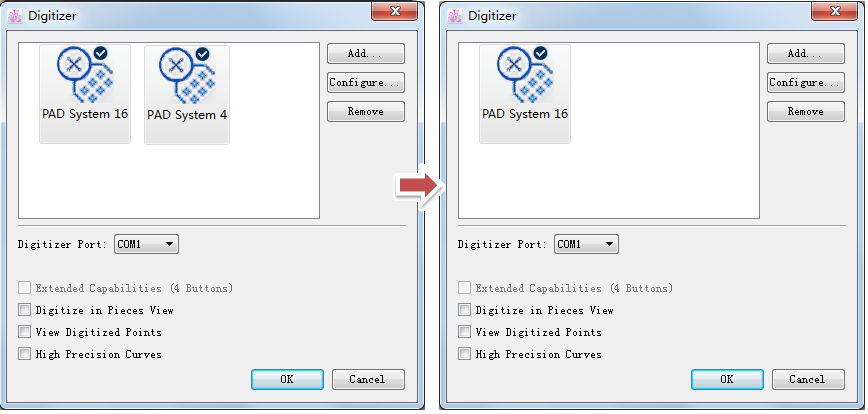
Remove a drive:
Select the drive icon and then click [Remove] button.
Connection Settings
New in V6.0: Facilitate users whose network is not local area network ( LAN ) to send digitizer files through wide area network IP. For more information, you can refer to Chapter 5 PAD V6.0 Release Note.
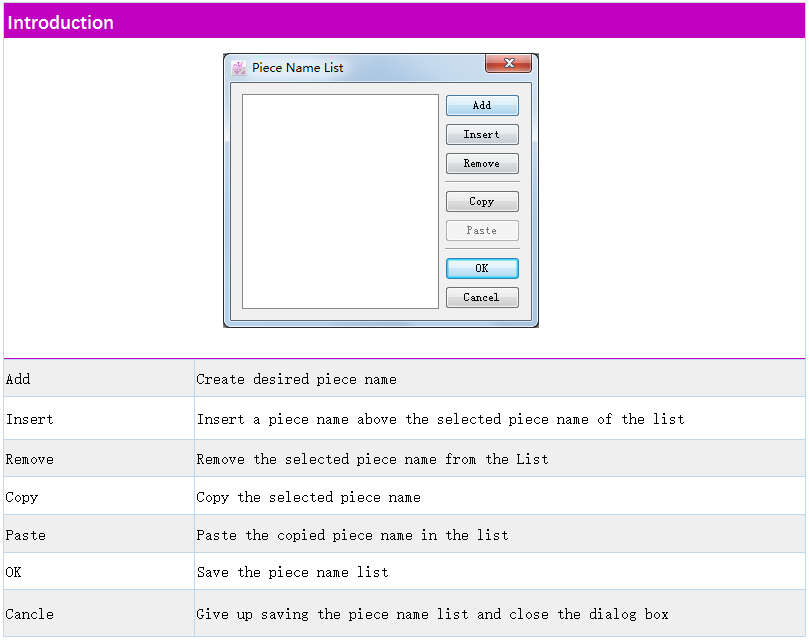
Piece Name List
You can pre-save the piece names in the list, which can be used directly in Pattern Design.
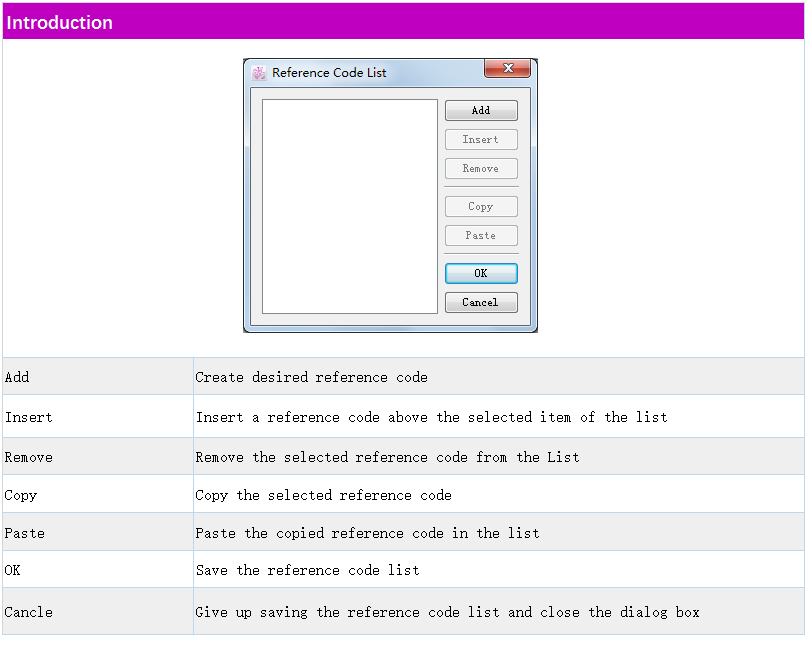
Reference Code List
You can pre-save the reference codes in the list, which can be used directly in Pattern Design.
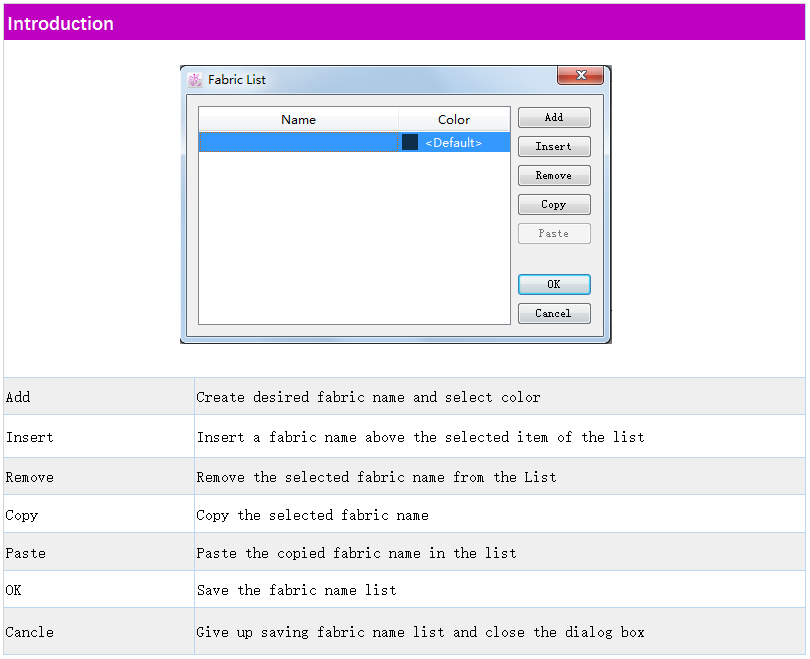
Fabric List
You can pre-save the fabric names in the list, which can be used directly in Pattern Design.
Notch List
You can pre-save the notches in the list, which can be used directly in Pattern Design.

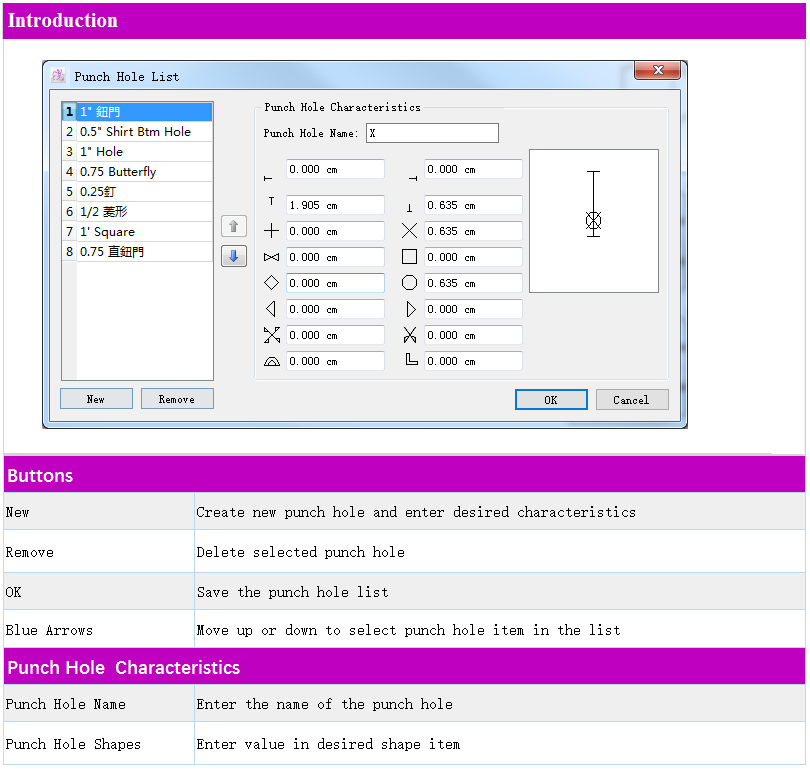
Punch Hole List
You can pre-save the punch holes in the list, which can be used directly in Pattern Design.
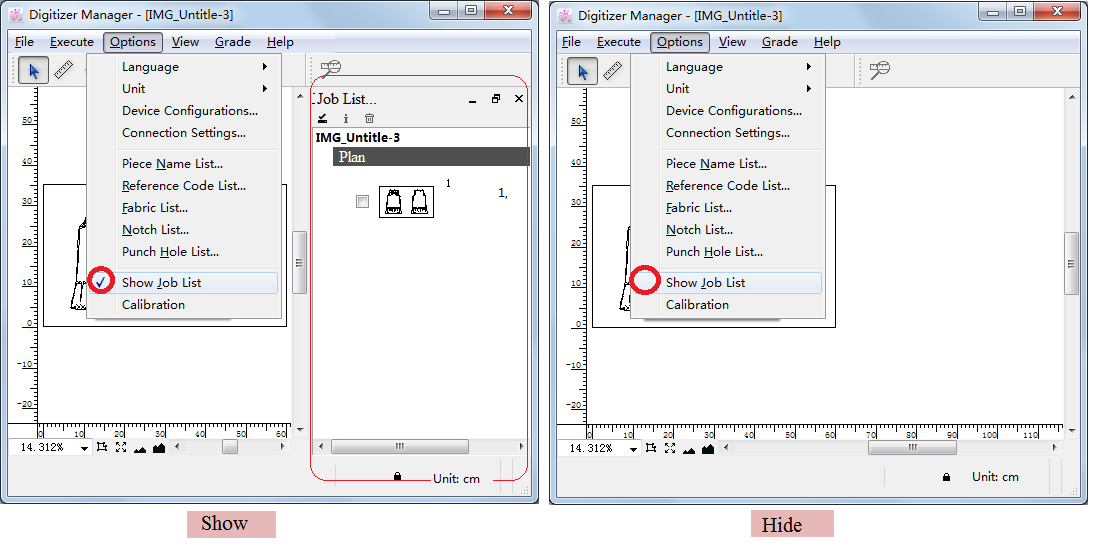
Show Job List
You can show or hide the job list. It shows the job list with a tick. It hides the list without a tick.
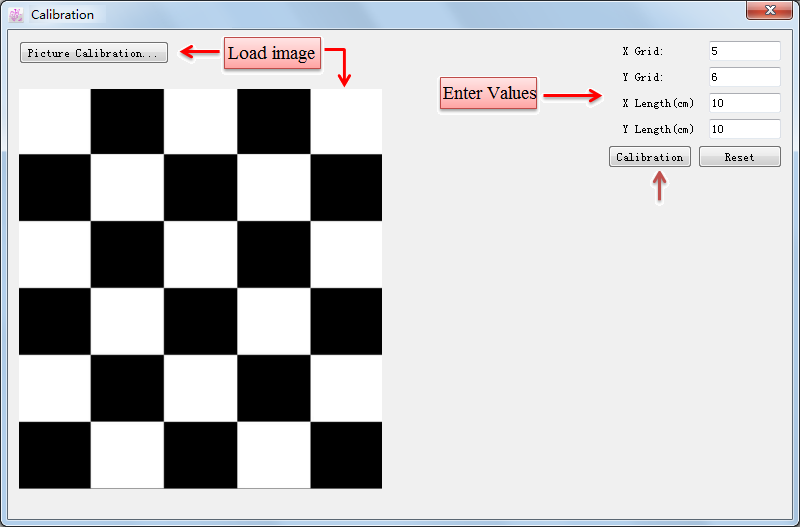
Calibration
Users need to set up a camera to take grid pattern, then input the actual length of grid (each grid width and whole fabric width), the system will automatically calculate the proportion, to calibrate the pattern piece digitized into computer. And this proportion will be applied on the further calibration of other pieces:
View
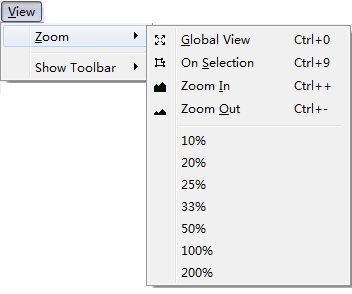
Zoom
Allow user to use this function to enlarge or reduce the view of working area.
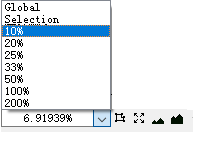
Global: View all the pieces on the working area.
Selection: It zooms on the selection and displays it in the center of the screen. It is available if one or more pieces are selected.
Zoom In/out: Enlarge or reduce the view of working area.
These options are available in the Zoom icons as well, which is located to the bottom left side of the Pattern application.
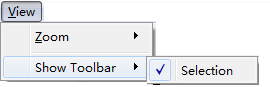
Show Toolbar
The function of the tools are the same as that of the menu items with a same name.
For more information, please refer to the coresponding section in this manual.

Grade
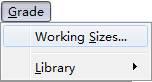
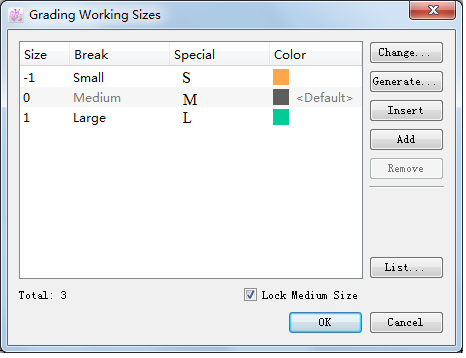
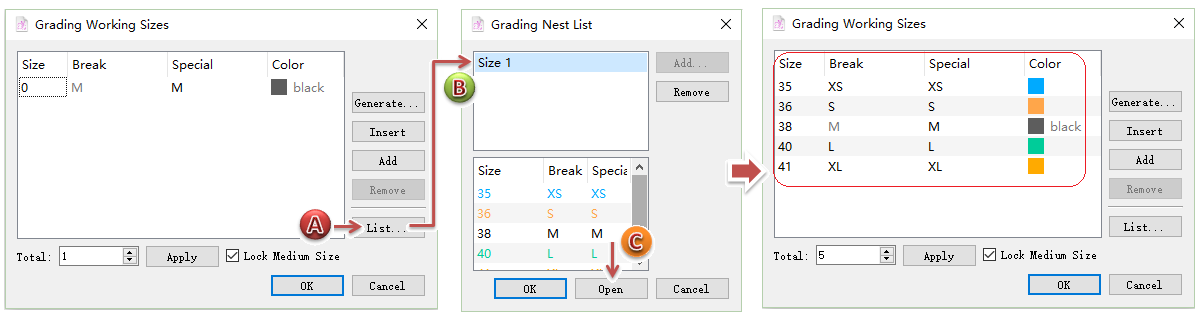
Working Sizes
Set the sizes, which can be used in Pattern Design directly:

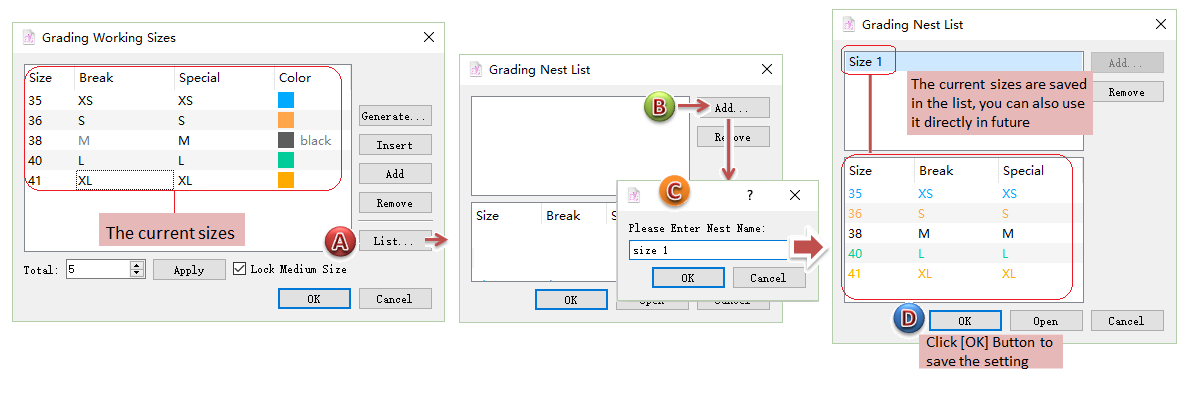
How to mantain/use the Size List
how to save the sizes into the Size List:
how to use the sizes save in the Size List:
Grade Library
You can open an grade library saved before to grade the pattern pieces. Click the item, a dialog box appears to guide you to open the desired library file, then click OK button.