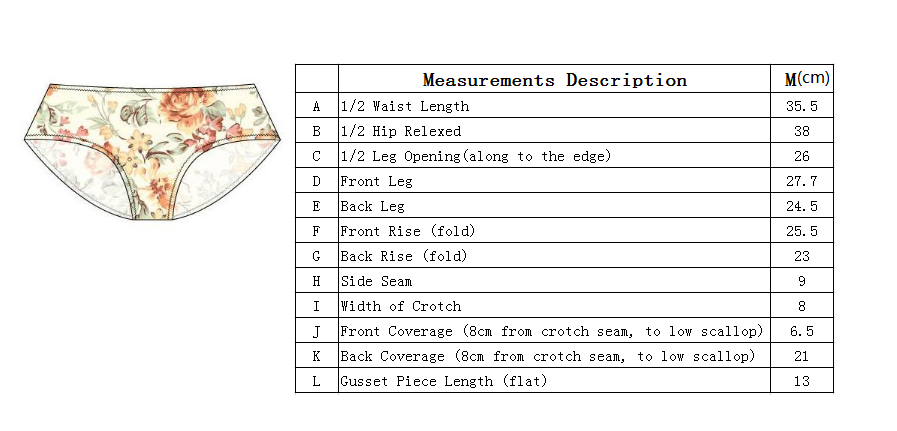
The below steps are detailed for the V7.0 version. If you are using V6.0, the steps will be slightly different.
Open PAD pattern design software, create a new file, click menu [Options]- [Preferences], select the unit(in/cm/mm) in your need.
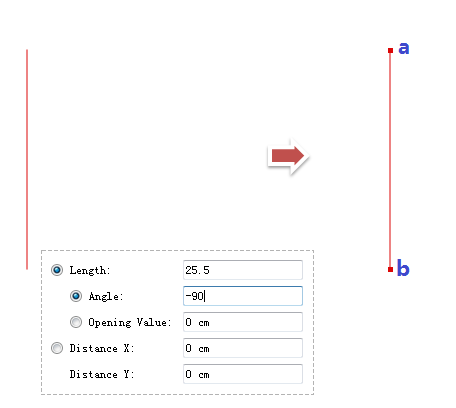
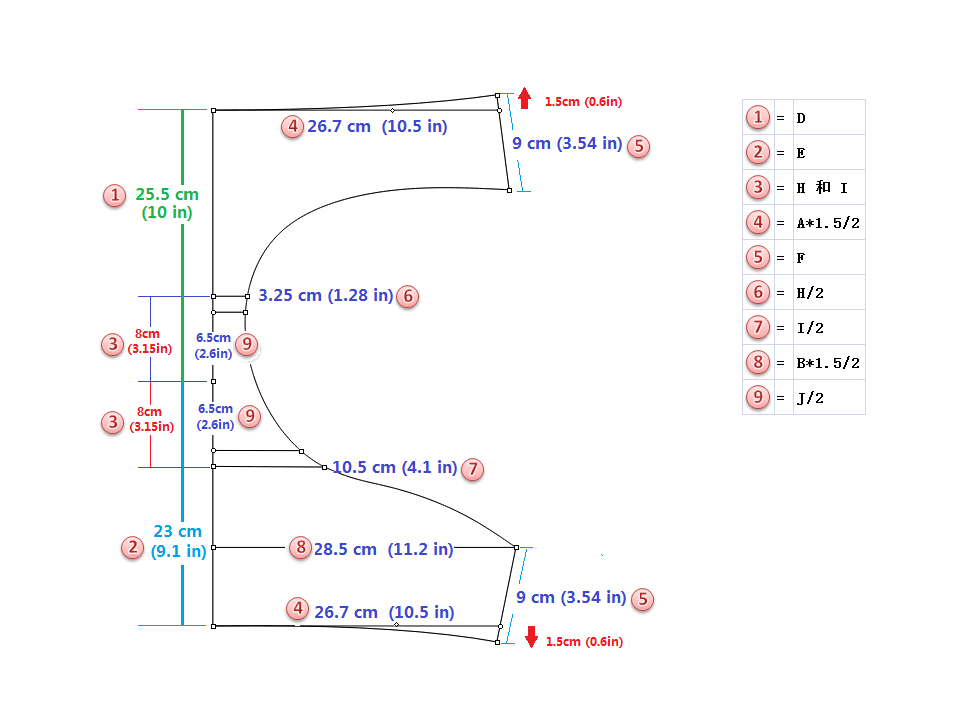
Draw front rise: Click
tool, left click on the blank area, move the mouse and the dialog box appears, then enter the length value: 25.5cm (10in), press [Tab] key on the keyboard and the cursor will jump to the next column, enter the angle vaule: -90, press [Enter] key to finish the operation and you can get the front rise segment “ab”.
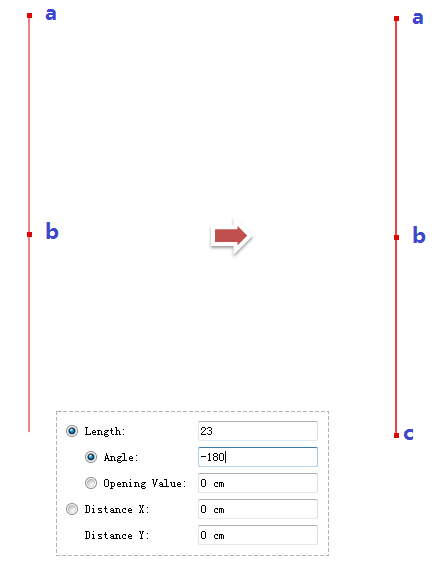
Draw back rise: still use
tool, left click “b” point directly, move the mouse and enter the length value 23cm(9.1in) in the appearing dialog box, press [Tab] key on the keyboard and the cursor will jump to the next column, enter the angle vaule: -180, press [Enter] key to finish the operation and you can get the back rise segment “bc”.
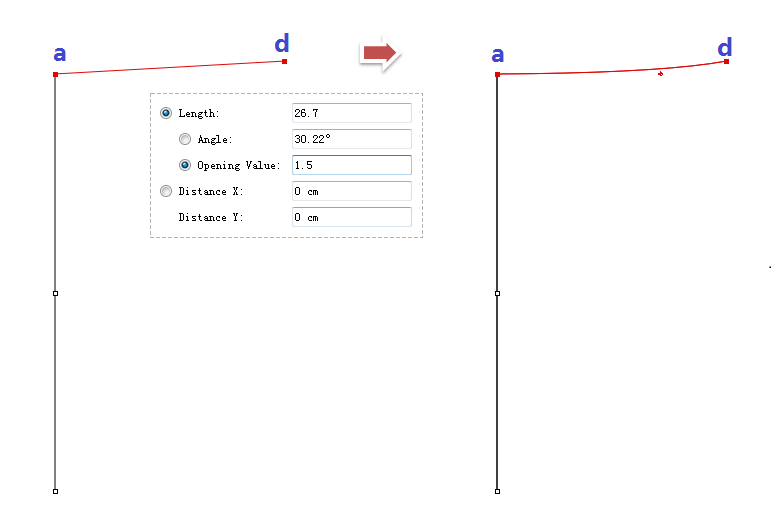
Draw front waistline: still use
tool, left click “a” point directly, move the mouse towards the right, enter the value 26.7cm (10.5in) on the appearing dialog box directly, press the [Tab] key twice let the cursor jump to “Opening Value” column, ebter the value 1.5cm (0.6in), press the [Enter] key or left click the blank area to finish the operation and you can get “ad” segment.
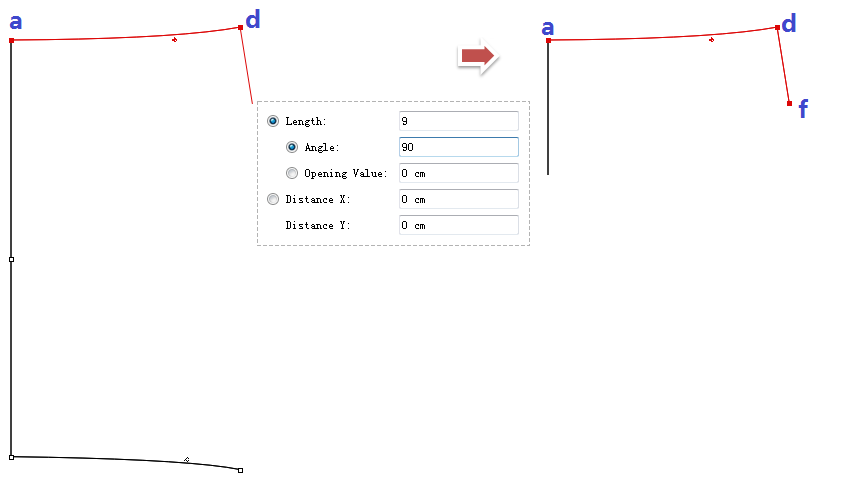
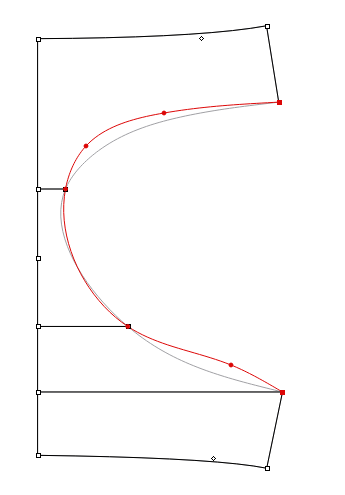
Bend the “ad” segment in need: click
tool, left click to drag “ad” line to be curve shape in need, release the mouse to finish the operation.
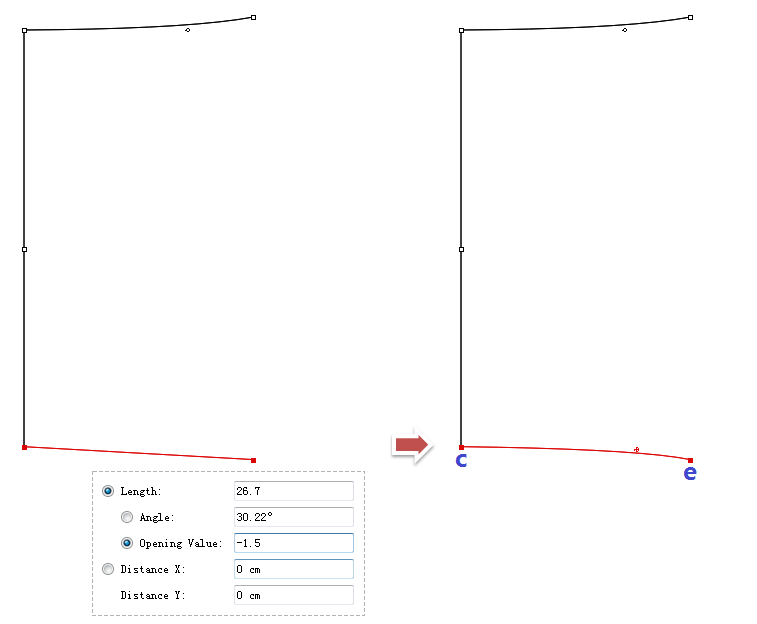
Draw back waistline: click
tool, left click “c” point, move the mouse towards the right,enter the value 26.7cm (10.5in) on the appearing dialog box directly, press the [Tab] key twice let the cursor jump to “Opening Value” column, ebter the value -1.5cm (-0.6in), press the [Enter] key or left click the blank area to finish the operation and you can get “ce” segment.
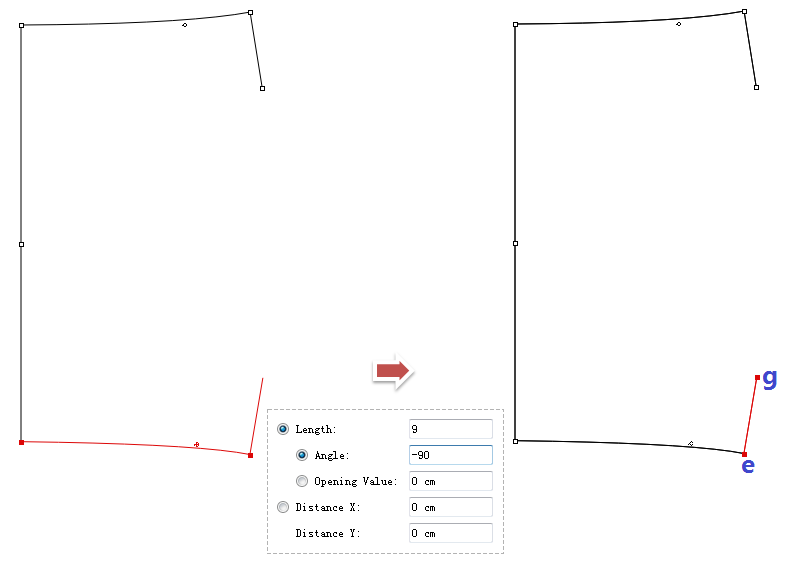
Bend the “ce” segment in need: click
tool, left click to drag “ce” line to be curve shape in need, release the mouse to finish the operation.
Click
tool,left click to select “ad” line, click
tool,left click “d” point, move the mouse towards down to pull out a segment, enter the length value 9cm(3.54in) in the appearing dialog box, press [Tab] key let the cursor jump to the next column , enter the angle value 90, press the [Enter] key or left click the blank area to finish the operations.
Use step8’s method to draw out “eg” segment:
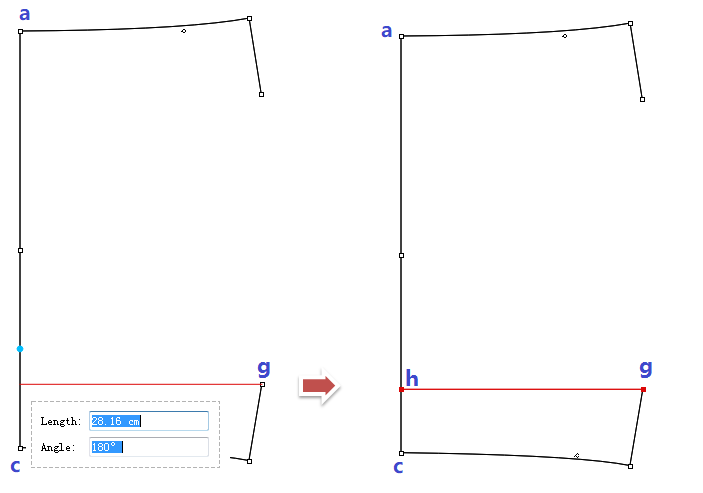
Click
tool,left click “g” point,hold down [Shift], move the mouse towards to “ac” segment and left click “ac” line, then release [Shift] key, you can get “gh” segment which perpendicular to “ac” segment.
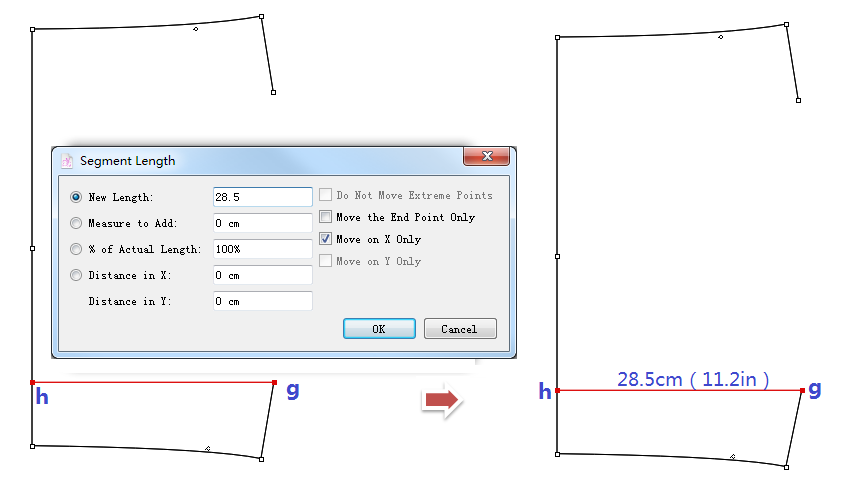
Edit “gh” segment length: click
tool, enter length value 28.5(11.2in)in the “new length” column and check “Move on X Only” box on the appearing dialog box, click [OK] button to finish the operations.
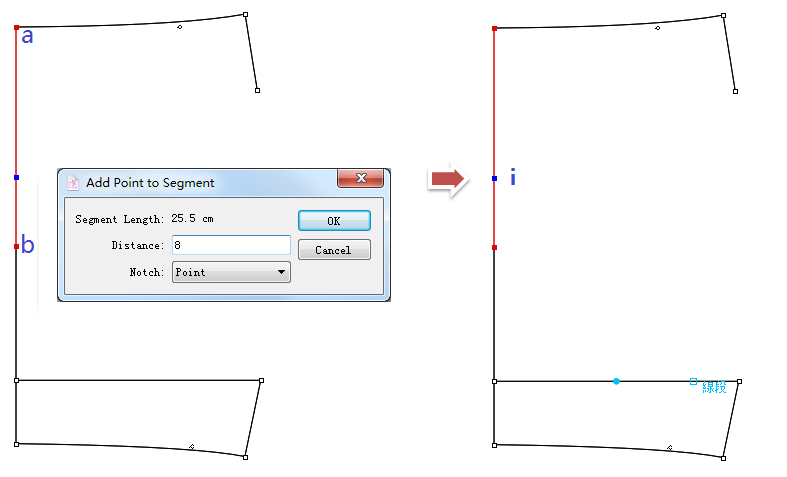
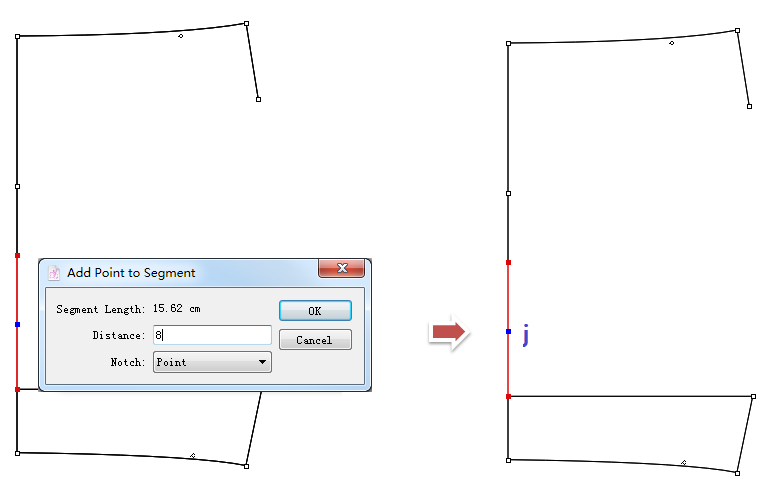
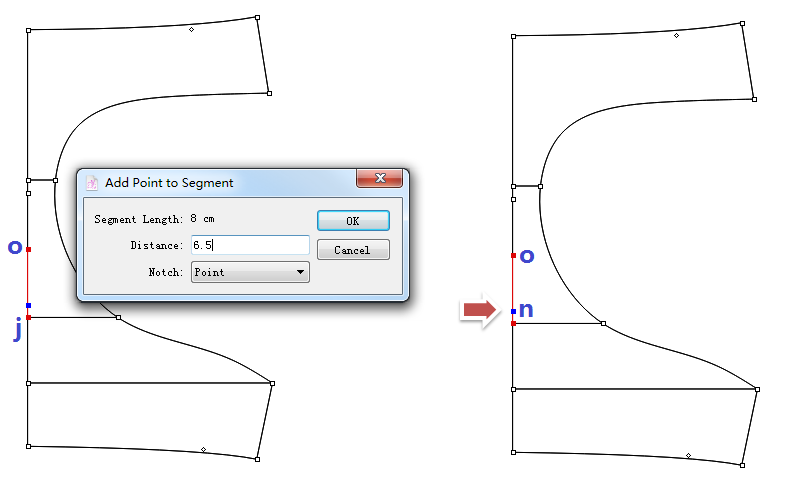
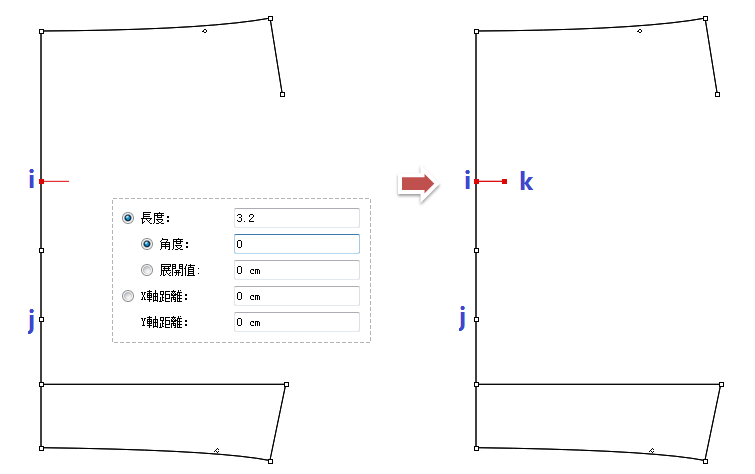
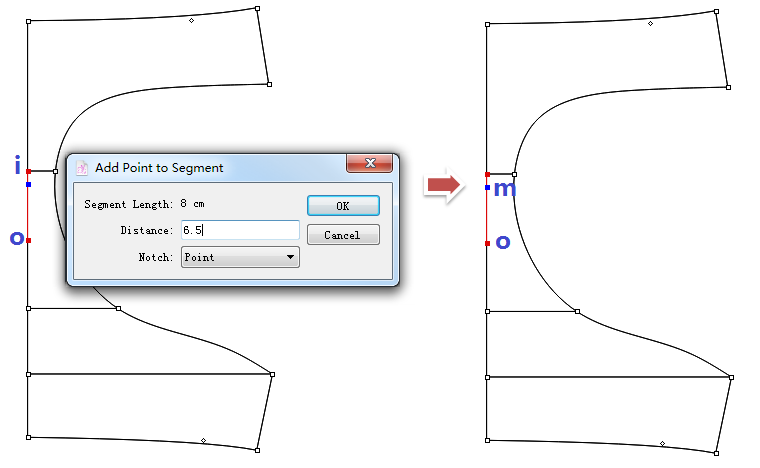
Create “i” point and “j” point on “ah” segment: Select “ba” segment by using
tool, click
tool,left click “b” point, enter distance value 8cm(3.15in) in the appearing dialog box. Select “bh” segment by using
tool, click
tool,left click “b” point, enter distance value 8cm(3.15in) in the appearing dialog box.
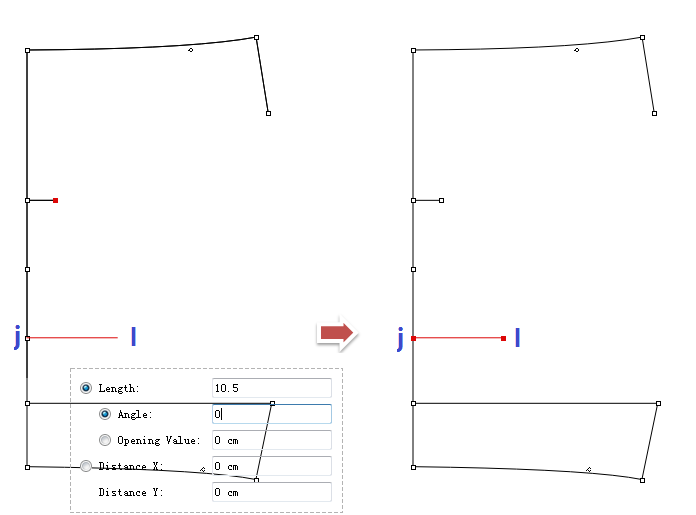
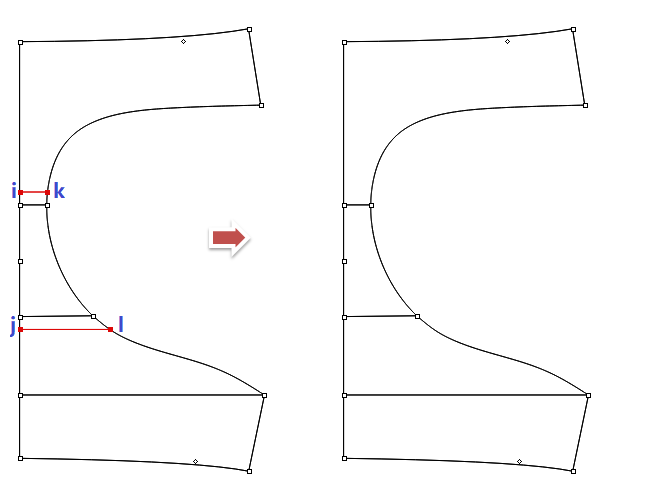
Draw out “ik” segment: click
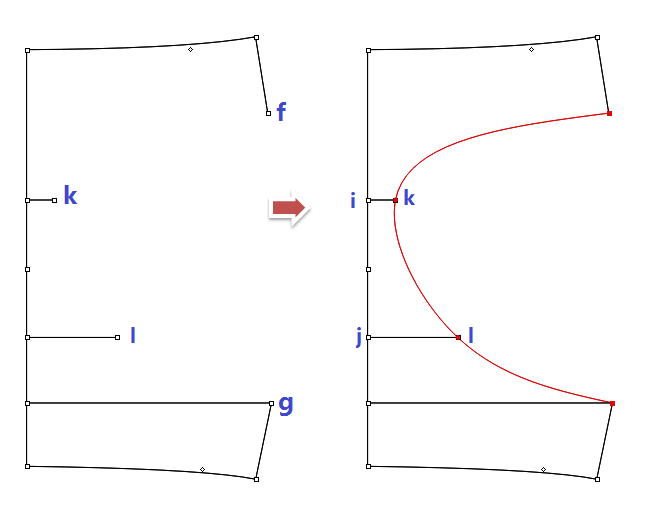
tool, left click “i” point, move the mouse, enter length value 3.25cm (1.28in) in the appearing dialog box. Use the same mathod to draw out “jl” segment: click
segment, move the mouse, enter length value 10.5cm (4.1in) in the appearing dialog box.
![]()
Click
tool,left click “f,k,i,g” points one by one, then right click “g” point to finish the operation, then you can get the preliminary leg opening curve.
Still use
tool,right click the leg opening curve then all points appear, hold down the “Shift” key and left click the desired position on the curve to add points. Left click (do not release the mouse) the point on the curve and then drag the mouse (or you can use the arrow keys on the keybord) to change the curve’s shape.
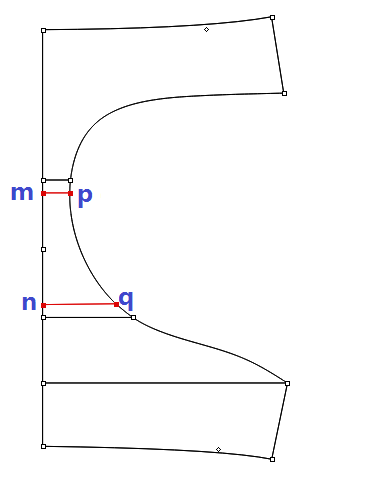
Draw the gusset piece: use
tool to select “oi” segment,left click
tool,left click “o” point,enter the value 6.5cm (2.6in) in the appearing dialog box, then click “OK” to get the “m” point. Use the same procedure to draw out “n” point.
![]()
Left click
tool,hold down the Shift key and left click “m” point, then move the cursor to point “p” and left click the point “p” to get “mp” segment.
Use the same procedure to draw out “nq” segment.
Use
tool to select “ik” segment and “jl” segment, press the Backspace key (windows) or Delete key (Mac) to delete selected segments (“ik” segment and “jl” segment) be delete.
Left click
tool,double click “A” area and then left click “B” area, hold down the Shift key and left click to select “mp” segment, then right click the mouse, “Set Piece” dialog box appears. Check “plan” item and click “Ok” button, then you can get the front piece.
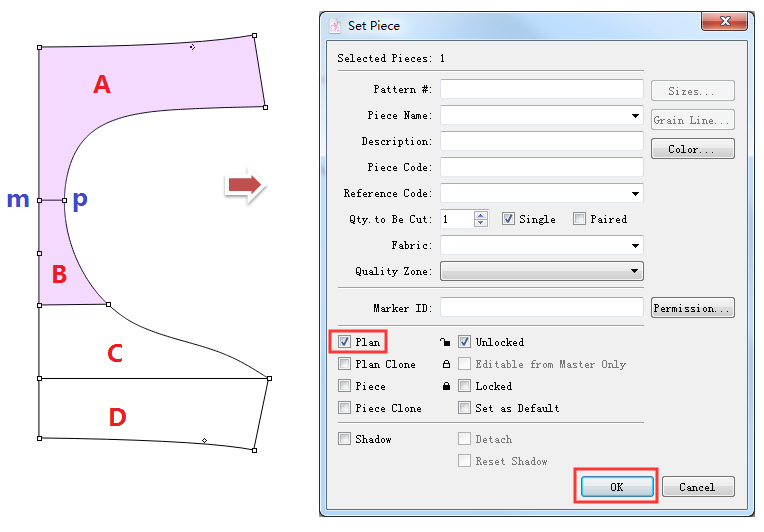
Double click “B” area and then right click it directly, check the “plan” item and click [OK] button in the “Set Piece” dialog box, then you can get the gusset piece.
Double click “C” area and then right click it directly, check the “plan” item and click [OK] button in the “Set Piece” dialog box, then you can get back piece.
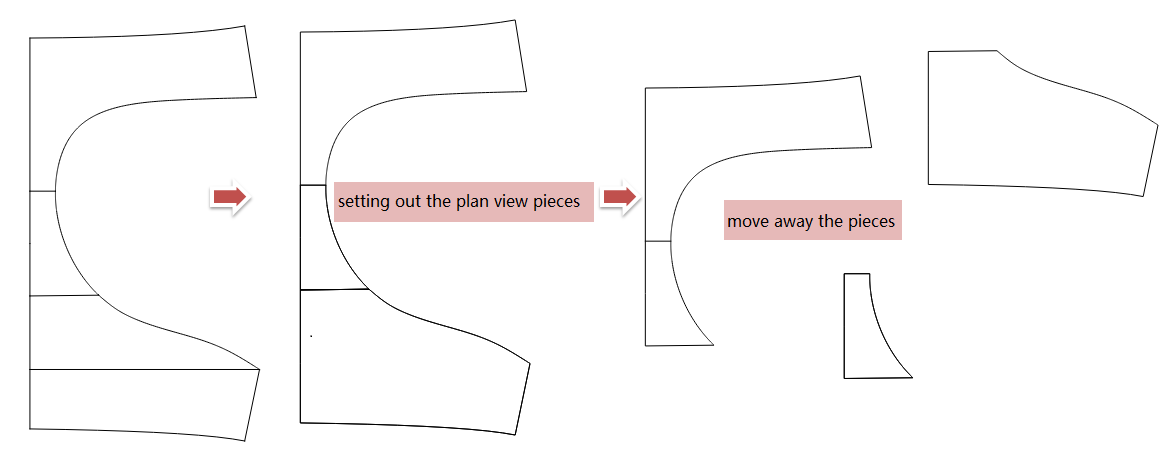
All the plan pieces that you set up are piled up together, you can use
tool to move away the pieces: hold down the Alt key, left click (hold down and do not release)one outline segment, release the mouse after you moved the piece to the desired position.
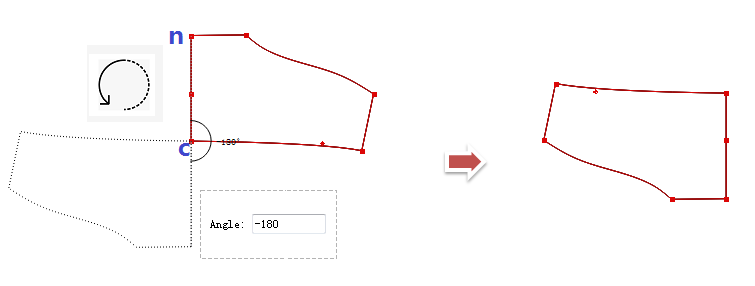
Select back piece by using
tool, left click “c” point and then move the mouse towards “n” point and left click “n” point, whirling counterclockwise and enter the angle value “-180”, press the [Enter] key or left click the blank area to finish the operations.
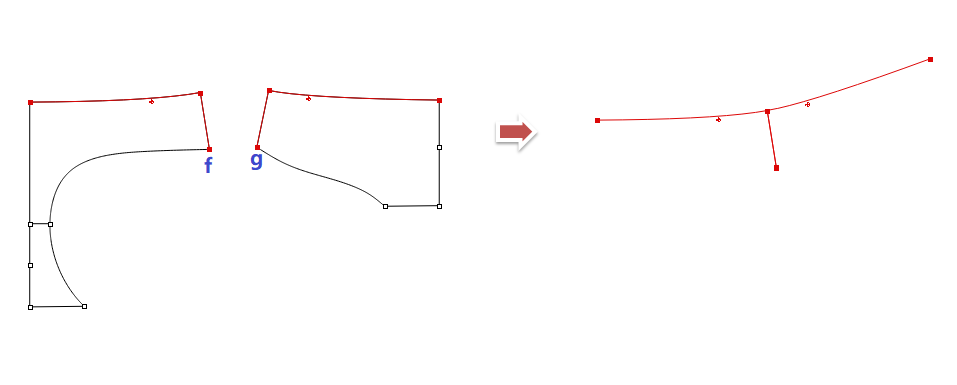
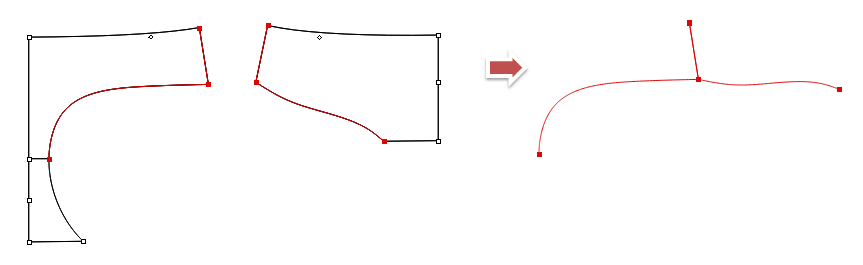
Simulate stitching status of the front and back pieces to smooth the waistband line: hold down the Shift key, select the waistband line and side seam of the front and back pieces by using
tool, select
tool, left click “f” point and “g” point one by one, then it will present stitching status for you to check if the waistband smooth or not. You can left click the point (hold on and do not release) and dragit to edite the crve, or left click to select the point and then use the arrows key on the keybord to move the point to edite the curve. Right click the blank area to finish the modification.
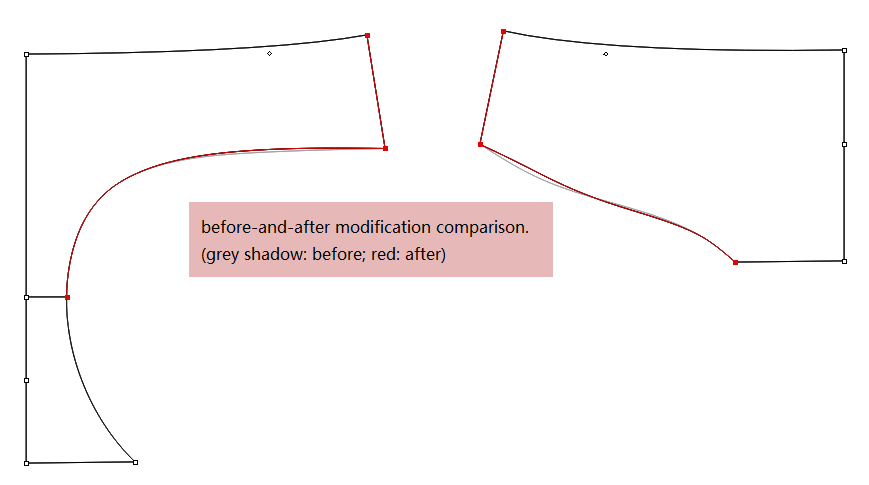
Simulate stitching status of the front and back pieces to smooth the leg opening curve: hold down the Shift key, select the leg opening curve and side seam of the front and back pieces by using
tool, select
tool, left click “d” point and “e” point one by one, then it will present stitching status for you to check if the leg opening curve smooth or not. You can left click the point (hold on and do not release) and dragit to edite the crve, or left click to select the point and then use the arrows key on the keybord to move the point to edite the curve. Right click the blank area to finish the modification.
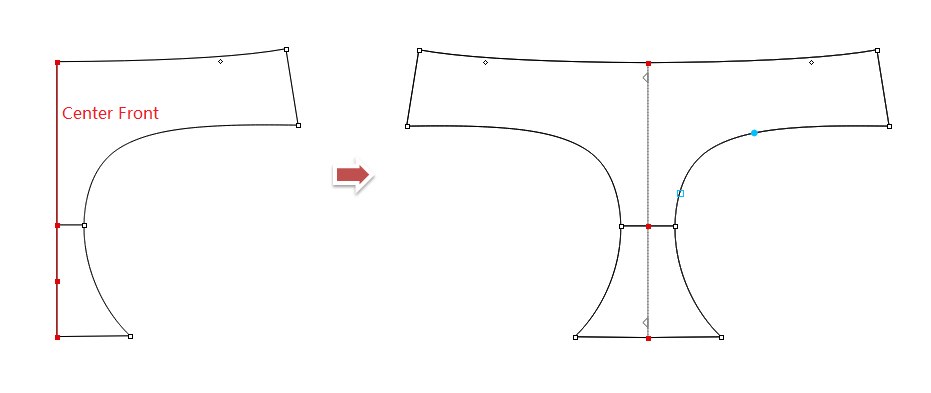
Unfold the all the half pieces into completed pieces: take front piece as an example: use
tool to select the center line of the front piece, select
and left click the selected center line.
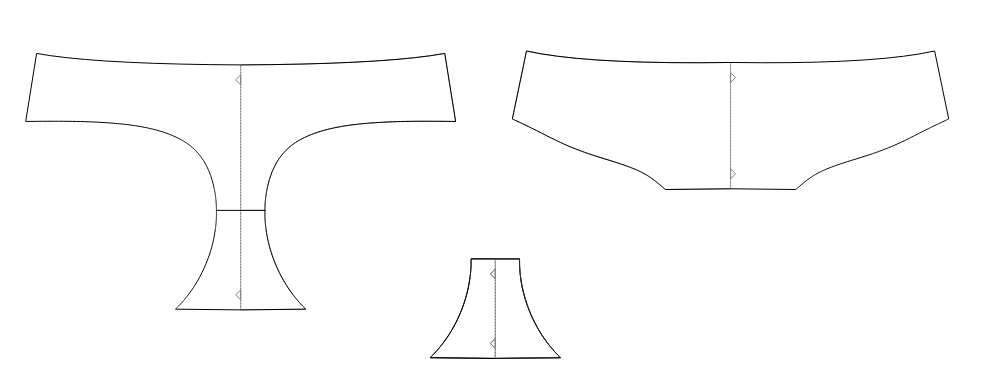
Now you’ve finish the lady brife pattern making, then you can follow the following manual to learn how to set pieces and how to add seam allowance.