A-Line Skirt
The below steps are detailed for the V6.0 version. If you are using V7.0, the steps will be slightly different.
Steps
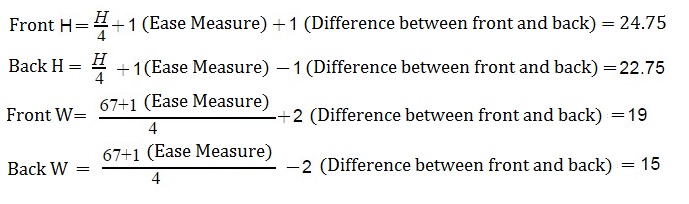
Draw two rectangles with value of front / back H and skirt length.
Select
 , hold down Option (Mac) or Alt (Windows), left-click the desired area.
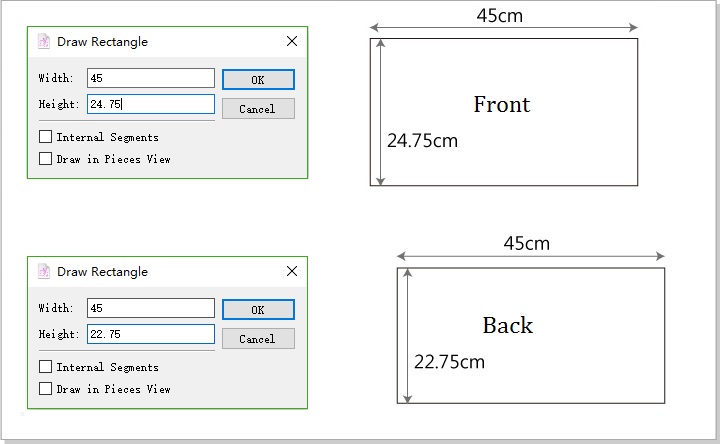
Draw a parallel line (hip) 18cm from the waist line.
Select
 , select waist line, select
  . Click inside the rectangle. Enter 18cm in the dialog box.
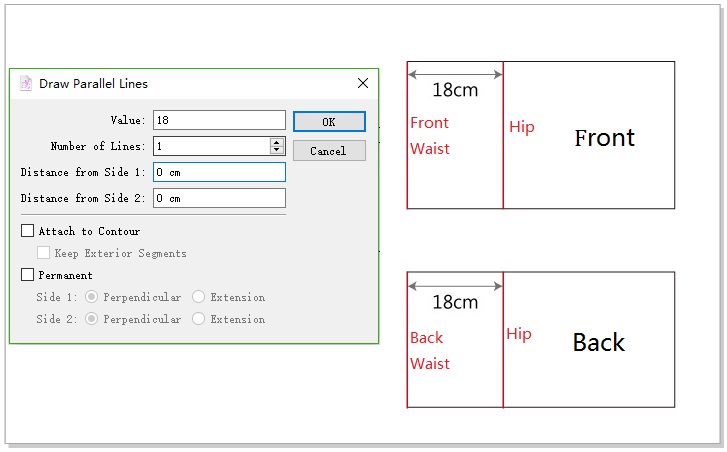
Draw the waist point on the side seam: Select
 , hold down Option (Mac) or Alt (Windows), click Point A (B). Enter value “0.5cm”, click “OK”.
Draw the point 0.5cm down from the center line: select
, select center back line, select  , click point “C”, enter the value “0.5”cm, click “OK”.
Connect the points as picture shows: select
 , left click point 1,2,3 point that the arrows pointed, to draw out the front/back wait line.
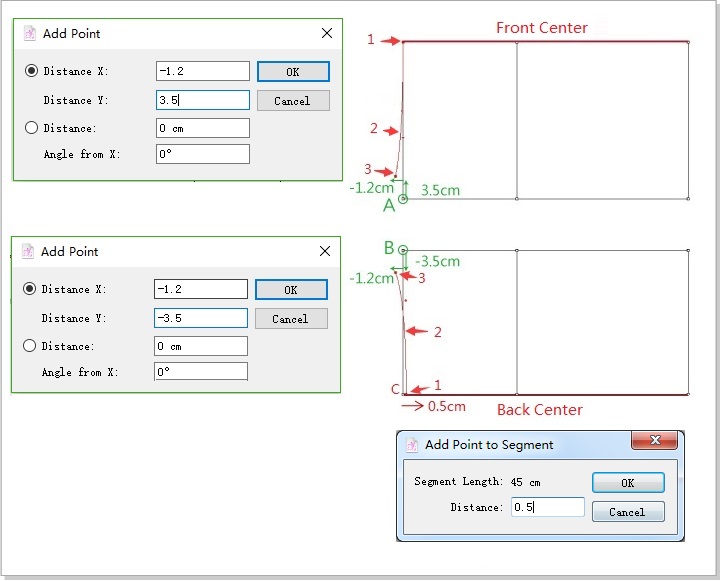
Select waist line in front piece, change length value to 21.4cm; select waist line in back piece, change length value to 19.4cm. After modifying length, connect side seam.
Use
to select front waist line, select  , left click point “A” on the selected line, the dialog box appears, enter the value “21.4cm” in the “New Length” column, click “OK”.
Use
to select back waist line, select , left click point “B” on the selected line, the dialog box appears, enter the value “19.4cm” in the “New Length” column, click “OK”.Connect the points as picture shows: select
, left click point 1,2,3 point that the arrows pointed, to draw out the side seam.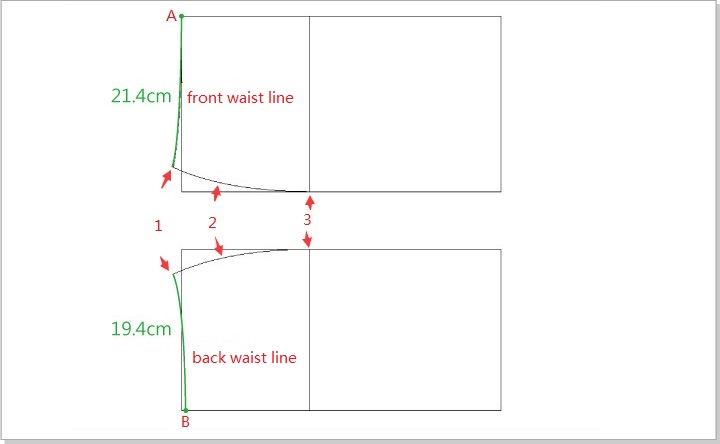
Draw the segment where the dart is located in the piece.
The dart value in front piece is 21.4 - 19 = 2.4cm
Front piece: use
to select waist line, Select  to divide it into two parts. Select
  , hold down Option (Mac) or Alt (Windows), draw a segment as dart center from Point A.
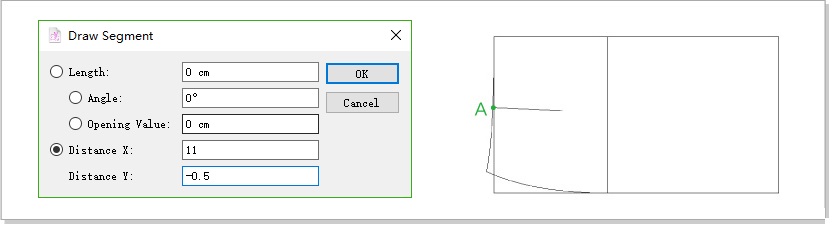
The dart value in back piece is (19.4 - 15)/ 2 = 2.2cm
Back piece: use
to select waist line, add a point 7+2.2 (dart value) / 2=8.1cm from the center line: Select , hold down Option (Mac) or Alt (Windows), left click the start point, enter the value “8.1cm” in the appearing dialog box, click “OK”.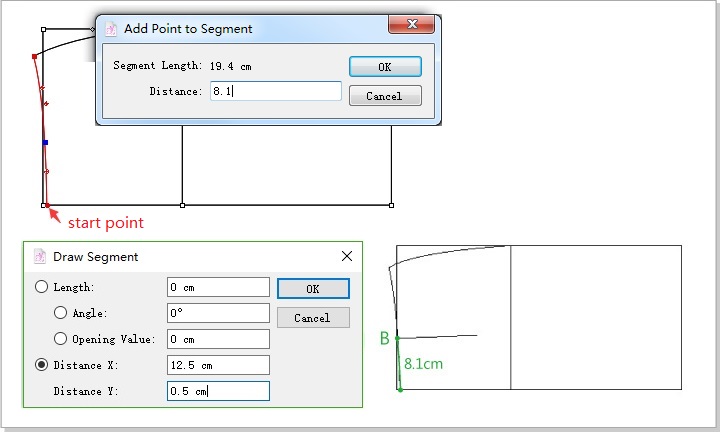
Select
to divide it into two parts. Select , draw a line as dart center line from Point B.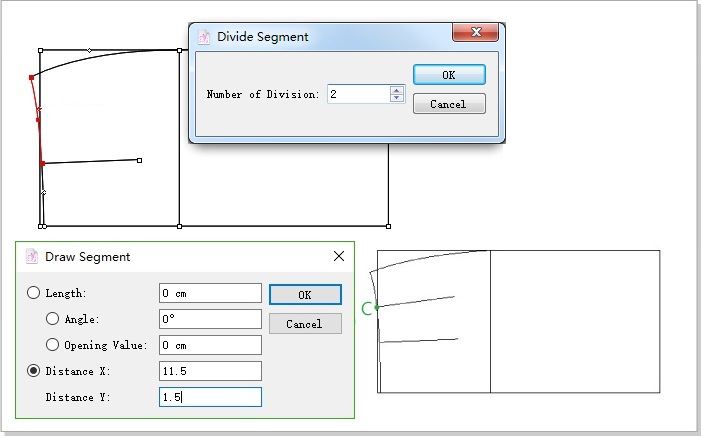
Add 1.5 cm length to the hem. Connect side seam and the hem.
Select
, hold down Option (Mac) or Alt (Windows), left-click Point A (B). Enter value. Select , left click two points one by one that the red arrow pointed to create side seam.Use
to slect segment “a”, select , click the selected segment, enter the value “3” in the appearing dialog box, to devide the segment to 3 equal parts. Same steps to devide segment b into 3 equal parts.Select
, click 2 points to create hem line as the purple arrows show.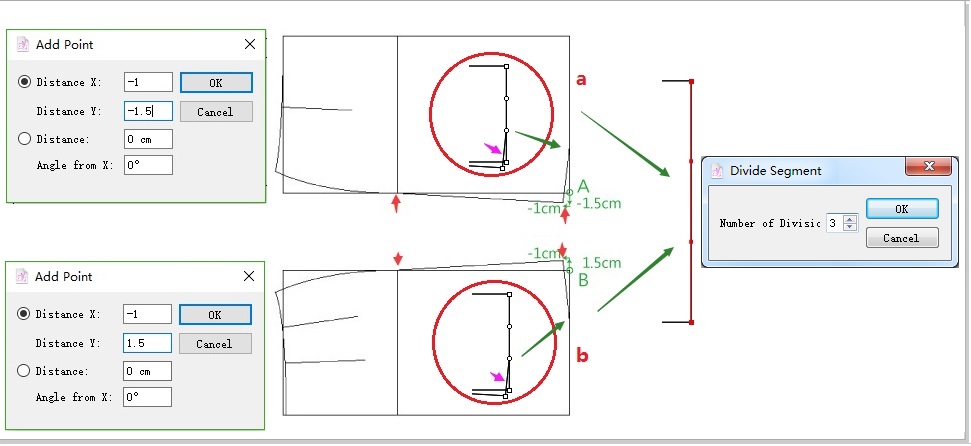
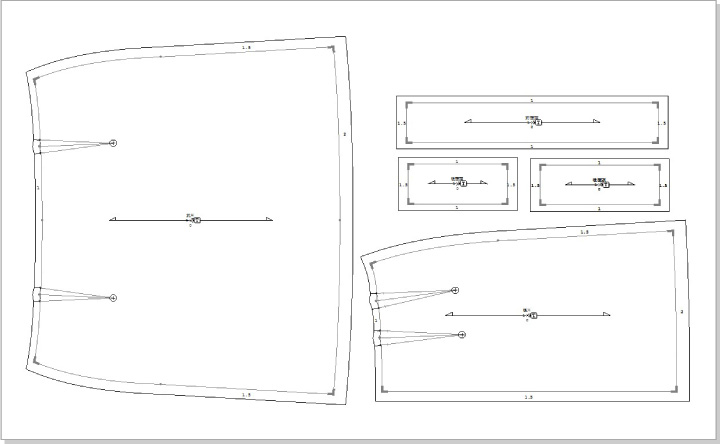
Separate front and back piece. Mirror the front piece.
As the picture shows, select
, double click the mouse and then drag out a pink line to select the piece in need, right click the mouse, a window appears, enter information and click [OK] to create out the front piece. Repeat it for the back piece.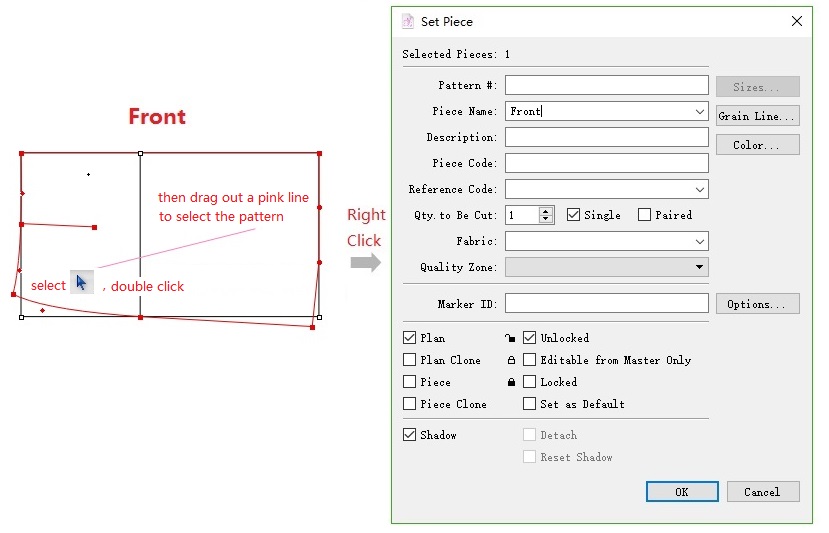
Select the center line. Select
 . Click the center line to mirror the piece.
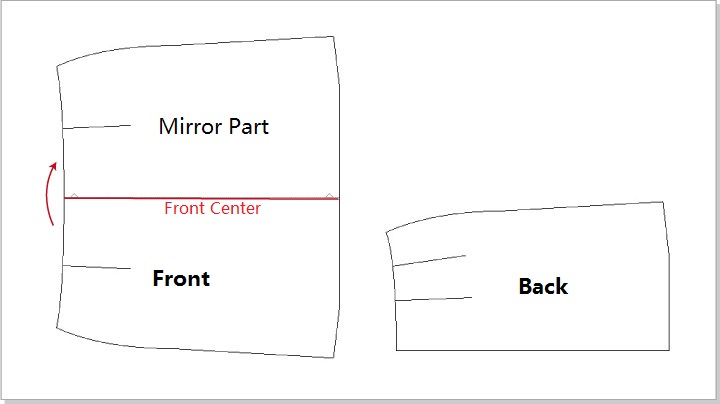
Develop a dart by using Dart tool.
Use
to select the center segment of the dart, select  , click the start point of the segment. Dialog appears. Enter value.
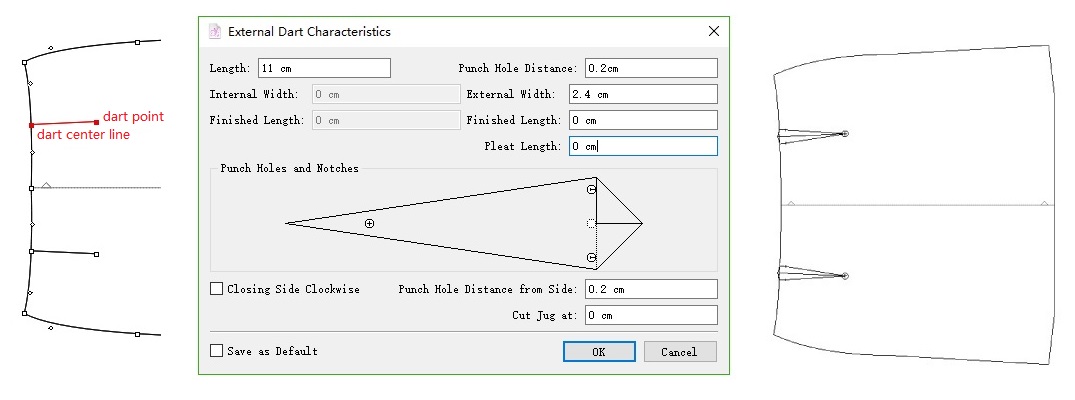
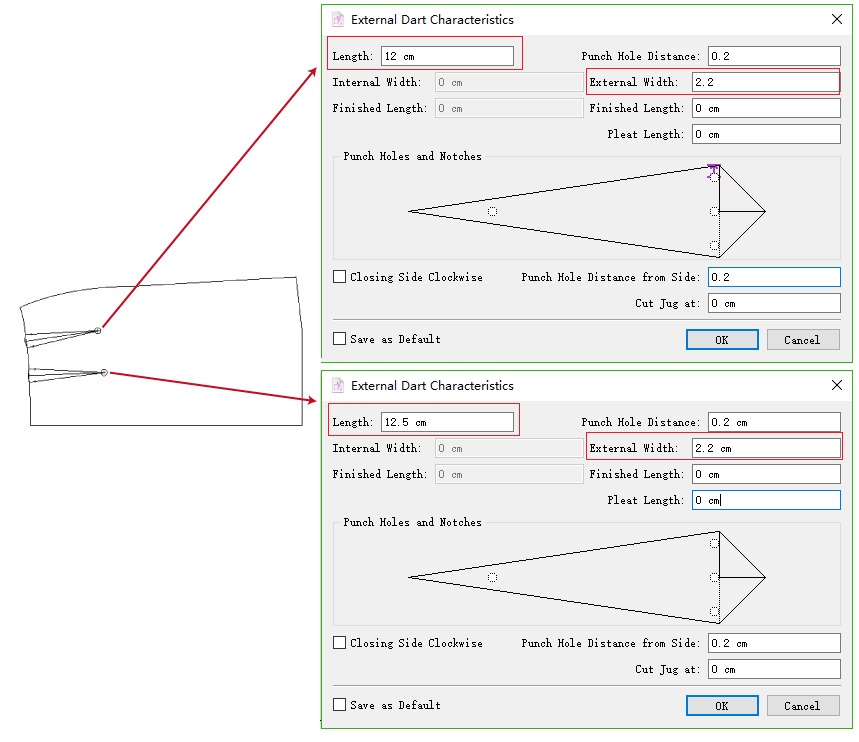
Modify the segments by using Segment Sync tool.
Use
to select the red lines and dart. Select  . Click Point A. After modifying the segments, right click once. Repeat the former operation for the back piece.
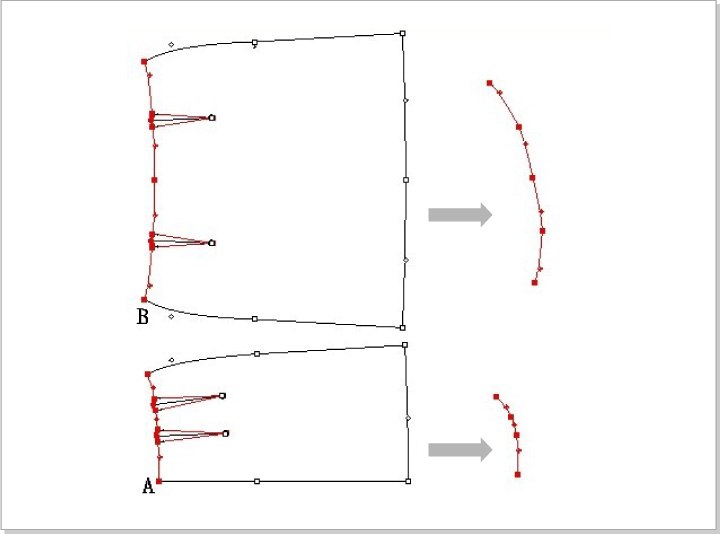
Use
to select the red segment. Select , click Point A then Point B. After modifying the segment, right click once. Repeat the operation for the hem line.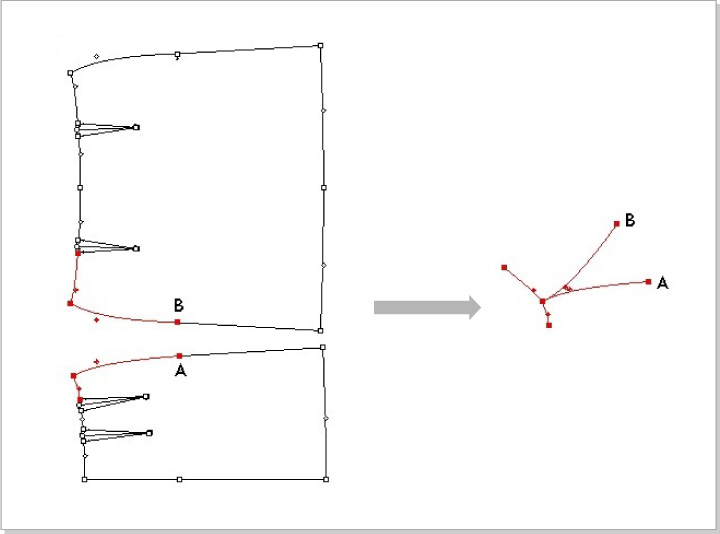
Select
, hold down Option (Mac) or Alt (Windows), left-click the desired area, enter width value 38cm / 15cm /18 cm and height value 3cm to draw three rectangles.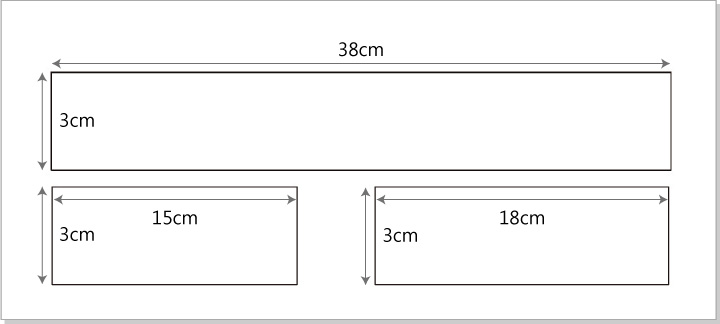
Set pattern piece.
Select
, right-click inside the piece, pull-down menu appears. Click [Set Piece from Contour…] to open the following window. Enter desired information and click [OK].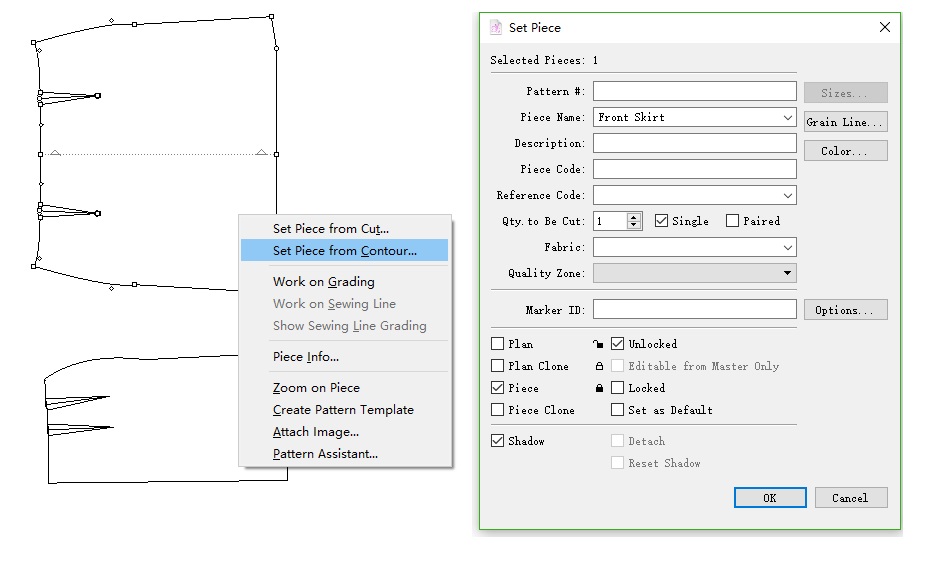

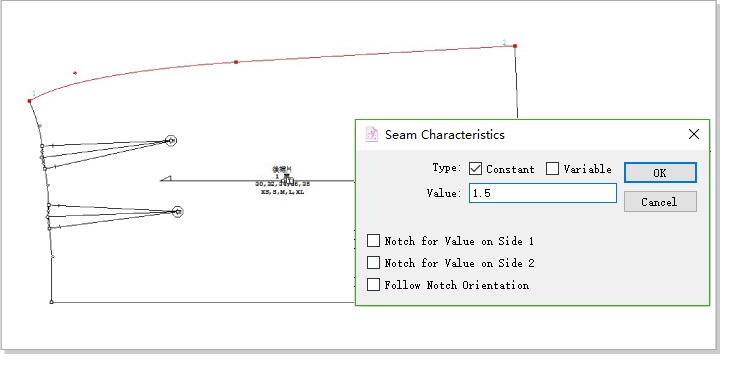
Add seam allowance.
Use
to select the desired segment in the pattern piece. Select  . Click the segment. Enter value.