 Create Spline
New in V7.0:
Facilitates users to draw a continuous and accurate spline easily and quickly. Create Spline also allows users to curve a straight line or make a parallel without converting other tools.
Draw contuinuous spline
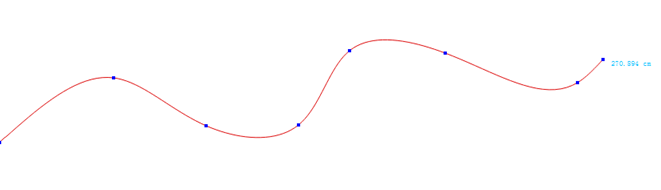
To draw a continuous spline without point limitation:
How to do:
Select
Draw a spline by continuous left-clicking on the desired area and right-click to finish drawing.
Note
It will be a straight line if just click two points.
Snap points by exact value
Allow users to snap the curve points by entering precise value.
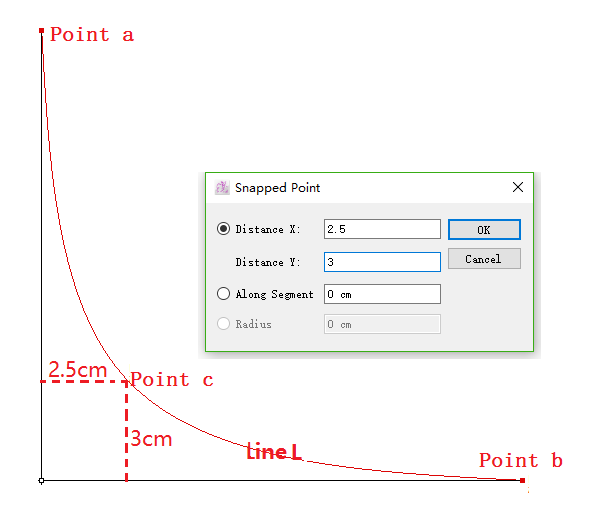
Draw Line L that goes through Point c
How to do:
Select a reference point (like Point a);
Select
Hold down Alt key (Windows) or Option key (Macintosh) and click on the blank space;
Enter 2.5 to Distance X and 3 to Distance Y, click OK;
Point c appears, then connect Point c and Point b by spline.
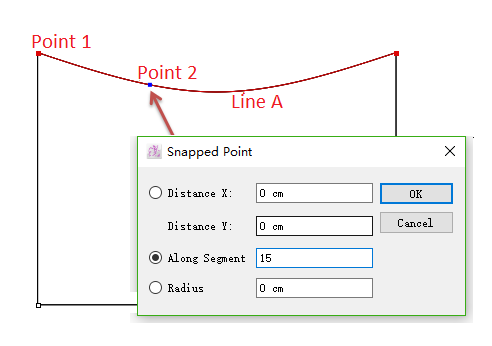
Take Point 1 as reference point, draw Point 2 and the distance between two point along Line A is 3 cm .
Select Line A;
Select
Hold down the Alt key (Windows) or Option key (Macintosh) and left-click Point 1;
Enter 3 cm to Along Segment in the dialog box.
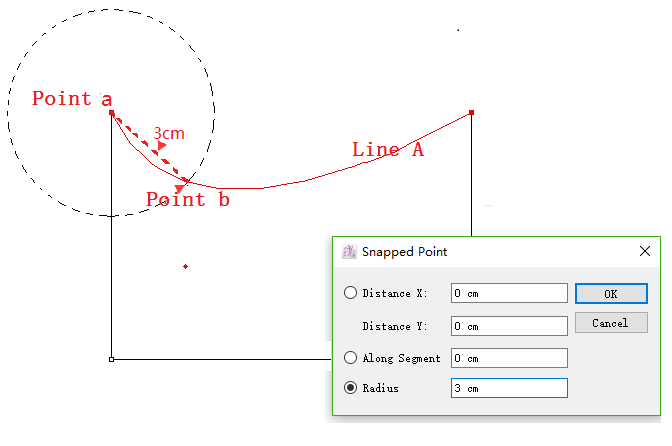
Draw Point b on Line A, and the distance between Point a and Point b is 3 cm:
How to do
Select Line A;
Select
Hold down Alt key (Windows) or Option key (Macintosh) and left-click Point a;
Enter 3 to Radius;
Click OK button.
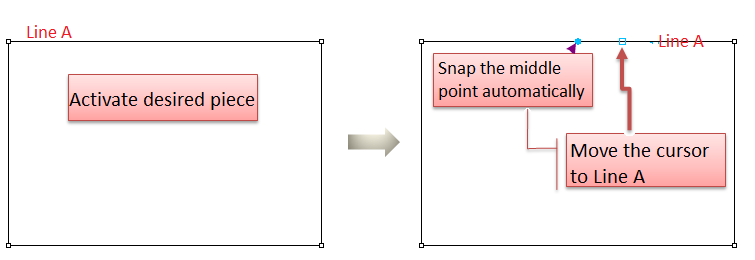
Snap central point
Help users to snap the central point of the selected reference segment.
How to do:
Activate desired piece;
Select
Move the cursor to Line A, the blue point, also the central point of Line A turns up.
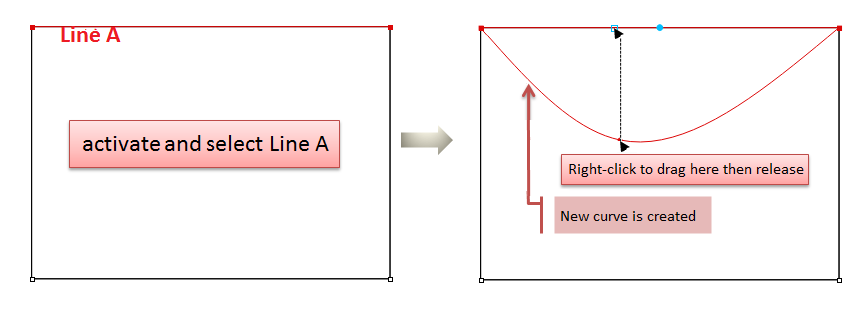
Curve a segment
Right-click to drag the selected straight line into a curve.
How to do:
Activate desired piece, select Line A (your desired segment);
Select
Move your cursor to Line A, right-click to drag it till desired shape.
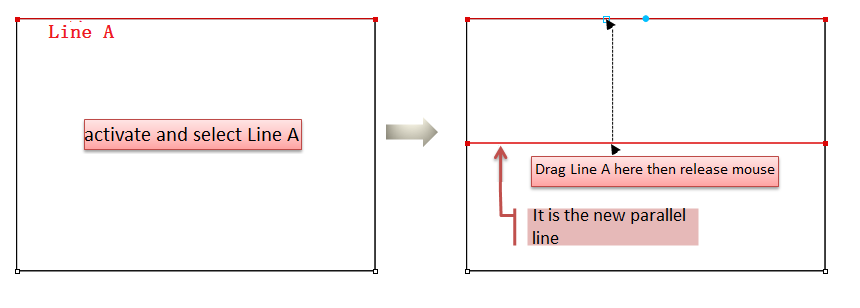
Draw parallel line
Drag the selected spline with left-clicking to draw parallel line.
Activate desired piece, select Line A (your desired segment);
Select
Move your cursor to Line A, left-click to drag it to desired position.
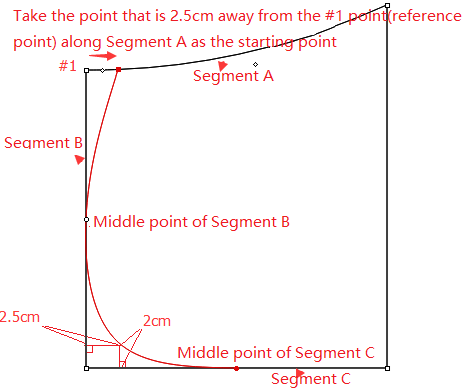
Exercise
For example,
How to do:
Activate the piece and select Segment A;
Select
Hold down the Alt key (Windows) or Option key (Macintosh) and left-click point#1;
Input the values of Along Segment in the dialog box, a point will appear in Segment A and left-click it;
Move the mouse to line B, it will snap the middle point of Segment B automatically;
Left-click the middle point of Segment B;
Hold down the Alt key (Windows) or Option key (Macintosh) and left-click the point#2, input values in Distance X and Distance Y, the point will appear, then left-click it;
Move the mouse to line C, the middle point of Segment B will appear automatically, then left-click it;
Right-click to end drawing.
Note
Press Z key on the keyboard to undo the former point;
Left-click to add point with holding down the Shift key. Left-click to select the point wanted to be deleted with holding down the Ctrl key (Windows) or Command key (Macintosh) then press the Backspace key on the keyboard;
If users want to modify the shape of the existing spline, select Create Spline tool, then right-click the spline. The points appear so drag them to modify.