Chapter 4 - Digitizer Manager Image Capture
Allow users to capture the images of the paper patterns and save them in the computer.
Supported Camera And System Requirement
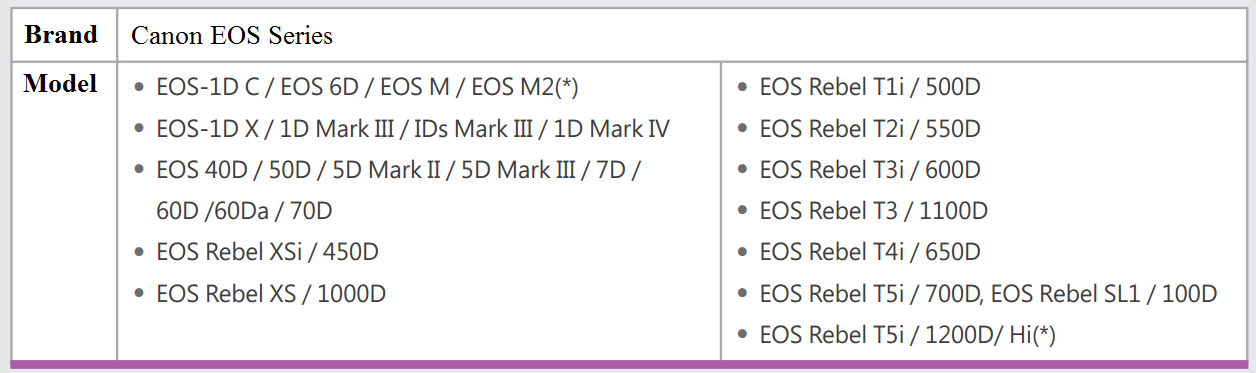
Support Canon EOS Series
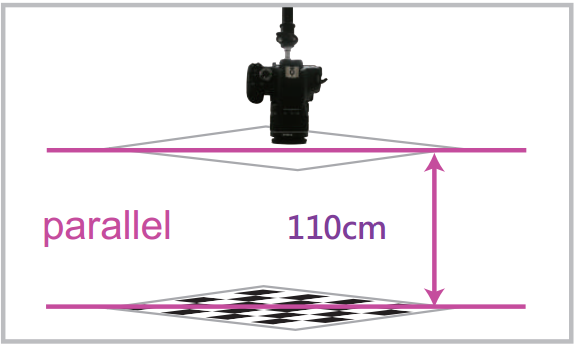
The shooting distance need to be more than 110cm.
System requirement and recommended hardware specification.
Accept V notches tailoring on the pattern (Not accept other painting notches and inner line on the pattern).
Can not read multiple patterns drawing in single paper.

Setup The Camera
How to setup the camera
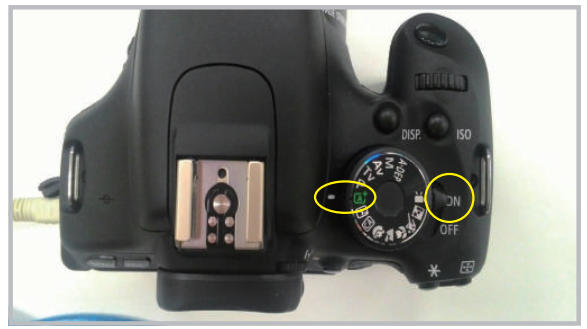
Set the power switch to [ON] and set the Mode Dial to
(Scene Intelligent Auto)
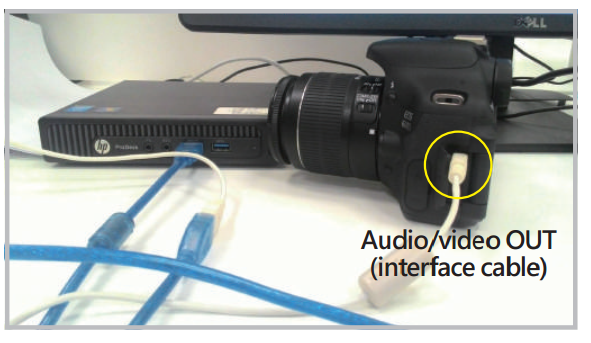
Connecting the camera to the PC
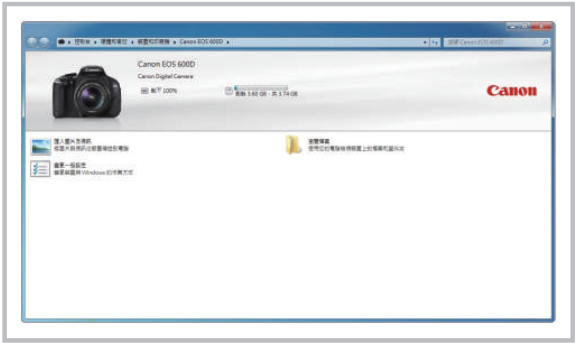
The camera is connected to PC successfully when this window pops up
Keep your camera and pattern paper parallel, with a distance more than 110 cm.
Capture Image
How to capture image by using Digitizer Manager
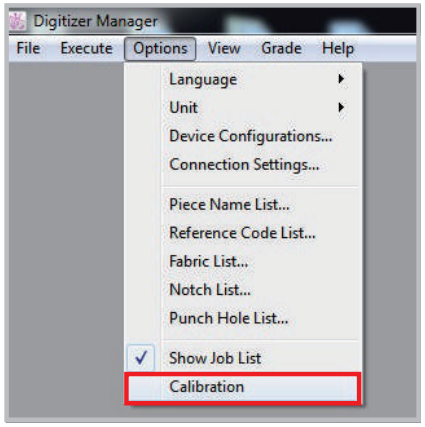
Open Digitizer Manager, click menu [Options] - [Calibration].
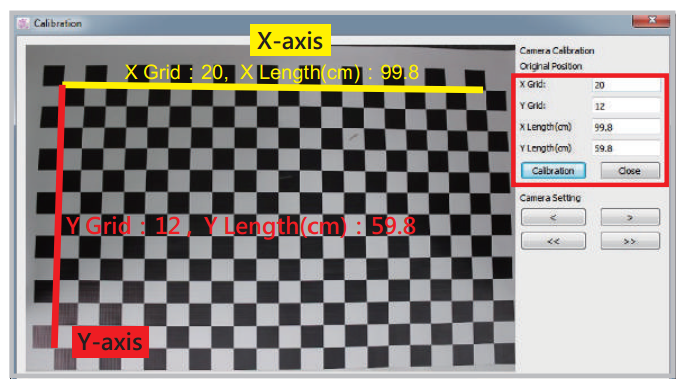
Enter original position in X, Y and click calibration.
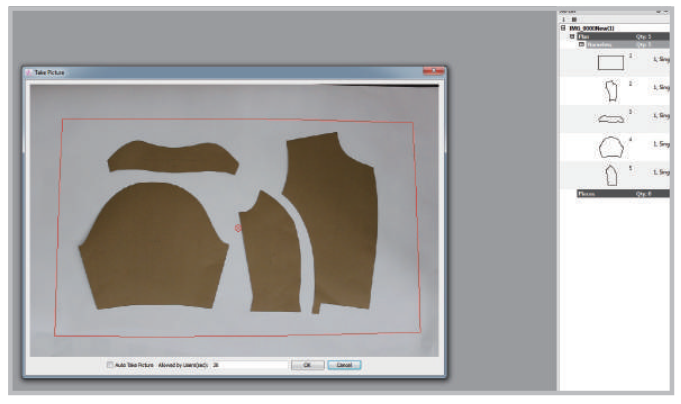
Pattern Paper must be placed inside the frame from camera preview
Keep pattern X, Y axis parallel to the X, Y axis in camera preview.
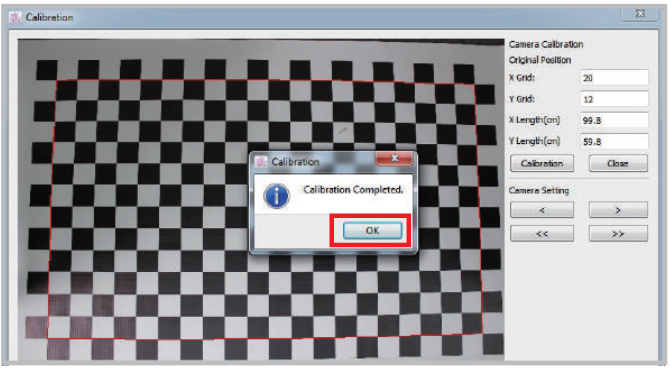
Calibration Completed -> OK.
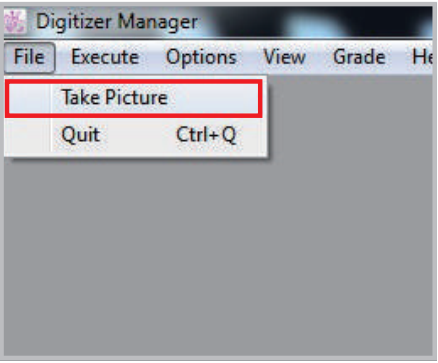
Click menu [File] - [Take Picture]
Lay a white paper on checker board paper, put patterns on the paper. Click [OK]. Check patterns in your job list.
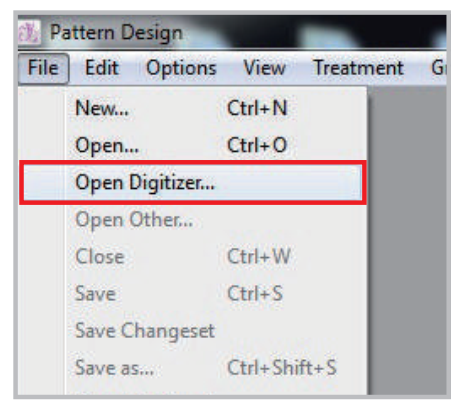
Open Pattern Design Application, click menu [File] - [Open Digitizer…].
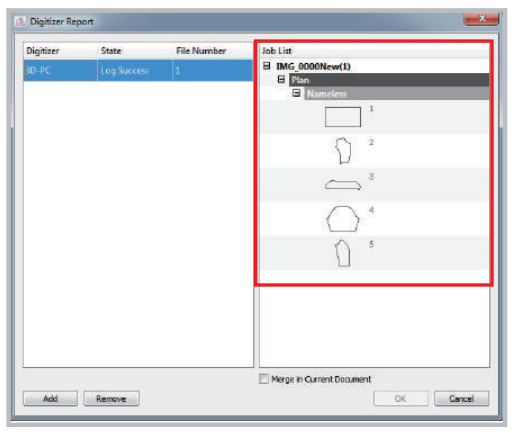
Select the “Job List” you want, click [OK] button.
Now you can design your patterns in Pattern Design.