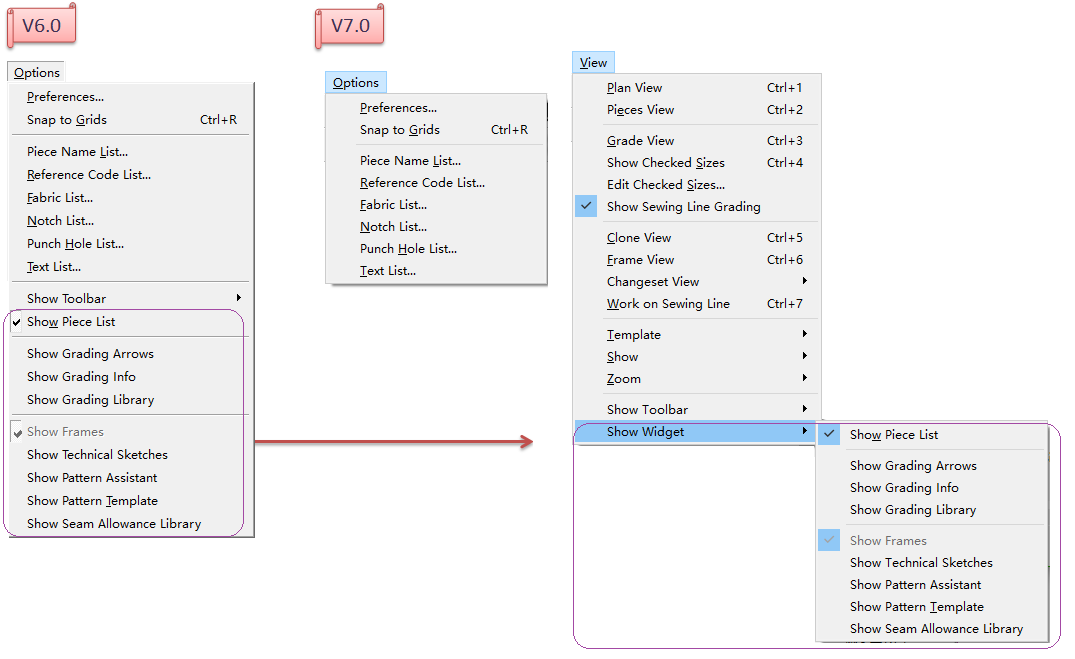
In V7.0, the position of [Show Toolbar],[Show Piece List], [Show Grading Library], [Show Frames], [Show Technical Sketches], [Show Pattern Assistant], [Show Pattern Template] and [Show Seam Allowance Library] are all moved to Menu [View] - [Show Widget].
For more information of menu mentioned above, please refer to the section of Menu [View].
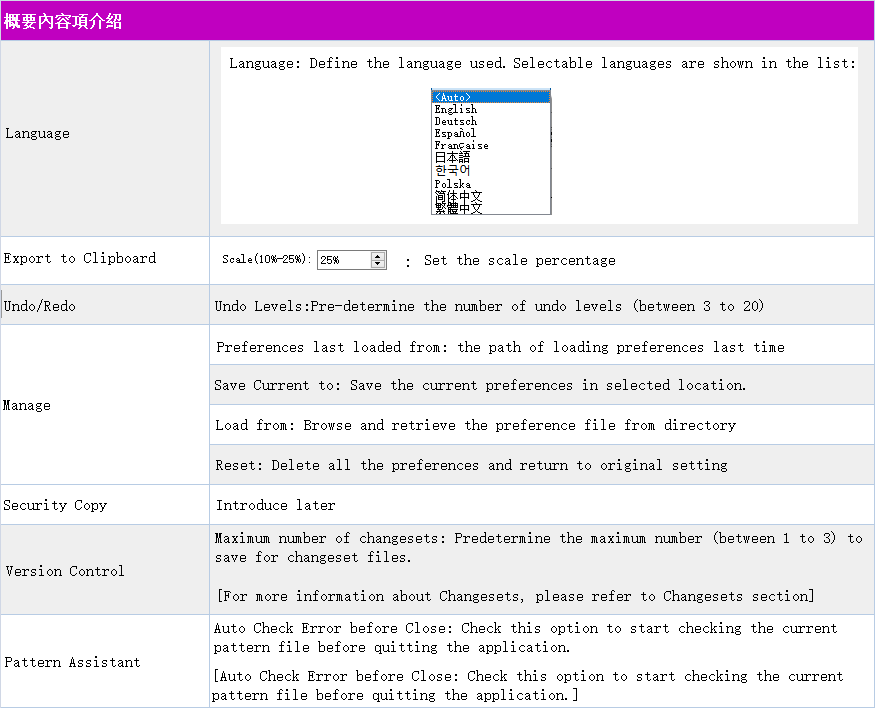
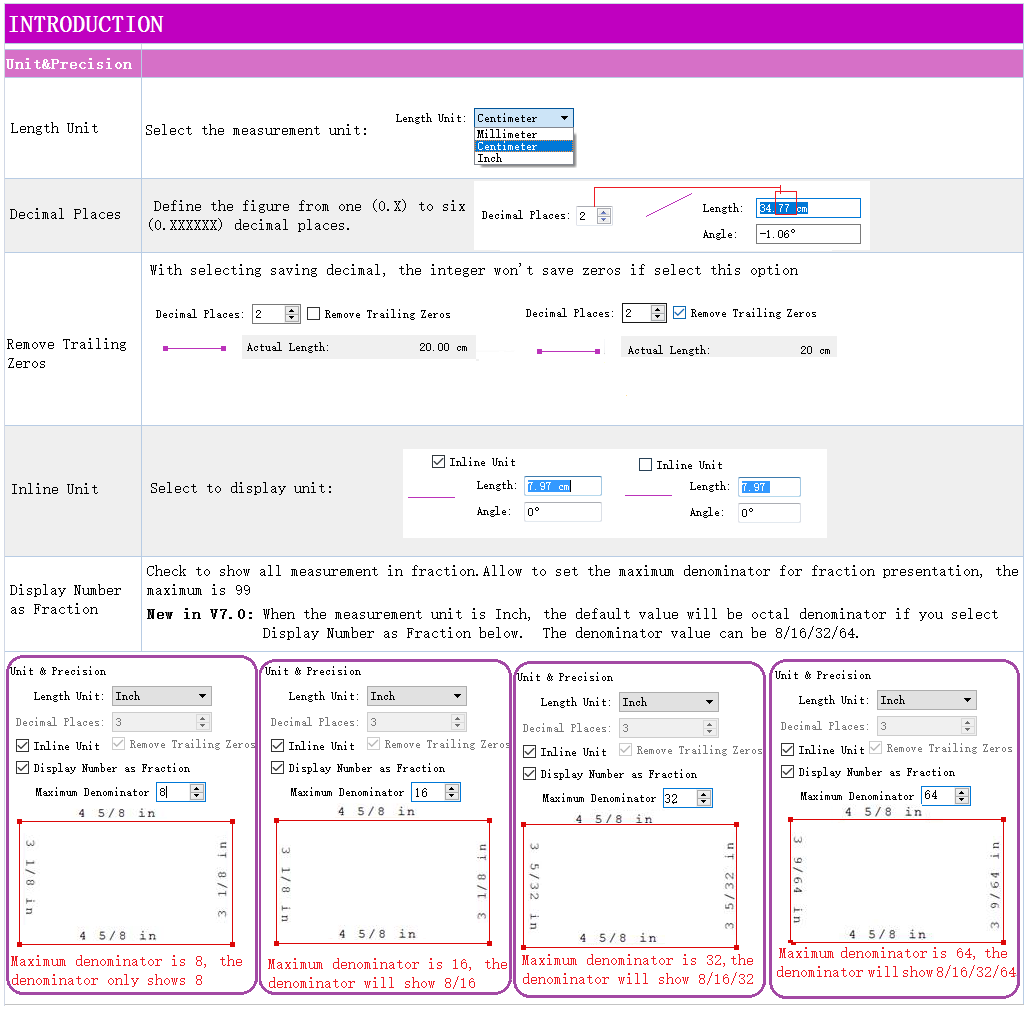
[Preferences]
Allow user to set different parameters to customize the working area.
General
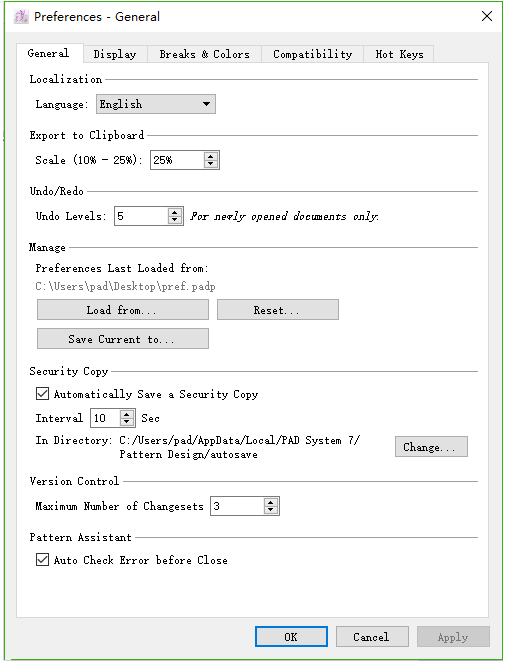
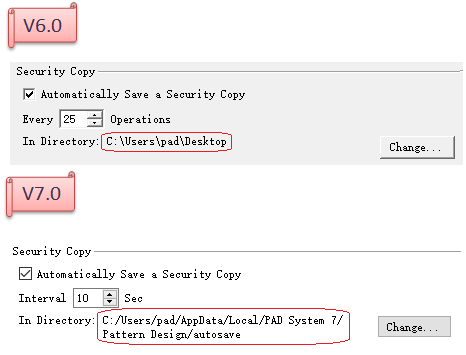
Security Copy
Automatically Save a Security Copy:
Set Security Copy as required, avoid missing the unsaved file caused by the unusual shutdown of the computer or crash of the software.
In V6.0: allow to set every N operations to automatically save a security copy
In V7.0: allow to set every N seconds to automatically save a security copy
備註
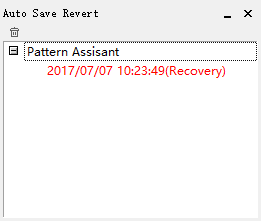
After setting Automatically Save a Security Copy, the system will save a security copy automatically according to the setting. Once you save a security copy by yourself, the security copy saved automatically will be deleted.
Optimiztion in V7.0: when the software crumbles, the window of auto save revert will appear after re-opening the software. Double-click it to revert the security copy:
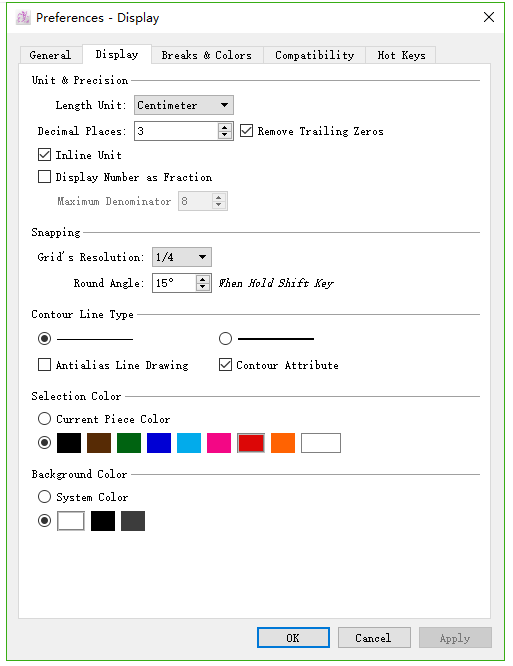
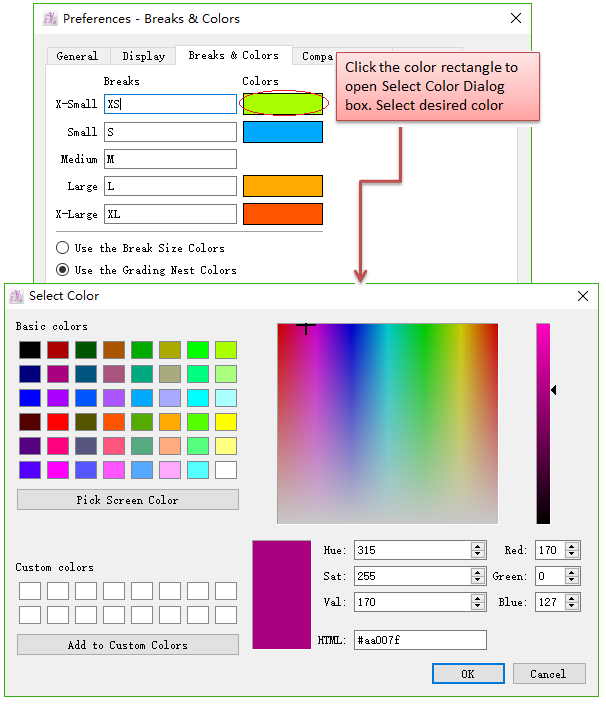
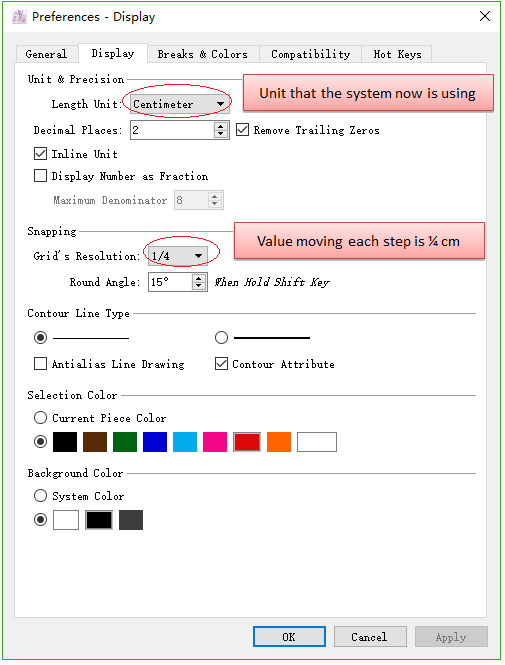
Display
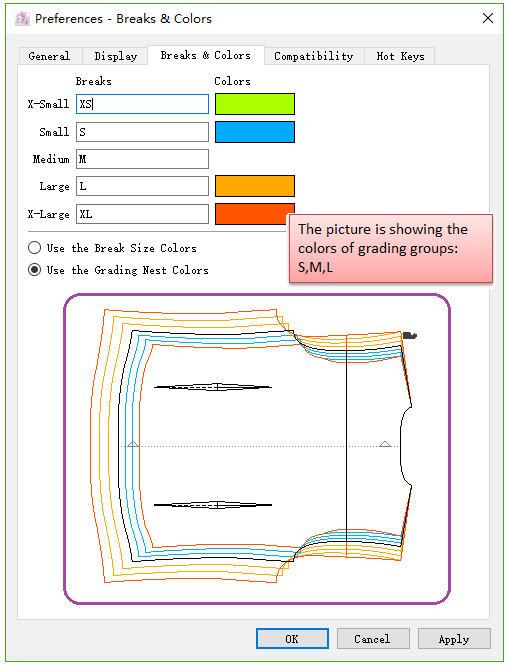
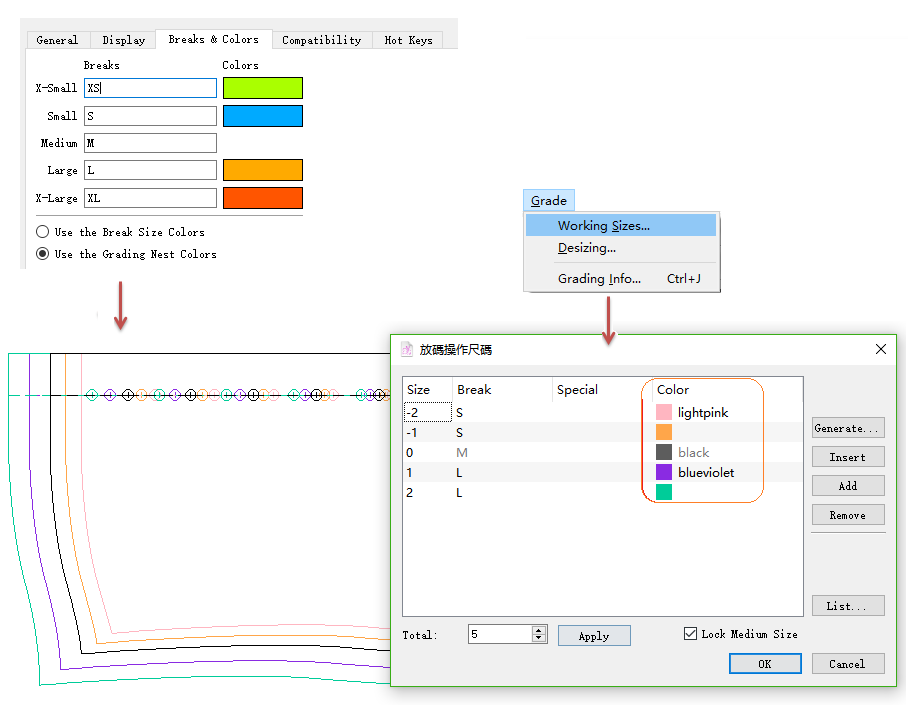
Breaks & Colors
Differentiate different Grading Breaks by their color and name to facilitate grading work.
Use the Break Size Colors: select the color for break group. Click the color rectangle to open the dialog box to change the color.
Use the Grading Nest Colors: use the colors set in Menu [Grade]-[Working Sizes].
Compatibility
Text Conversion
PAD Language: Convert text in .sty files saved in previous version (prior to v5.0) to system comptible language, to avoid the appearance of messy code when open other files.
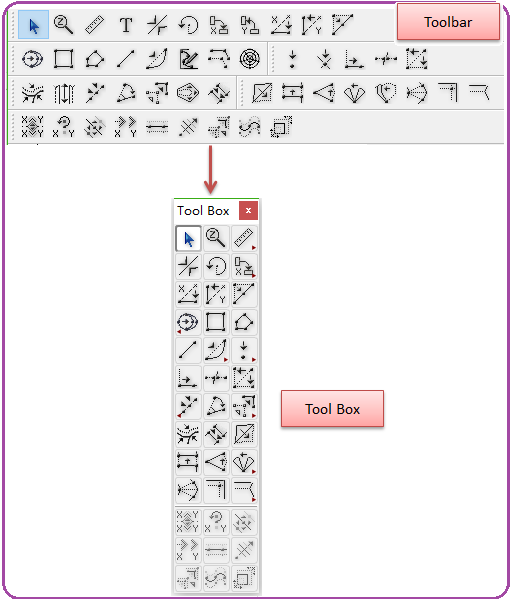
Look & Feel
Use Floating Tool Box Instead of Toolbars: System displays toolbar by default. Select to switch from Toolbars to Floating Toolbox.

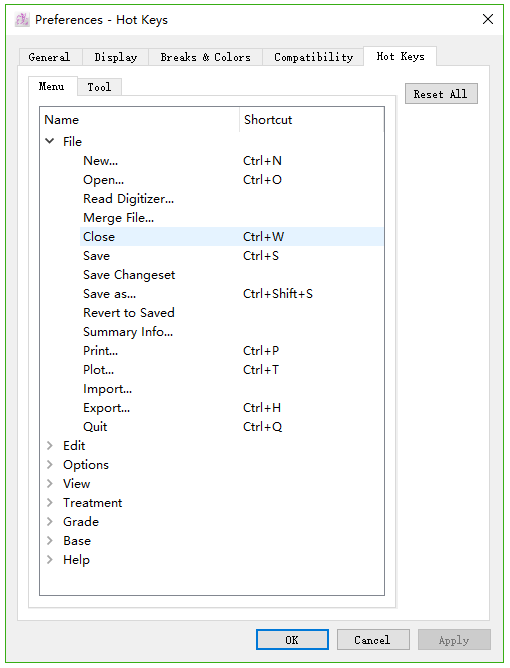
Hot Keys
Allow user to create hot key to carry out different functions quickly so as to increase efficiency of pattern-making.
User can use the default hot keys or re-configure the hot key as desired.
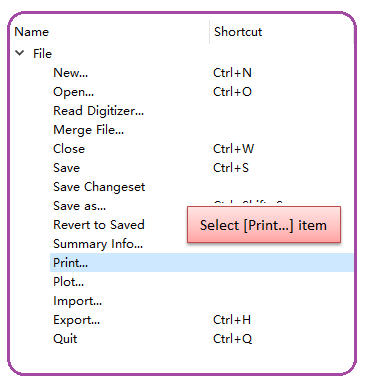
For example, add CTRL+P as hot key for [Print...] function:
Click to select the [Print...] item:
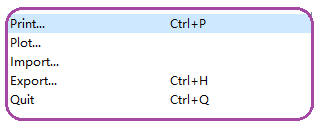
Then press Ctrl key and P key in the meantime, Ctrl+P is added to the blank space.
備註
If the hotkey was occupied by other functions, it appears in red as warning; if you still want to use this hotkey for the function, you need to click [Continue] button to delete the previous one, then the hotkey is used for new function.
To delete the hotkey, select the desired item, and press the Backspace key on the keyborad.
Click [Reset All], all the customized hotkeys go back to original default state.
The keys are not the same under different operating system (Windows/Mac/Linux), please refer to the Hotkeys list in Chapter One for more information.

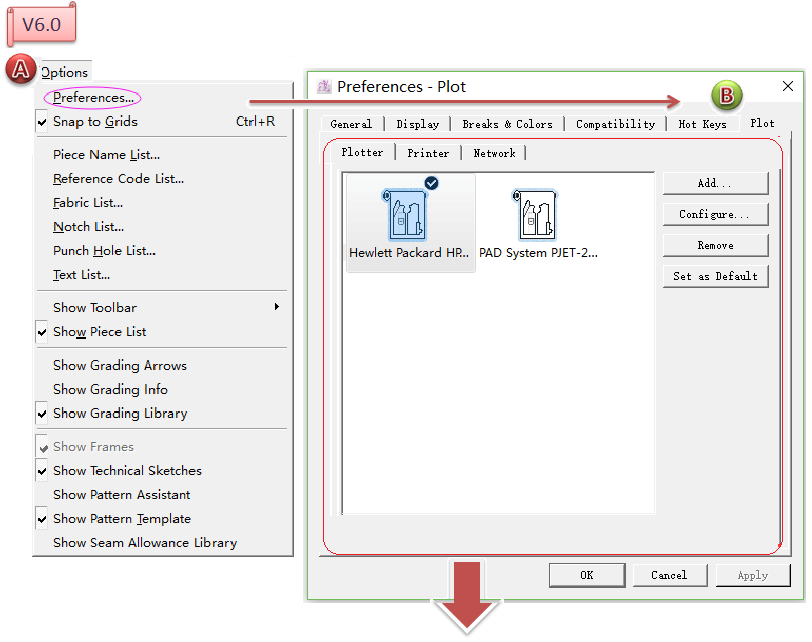
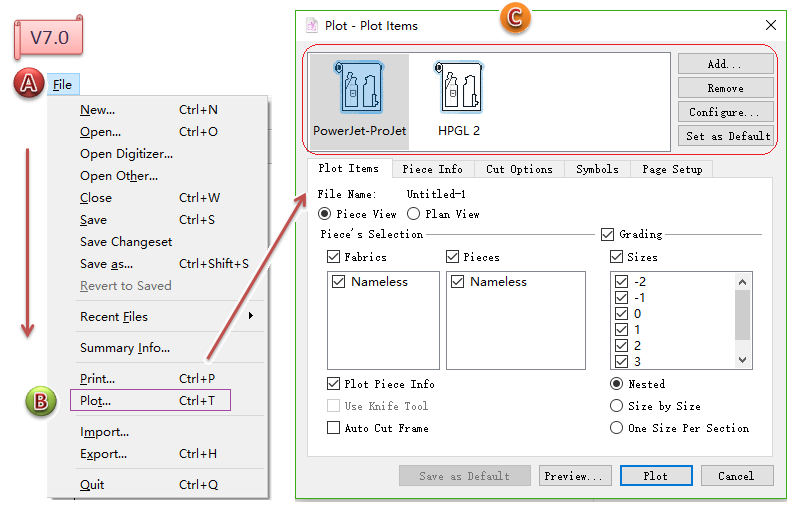
Plot...
The plot setting page is moved to path File-Plot. Users can set the plot information and choose to send the file to plot on the same page.
Original position: Option - Preferences - Plot
New postion: File - Plot
備註
The steps of setting are the same as before. For more information about plotting configuration, please refer to the section [File] menu in this chapter.
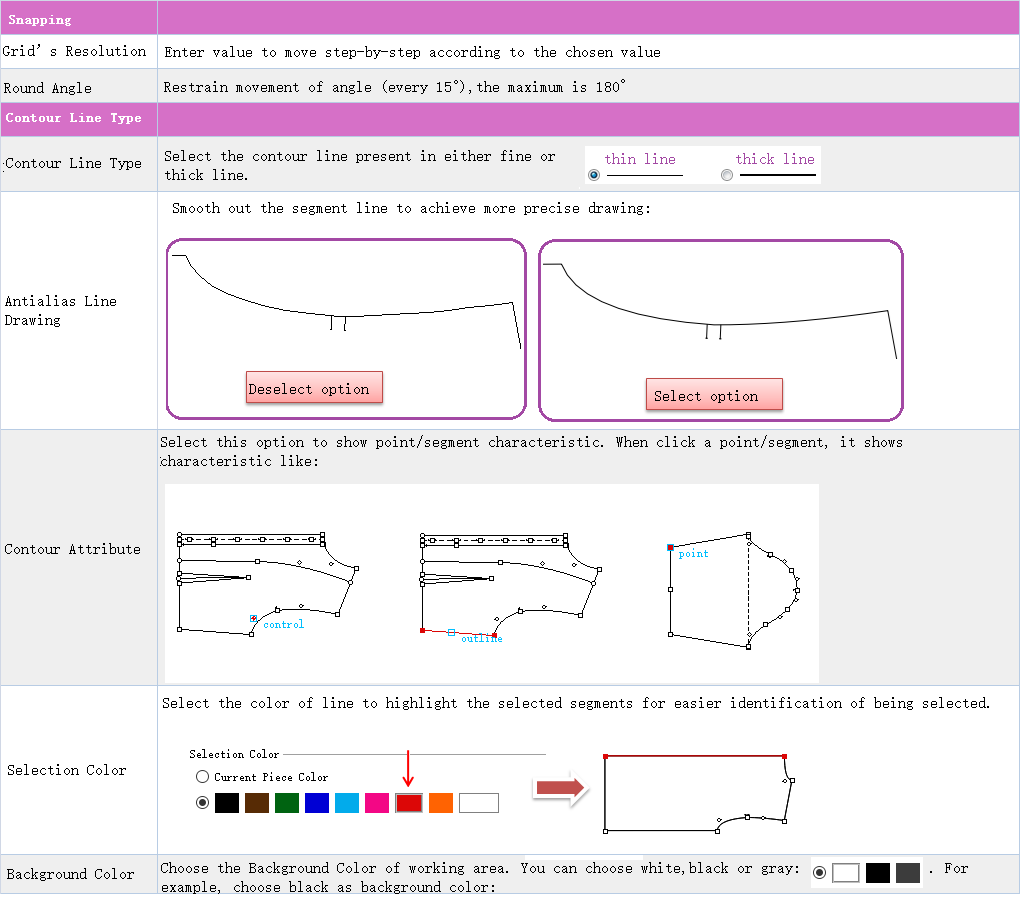
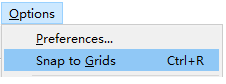
[Snap to Grid]
Allows user to move the pieces or elements (e.g.segment/point) on the working area using pre-defined grid steps.
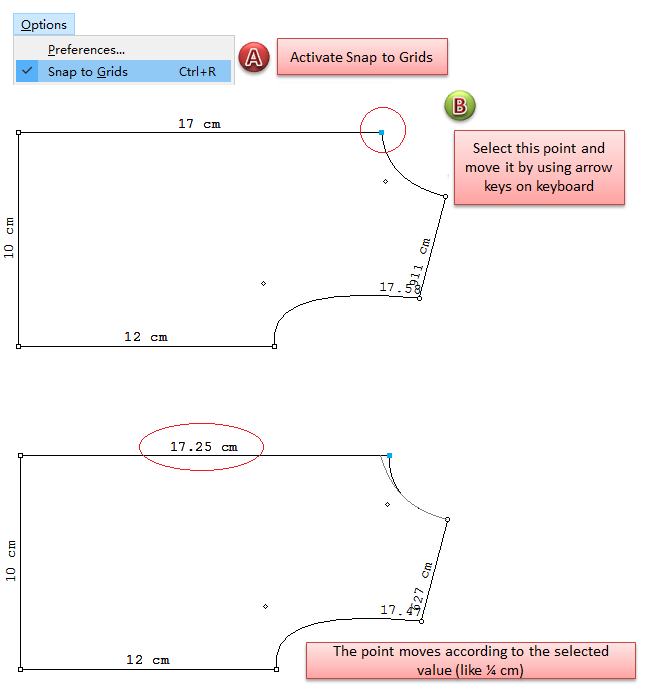
Activate Snap to Grid function:
User can set value of Snapping under menu [Options]-[Preferences]-[Display].
For example, select 1/4 of Grid’s Resolution, means that it is a quarter of current unit (cm).
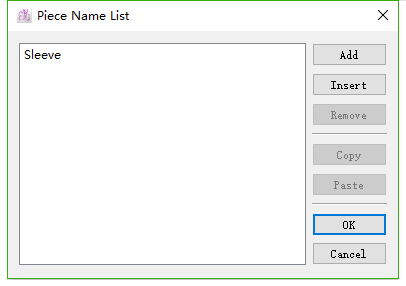
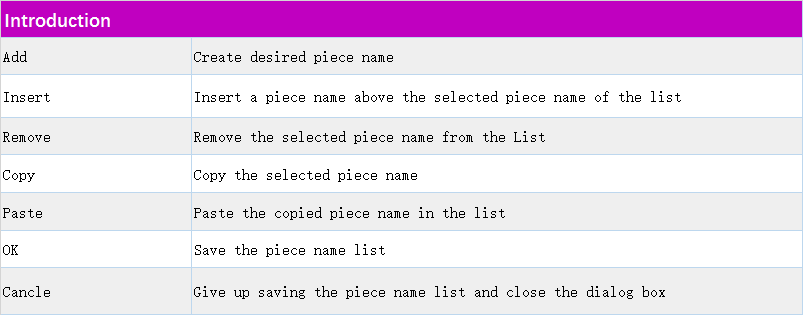
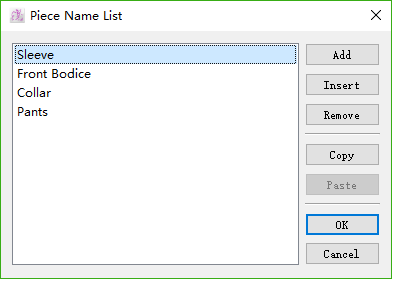
[Piece Name List]
Allow user to create the frequently-used names into a list so as to facilitate user in pattern-making.
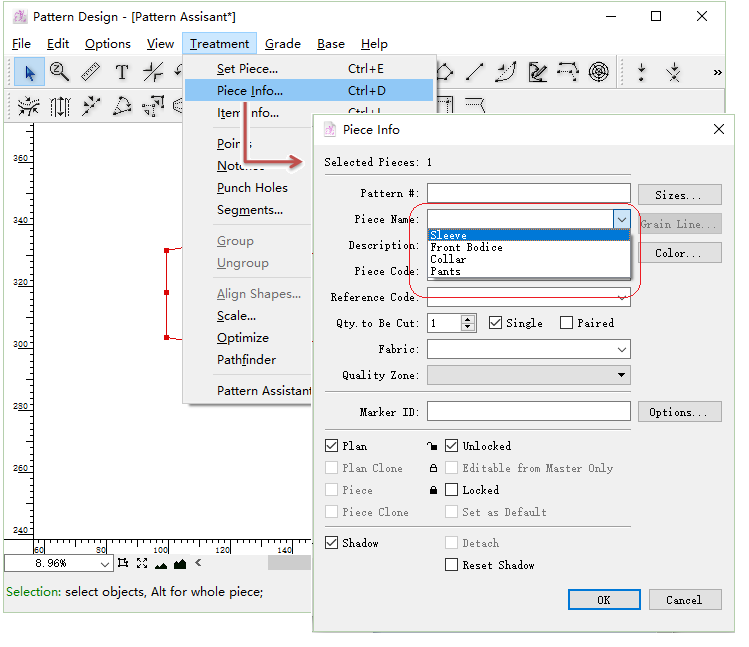
Use the nmae directly when you set piece infomation:
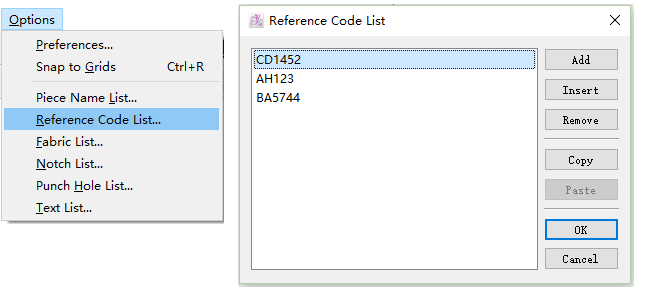
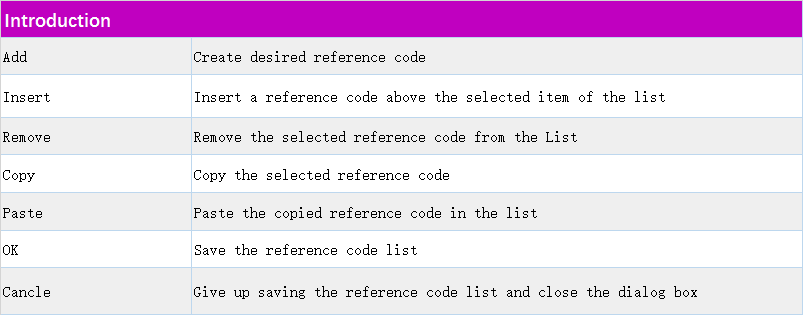
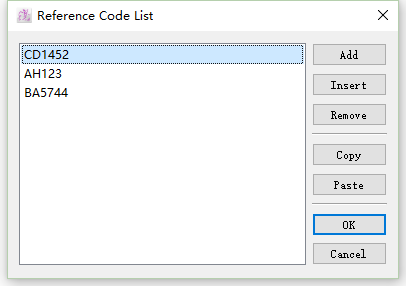
[Reference Code List]
Allow user to create frequently-used reference codes to [Reference Code List] facilitate user in pattern-making.
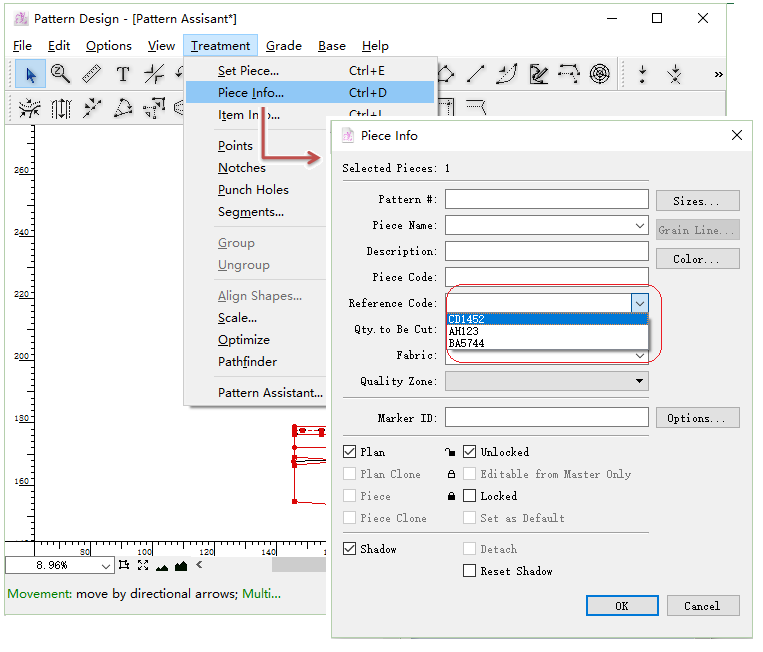
User can use the pre-set reference code directly when set piece info:
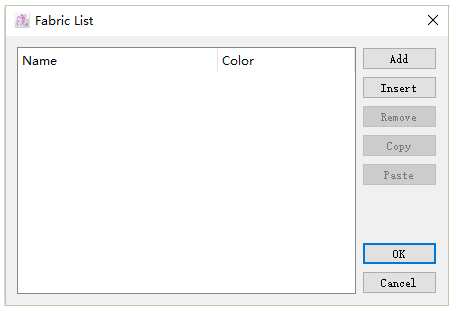
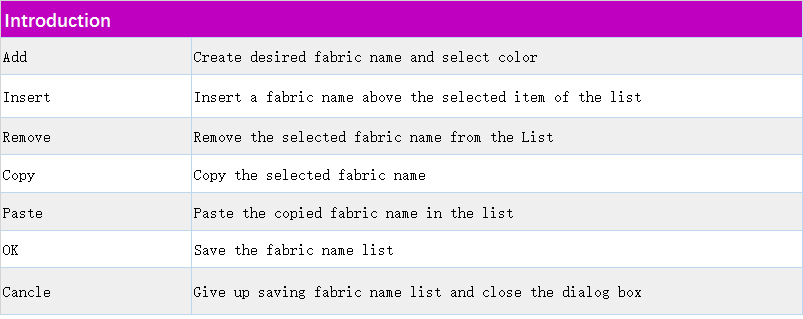
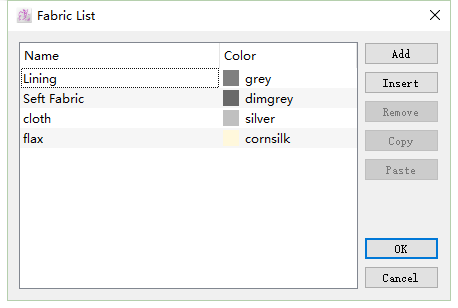
[Fabric List]
Allow user to create frequently-used fabric name to [Fabric List] facilitate user in pattern-making.
User can use the pre-set fabric name directly when set piece info:

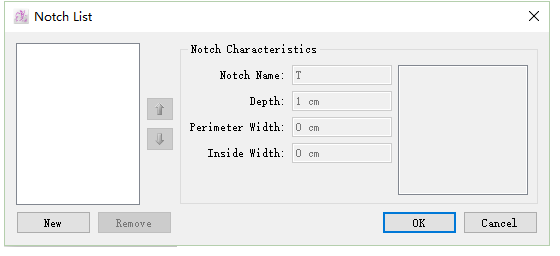
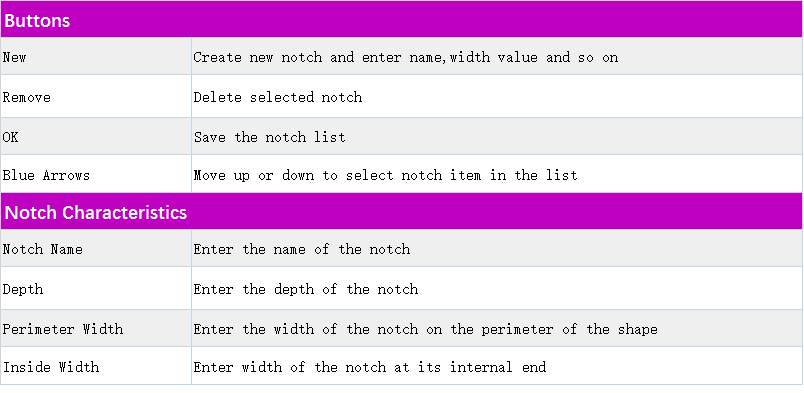
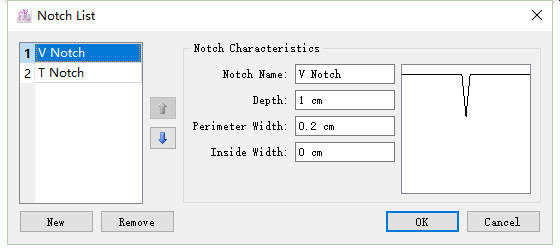
[Notch List]
PAD Pattern Design provides three kinds of notches, if the system-provided notches can’t meet the needs, user can create notches in the list, facilitate user in pattern-making.
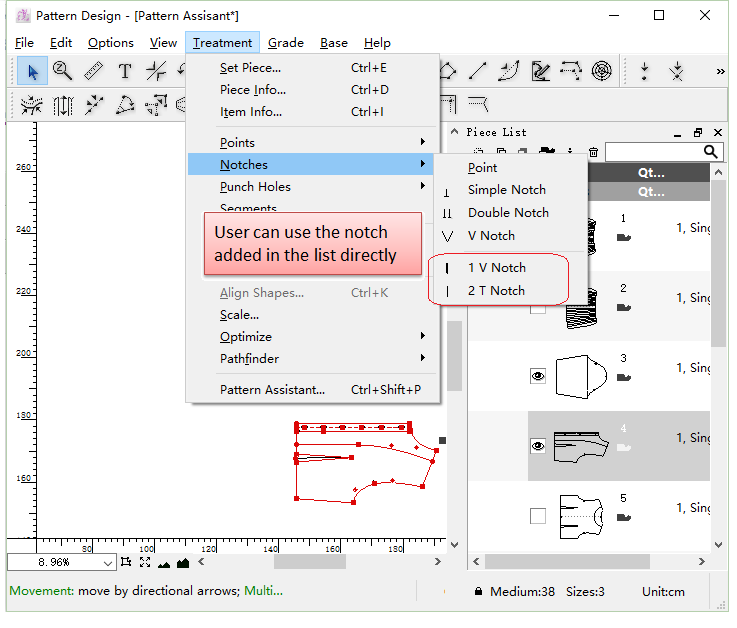
User can use the pre-set notches directly when add notch to the piece:
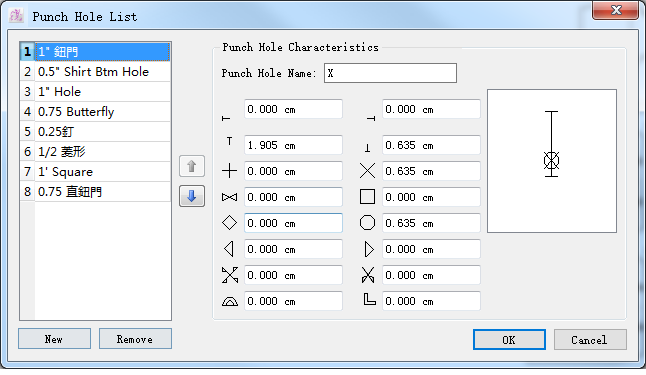
[Punch Hole List]
Allow user to create frequently-used punch holes to [Punch Hole List] facilitate user in pattern-making.
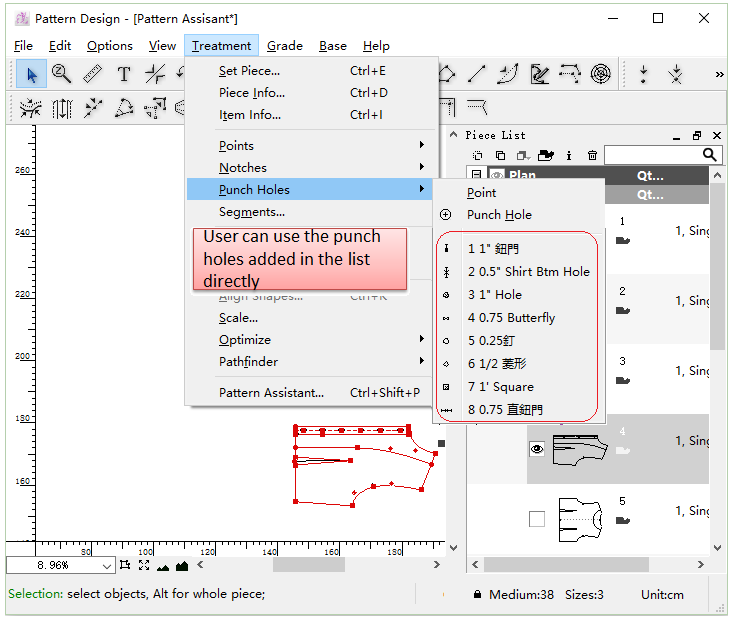
User can use the pre-set punch holes directly when add punch holes to the piece:

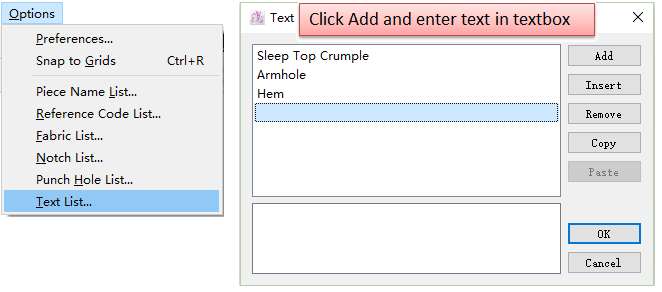
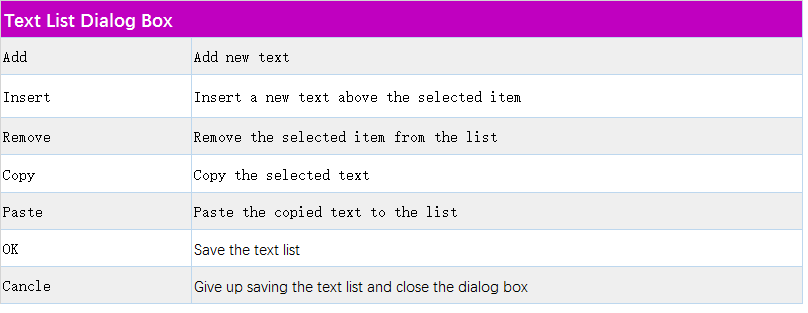
[Test List]
Allow user to create frequently-used text to [Test List] facilitate user in pattern-making.
Click [OK] button to add new text. User can use the pre-set text directly when add text on the piece by using Text tool: