Allow user to view desired items.
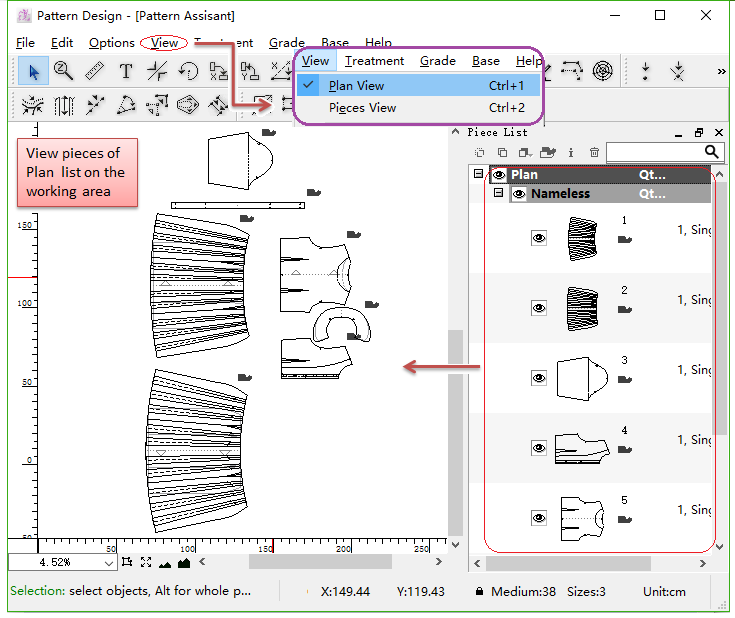
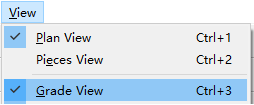
Plan View
Allow user to view all piece of Plan of Piece List on the working area.
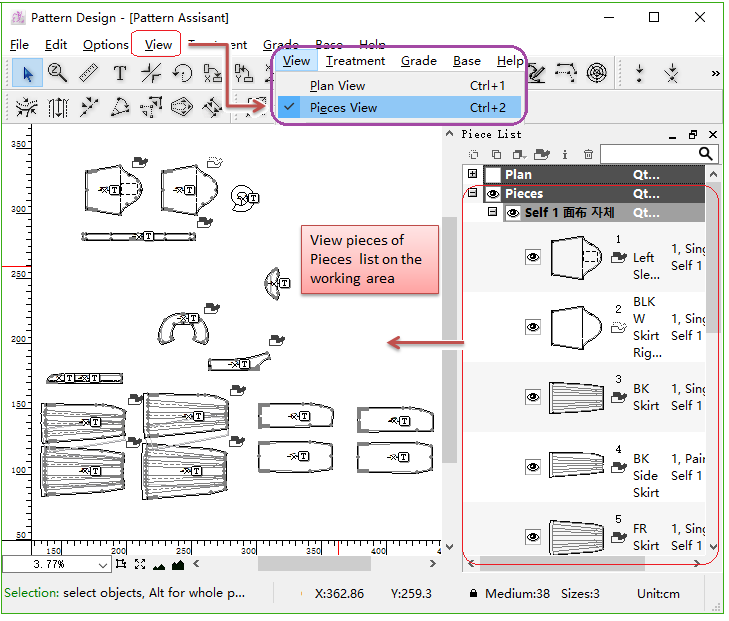
Pieces View
Allow user to view all piece of Pieces of Piece List on the working area.
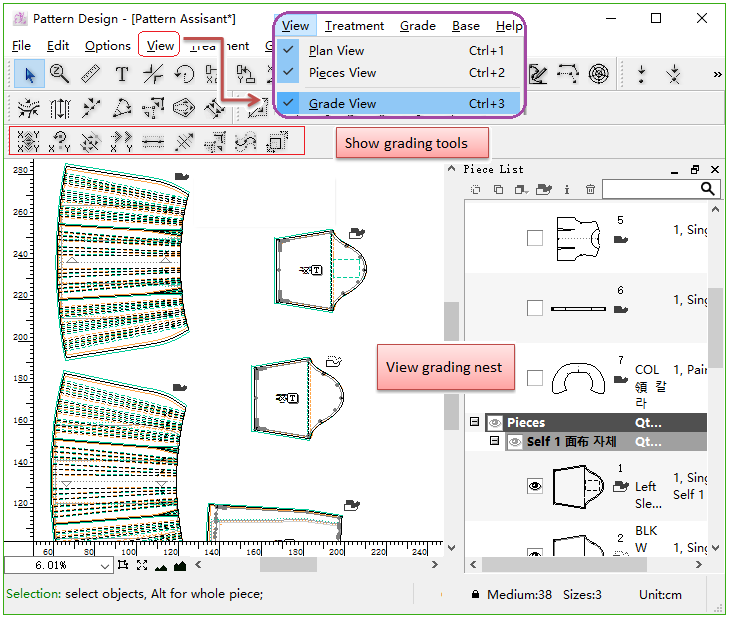
Grade View
Allow user to view the graded pieces with grading nest. Meanwhile the gradint tools are shown in toolbar.
For more information about grading, please refer to Chapter 4.
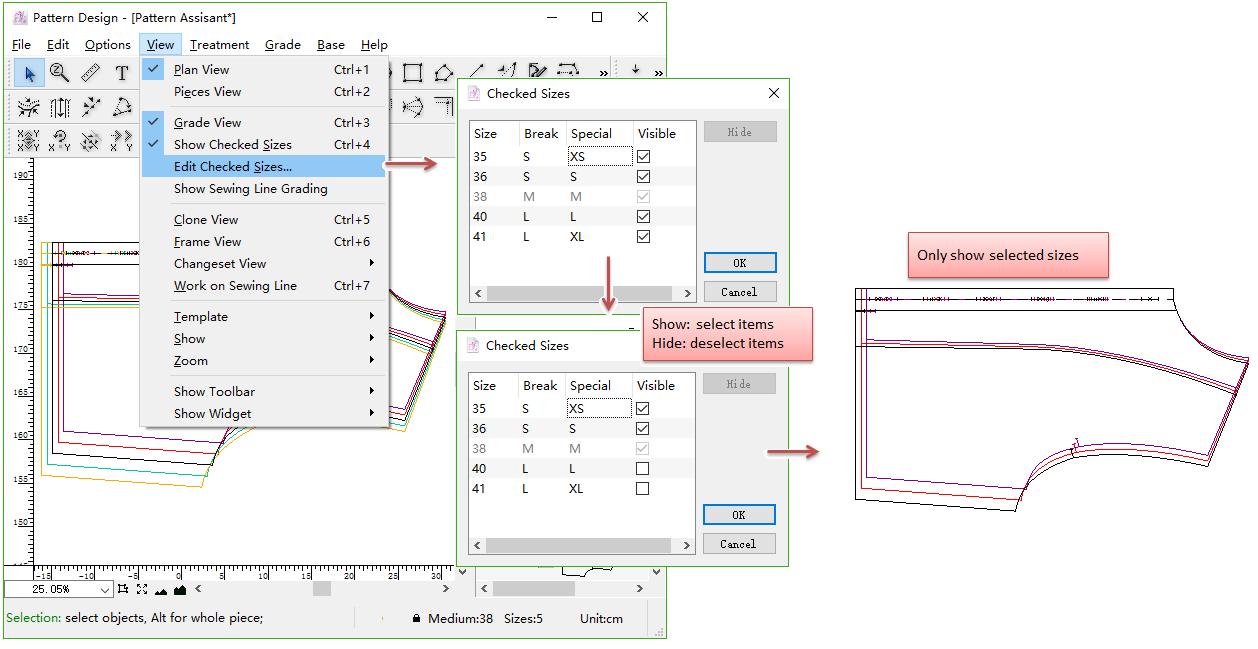
[View Checked Sizes]/[Edit Checked Sizes…]
Allow user to show or hide the desired sizes in grading view, facilitates user to check the grading nest.
Select [View Checked Sizes];
Click [Edit Checked Sizes…];
Select the sizes to be visable in the dialog box. Deselect them to be invisable.
Click [OK] button.
Note
Be sure to select [Grade View] when use this function.
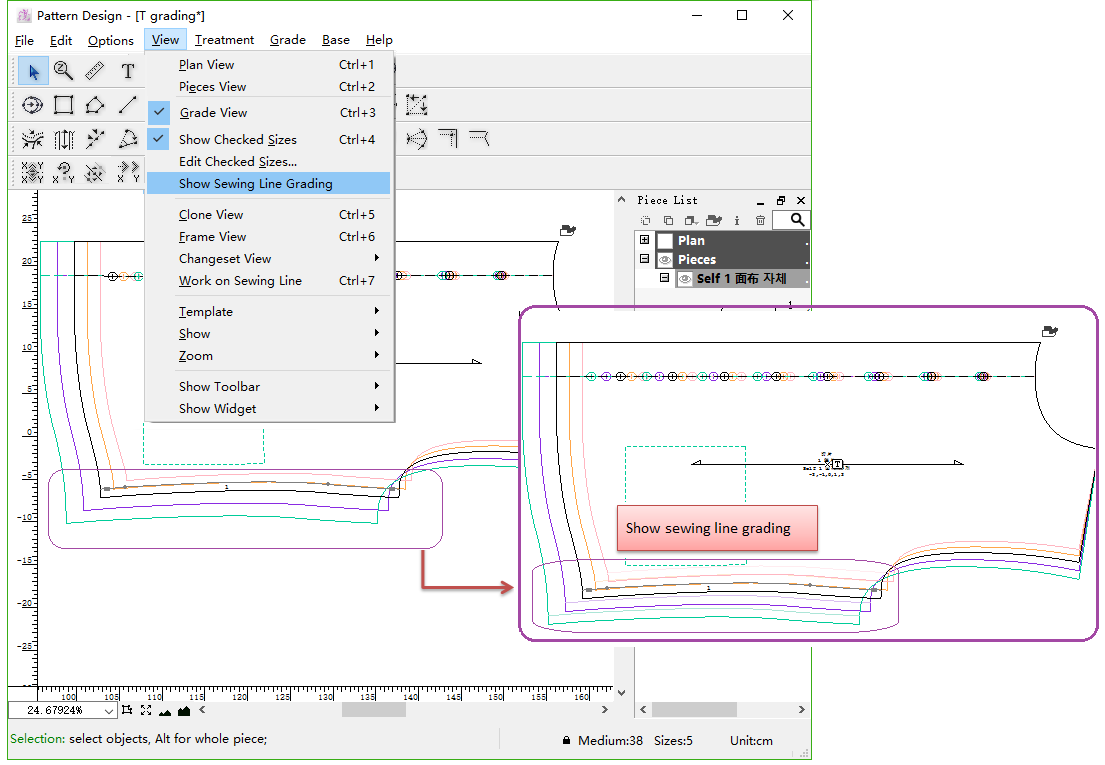
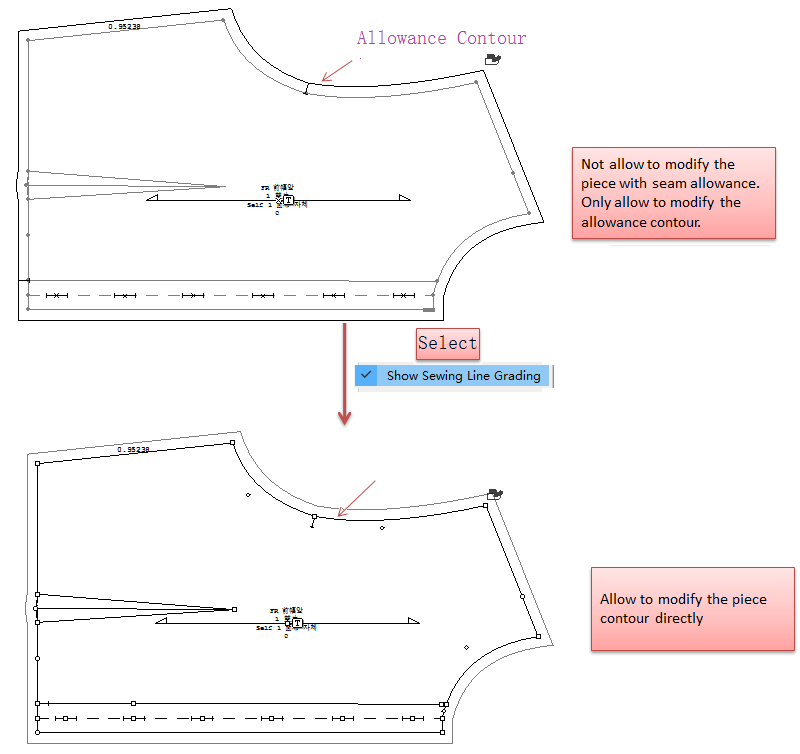
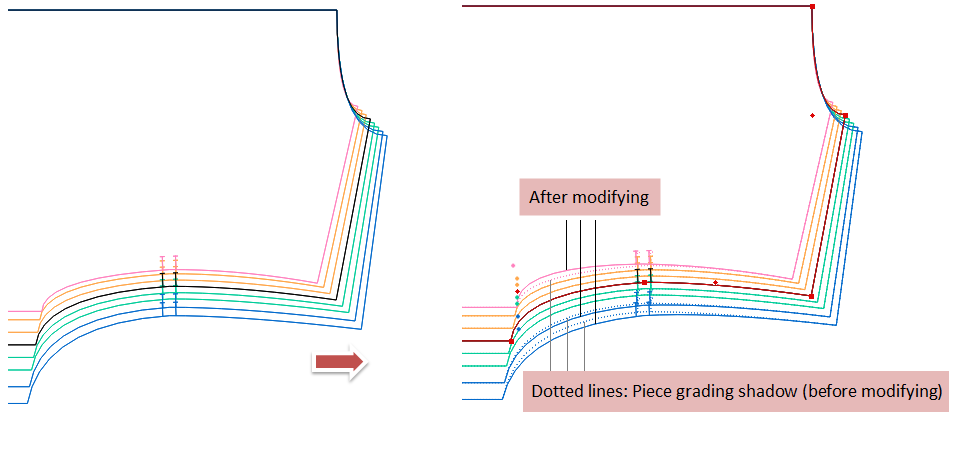
[Show Sewing Line Grading]
Select [Show Sewing Line Grading] option to show the sewing line grading, or the sewing line grading will be hidden.
To see the effect of this function, being in Grade View is mandatory.
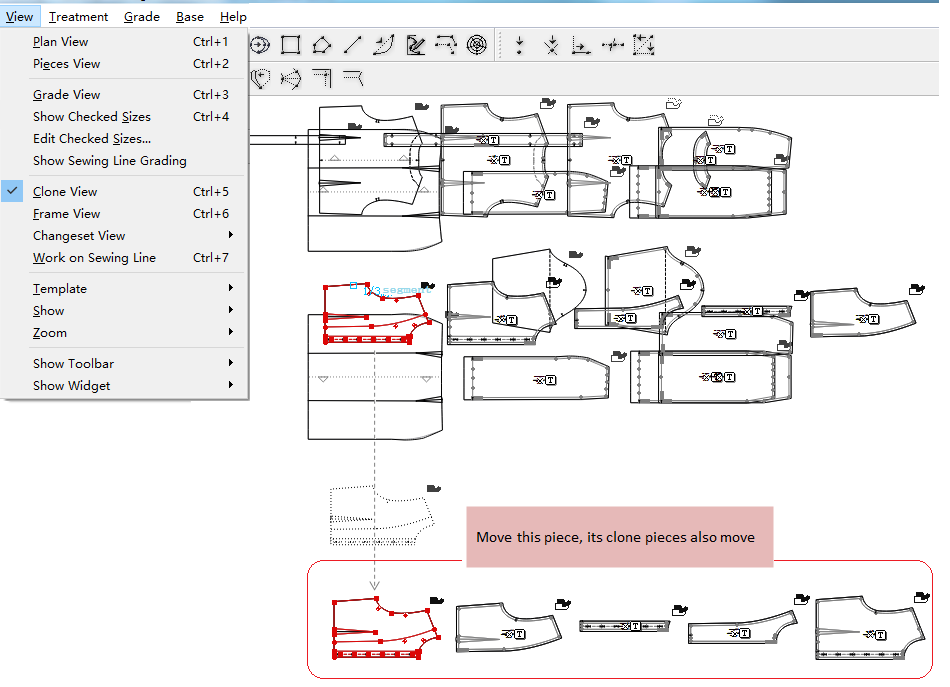
[Clone View]
Select [Clone View] to view the pieces in Clone View. In Clone View, when you move a piece, all the corresponding clone pieces also move.
(In Clone View, only the pieces in Plan can be moved. The pieces in Pieces can’t be moved. So if you can’t move a piece in Pieces, check if select [Clone View] item.)
Note
For more information about Clone, please refer to Chapter 5 Clone.
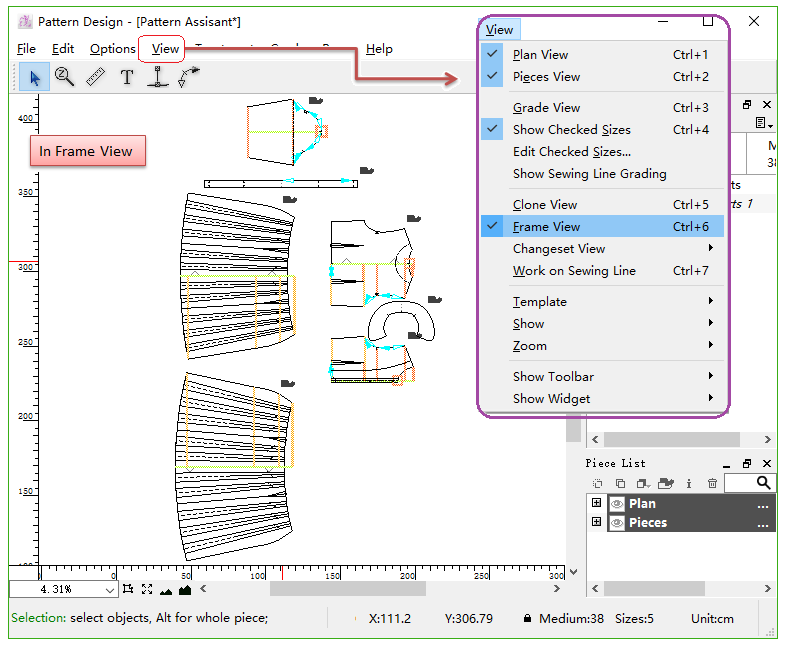
[Frame View]
In Frame View, user can view, make or modify the frames of pieces:
Note
For more information about Frames, please refer to Chapter 6.
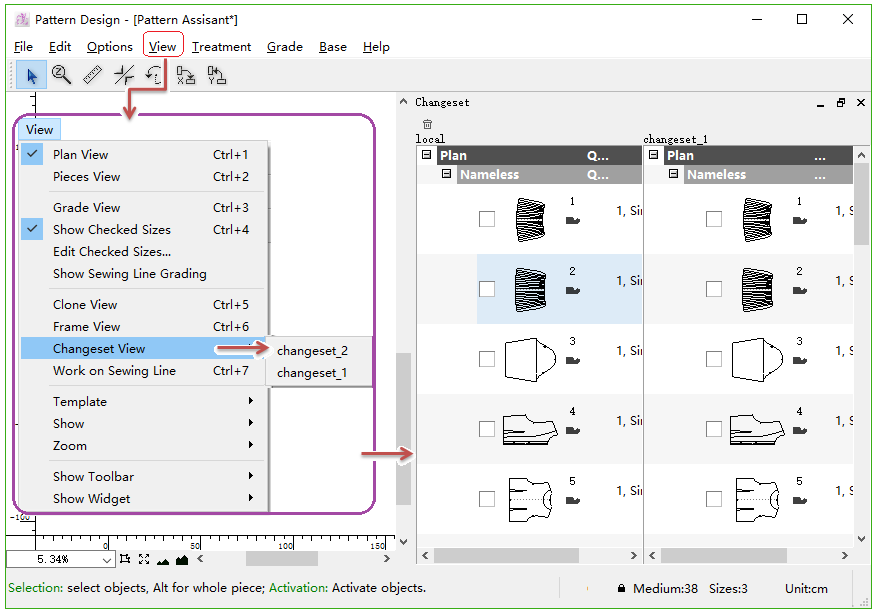
[Changeset View]
Allow user to view the changes on each piece in between two files.
Note
For more information about Changeset, please refer to [Save Changeset…] in [File].
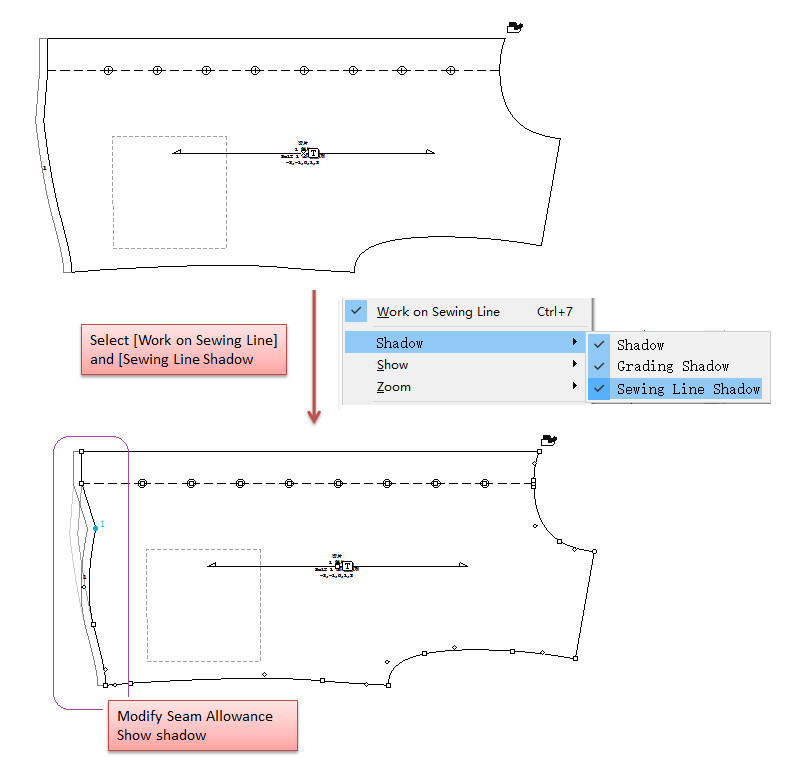
[Work on Sewing Line]
To work with the seam allowances on the pieces, user need to select [Work on Sewing Line].
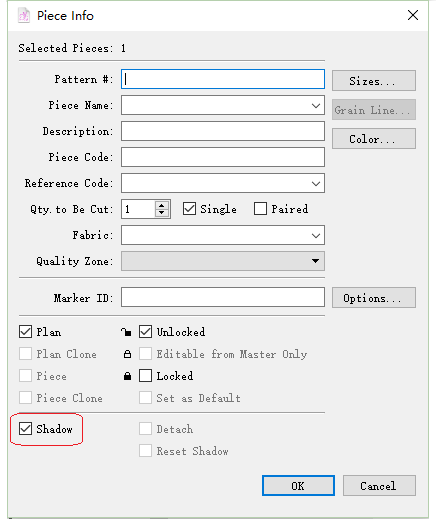
[Shadow]
User can compare modified piece with original one by shadow.
To use this function, user needs to select [Shadow] item in [Piece Info…] in [Treatment] menu.
Note
If select corresponding shadow item in [View] menu but shows no shadow, check if you select [Shadow] item in Piece Info Dialog Box.
[Shadow]
Select this item to show piece shadow:
[Grading Shadow]
This item is for modifying grading nest, especially working with
Manipulate Grading tool. This function facilitates user to compare modified grading nest with original one of each size.
Note
This function is used in [Grade View].
[Sewing Line Shadow]
Select this item to show sewing line shadow:
Note
If you want to use this function, select [Show Sewing Line Grading] before working on the graded pieces.
[Show]
Allows user to view or hide the following elements in the working area.
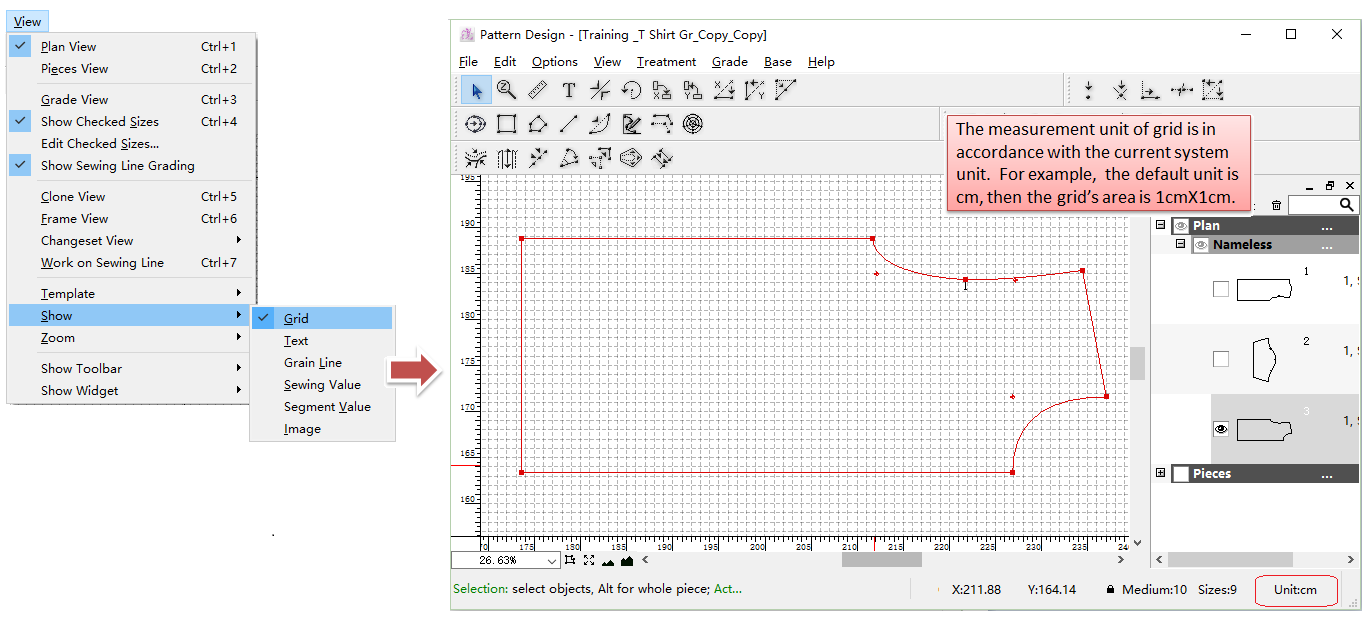
Grid
User can select to show grid as background, increase efficiency and accuracy of pattern-making.
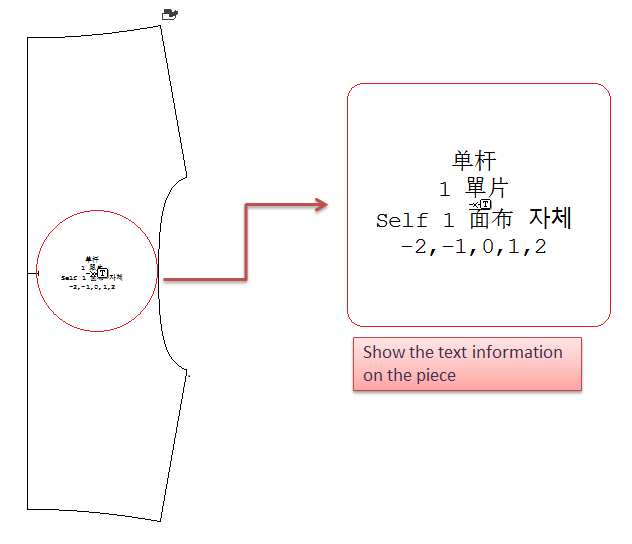
Text
Select to show the text info on the piece:
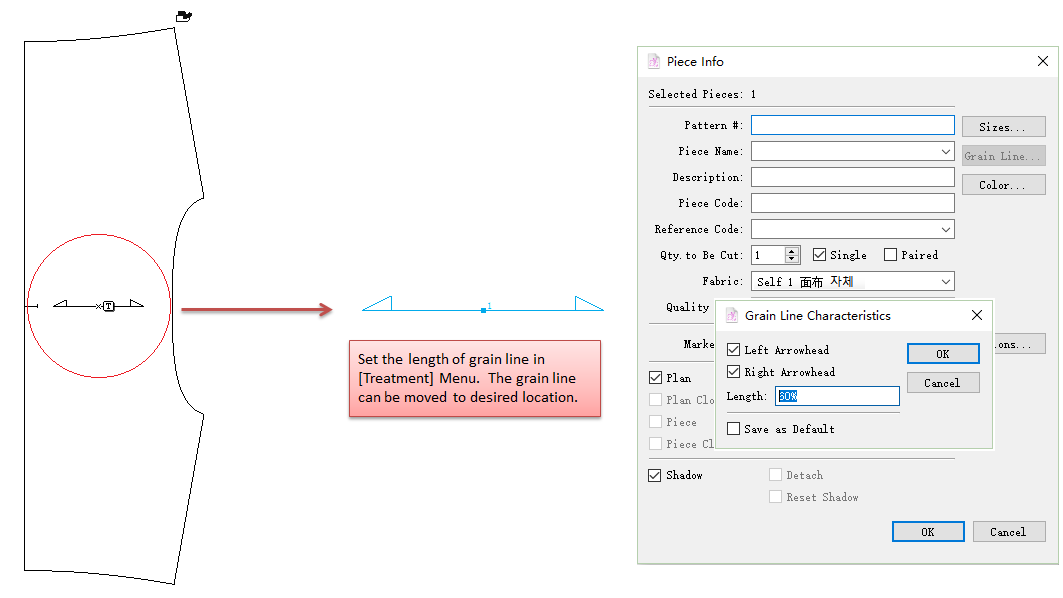
Grain Line
Select to display grain line on the piece:
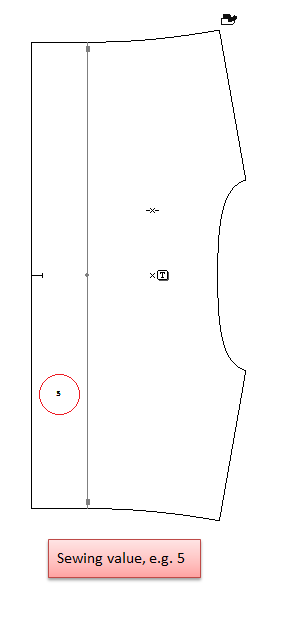
Sewing Value
Select to display sewing value on the piece:
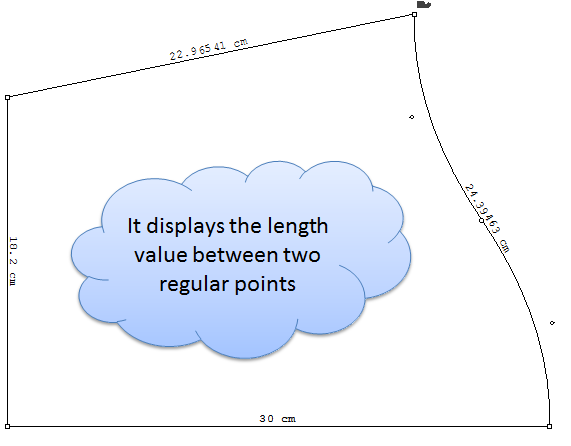
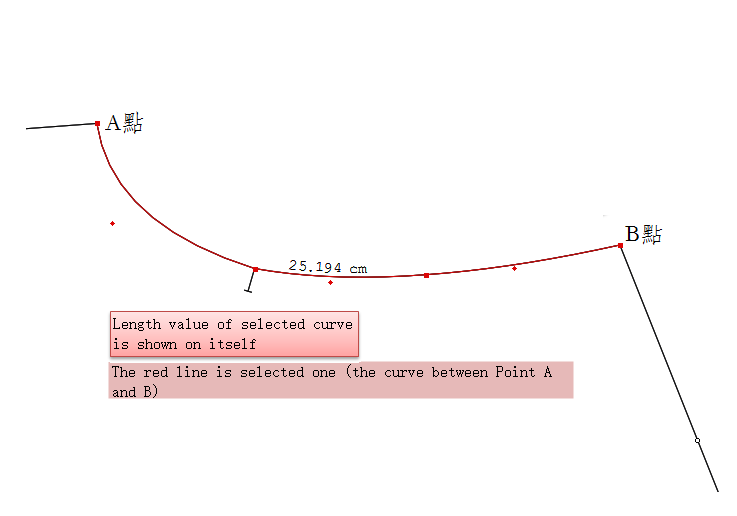
Segment Value
Display all the segment value:
Display selected segment value:
How to do:
Select the desired segment;
Select
Ruler tool (or press hotkey R);
Press R key again, the value is shown on the selected segment.
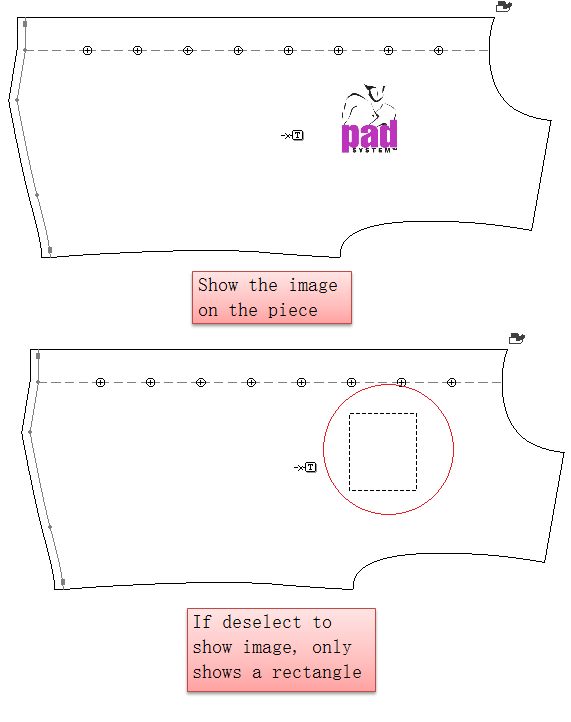
Image
Select to display image on the piece:
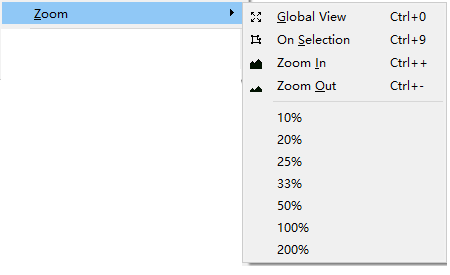
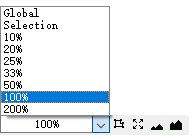
Zoom
Allow user to use this function to enlarge or reduce the view of working area.
Global: View all the pieces on the working area.
Selection: It zooms on the selection and displays it in the center of the screen. It is available if one or more pieces are selected.
Zoom In/out: Enlarge or reduce the view of working area.
These options are available in the Zoom icons as well, which is located to the bottom left side of the Pattern application.
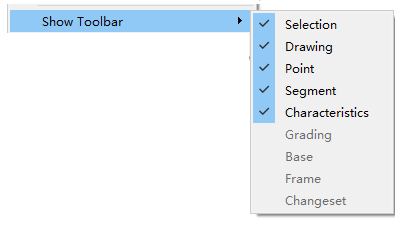
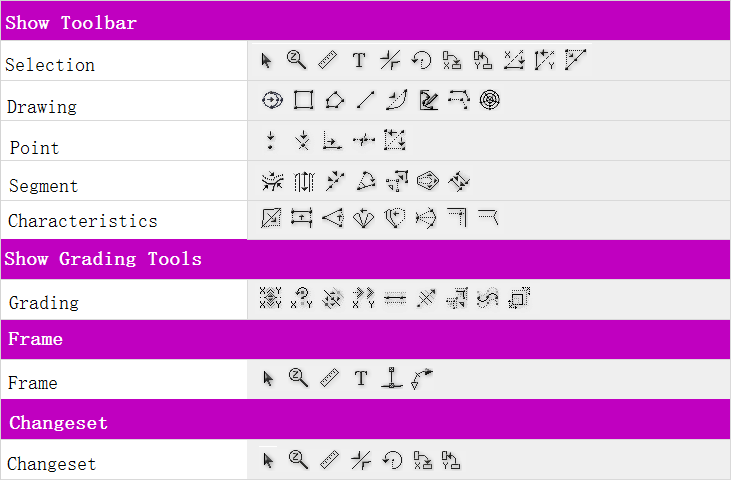
Show Toolbar
Allow user to select or hide the toolbar as required.
Note
For more information about Changeset, please refer to the section of File Menu - Changeset.
Show Widget
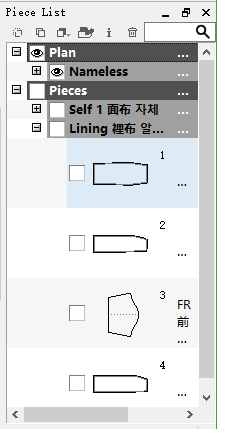
Show Piece List
Show [Piece List] window:
Note
For more information about Piece List, please refer to Chapter 1.
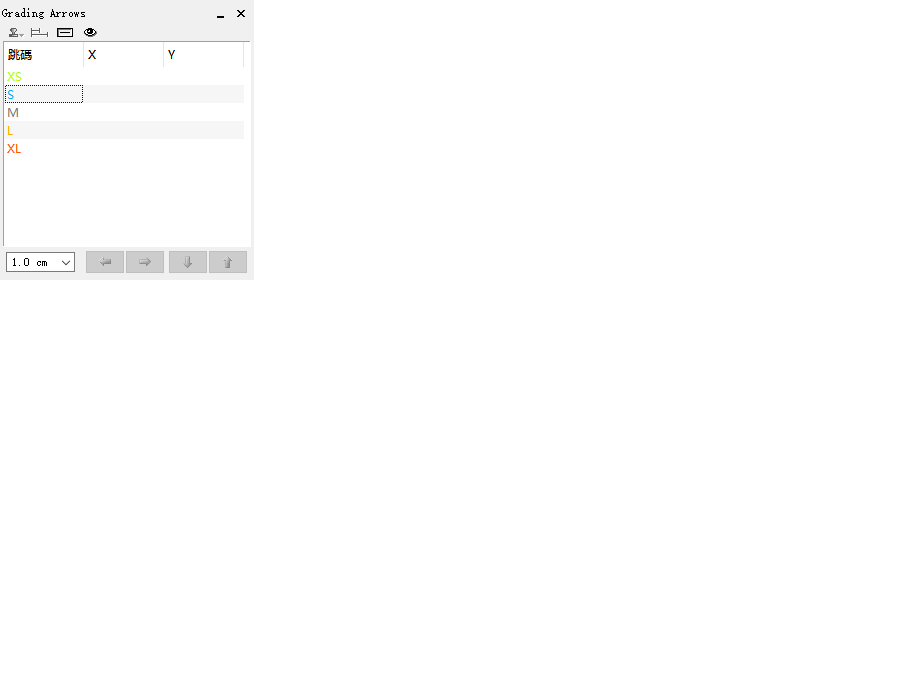
Show Grading Arrows
Show [Grading Arrows] window:
Note
For more information about Grading Arrows, please refer to Chapter 4.
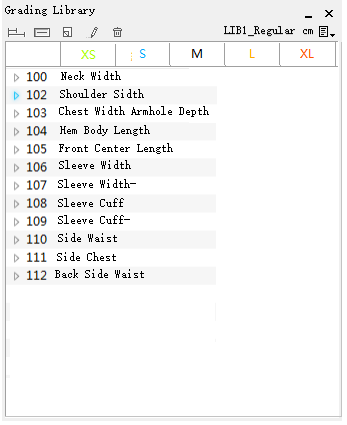
Show Grading Library
Show [Grading Library] window:
Note
For more information about Grading Library, please refer to Chapter 4.
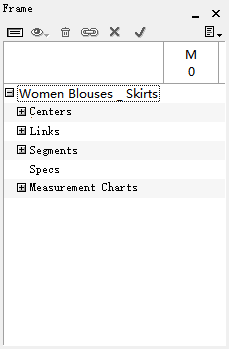
Show Frame
Show [Frame] window:
Note
For more information about Frame, please refer to Chapter 6.
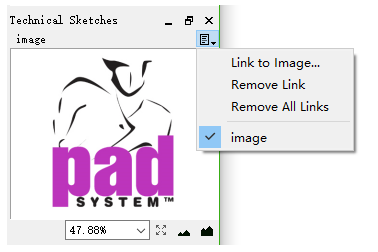
Show Tenical Sketches
Show [Tenical Sketches] window:
Note
For more information about Tenical Sketches, please refer to Chapter 1.
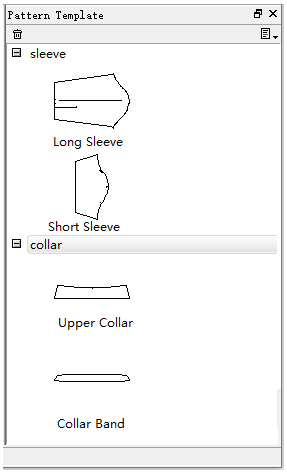
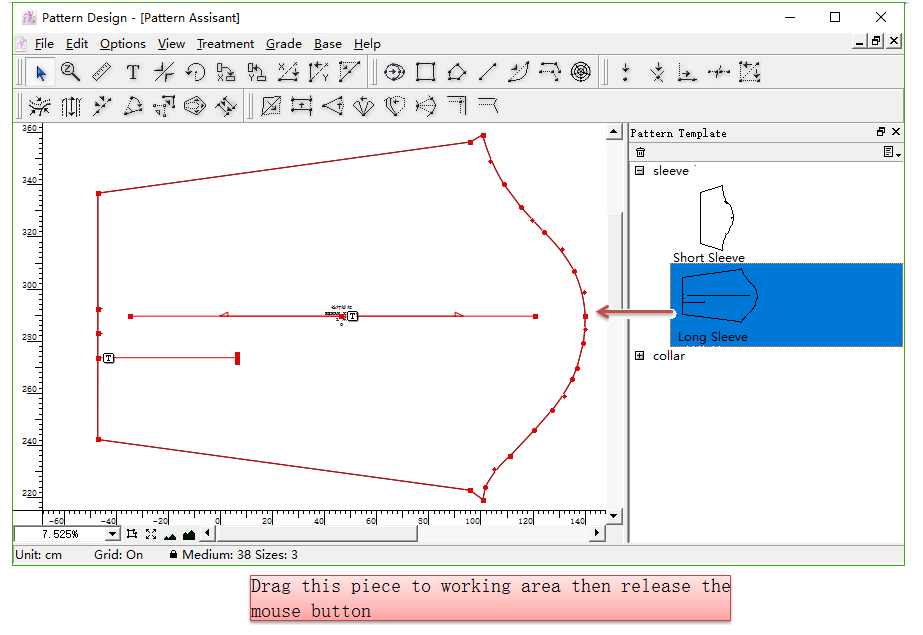
Show Pattern Template
Allow users to save the frequently-used pattern pieces to a database for applying them more quickly and easily. This database is the equivalent of Base.
Before using [Pattern Template], open the [Pattern Template] window, showing it in the sidebar. How to do:
Users can create more than one frequently-used pattern pieces in [Pattern Template].
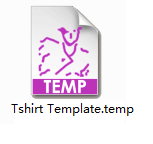
The file format saved is (.temp).
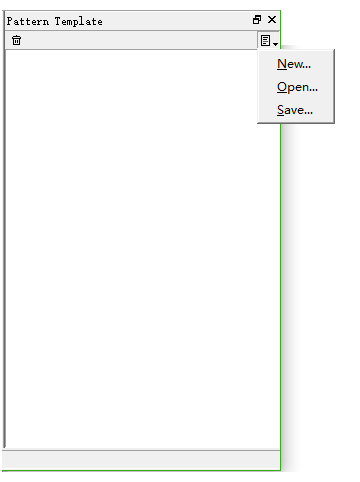
Introduction of buttons and full-down menu of Pattern Template
Delete : Remove all the selected piece shown in the window of Pattern Template;
New… : Create new item of pattern piece;
Open… : Open the pattern template file that is ready-made and saved (or sent from other users);
Save : Save a new-built/modified pattern template, for sharing the file to other users.
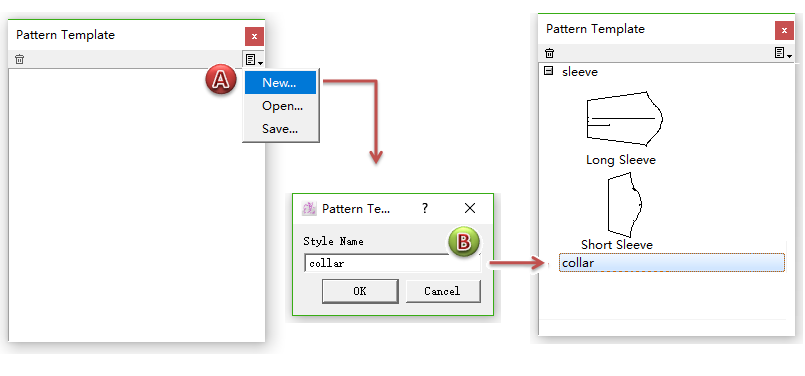
How to create pattern template
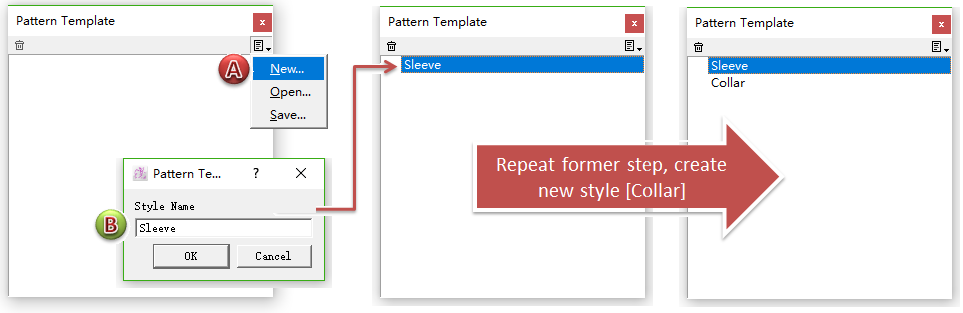
Left-click [New…] in the pull-down of Pattern Template, the dialog box appears and enter the name, for example, my desired pattern template includes two items Sleeve and Collar;
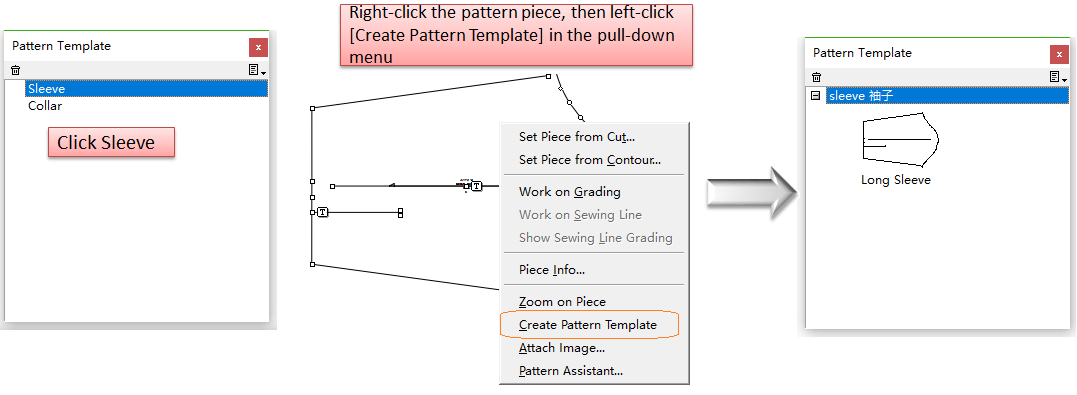
Select [Sleeve] Item in Pattern Template window, then move the cursor to the desired piece and right-click it, pull-down menu appears, click [Create Pattern Template];
Note
repeat the steps shown above to create more frequently-used template piece in different items.
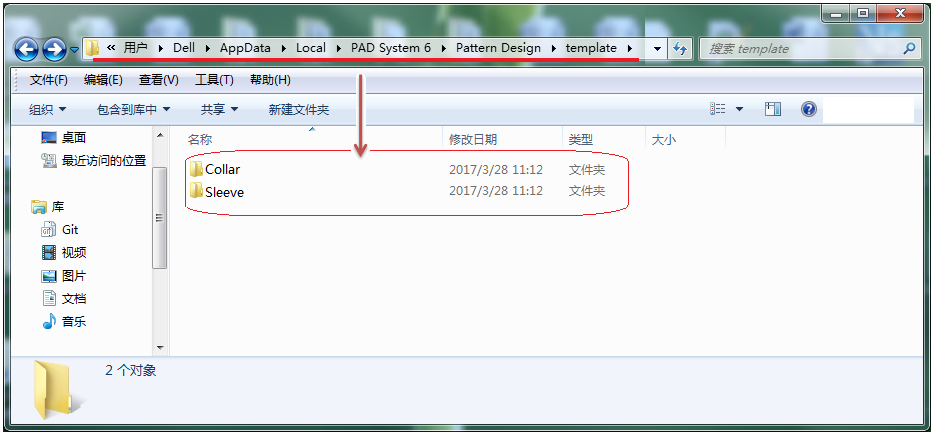
It will save the pattern template automatically to the path:
If you want to share the pattern template to other users, click [Save…] in the pull-down menu. The template file format is (.temp), send it to other users.
How to use the piece from pattern template
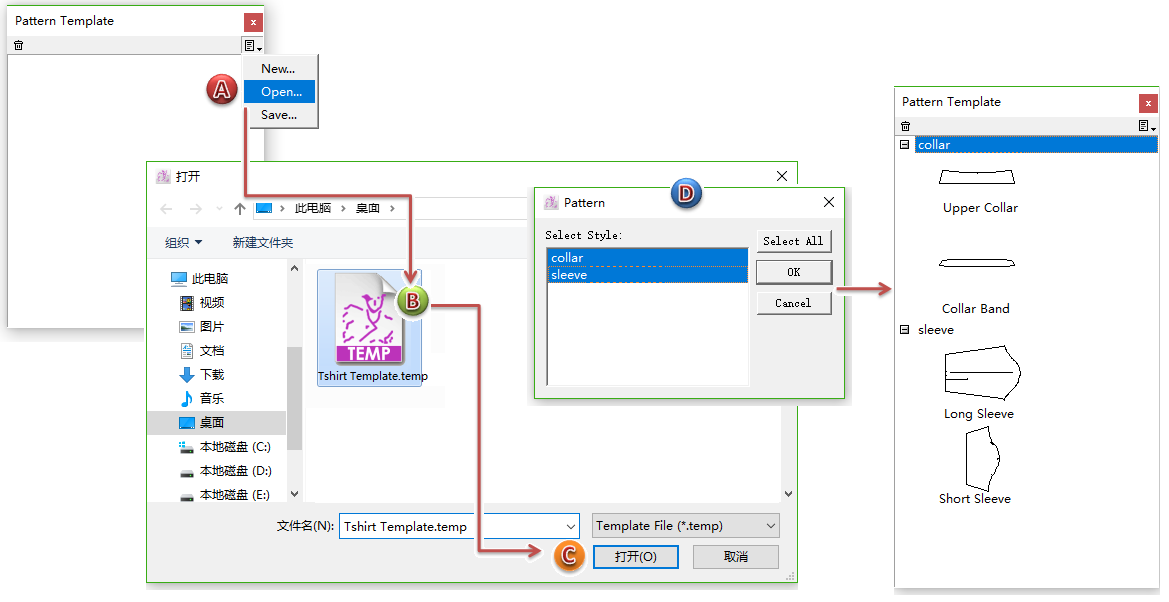
Open the Pattern Template Window in the sidebar. If the pattern templates are created locally, the software will read and show them in the window, then go to Step 3 directly.
If the pattern template file (.temp) is from other computer or user, then open it manually:
Left-click the desired piece in Pattern Template, and do not release the mouse button, drag it to the working area then release the button:
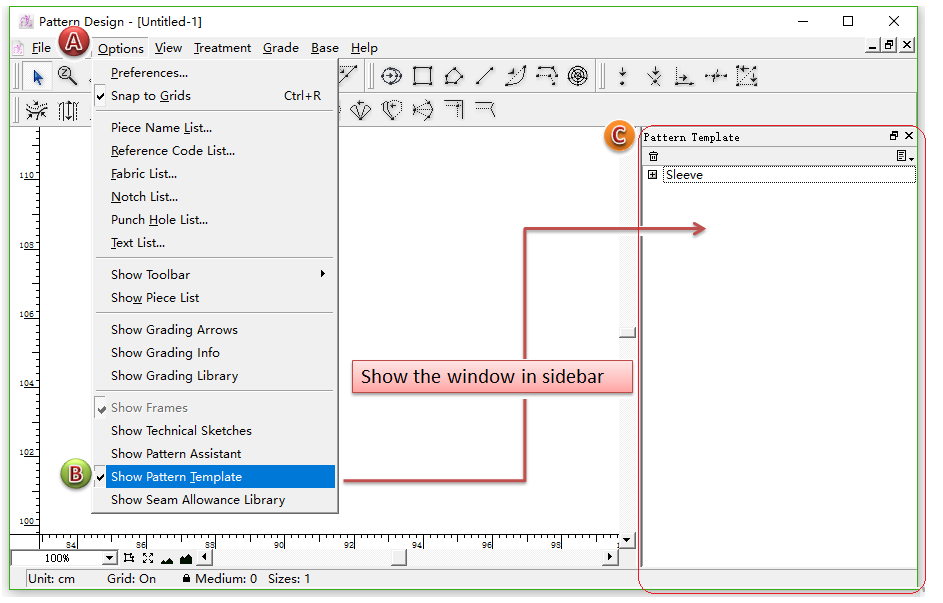


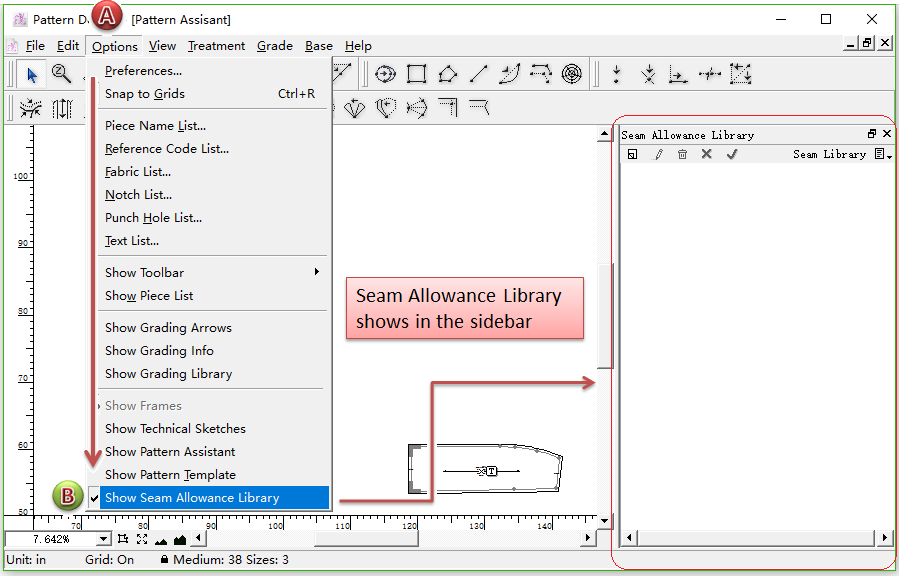
Show Seam Allowance Library
Seam Allowance Library allow users to establish the seam allowance database to save the pre-set allowance values.
Before using Seam Allowance Library, users should open its window shown in the sidebar.
How to do:
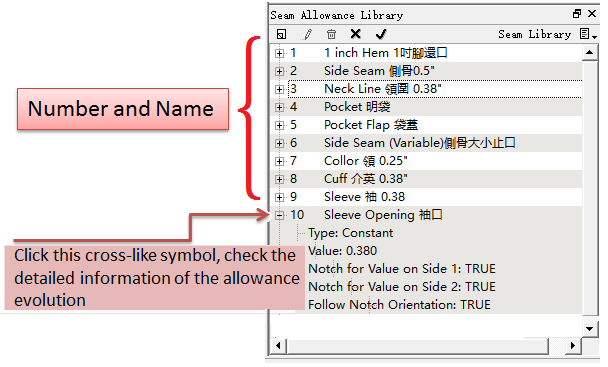
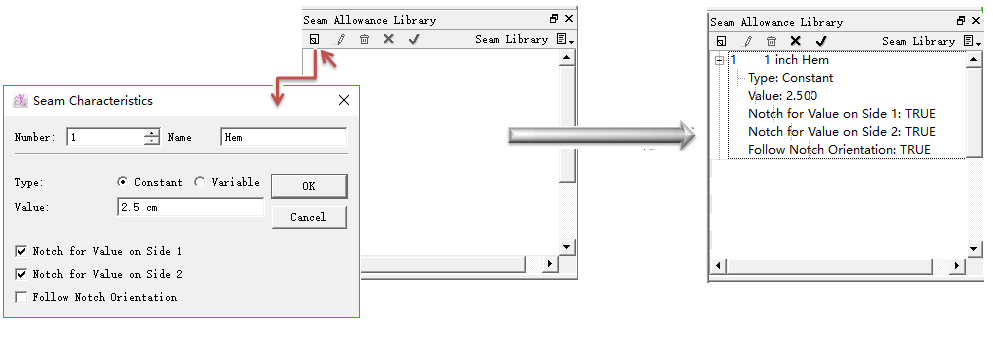
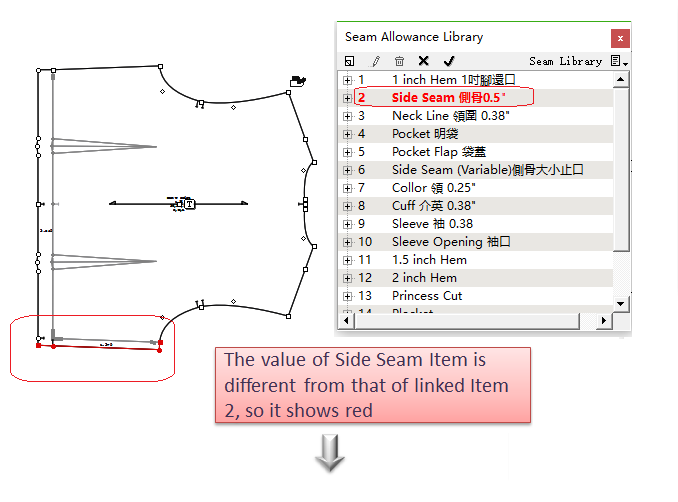
Users can creat more allowance values in the library as needed. Each library can include at most 999 allowance evolutions. Through the window of Seam Allowance Library, users can check each seam allowance’s number and name. Left-click the little cross-like symbol in front of the number and it shows the detailed information of the seam allowance evolution, like type, value and so on.
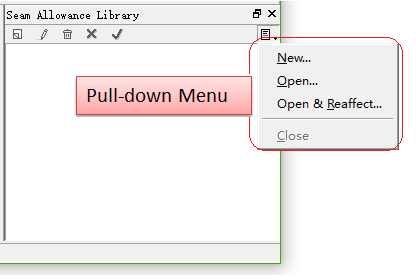
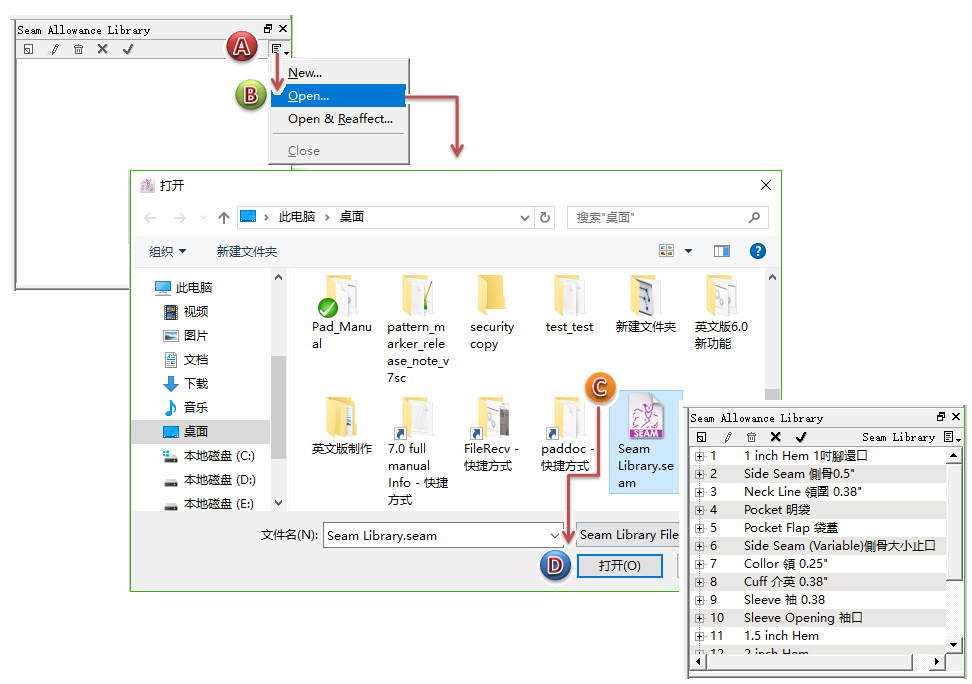
Introduction of the pull-down menu of Seam Allowance Library
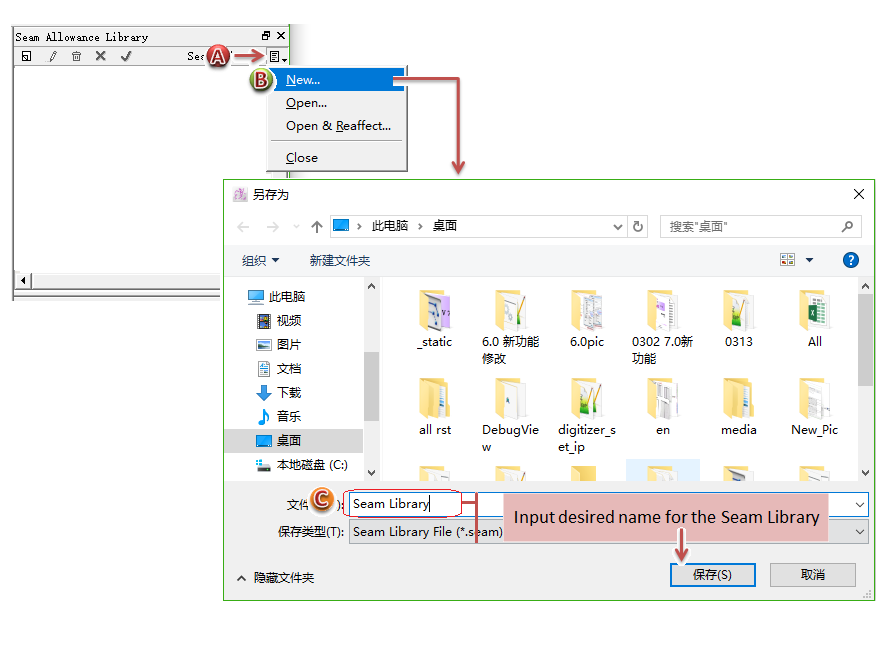
New… : Create a new seam allowance library;
Open… : Open the existing seam allowance library made and saved before;
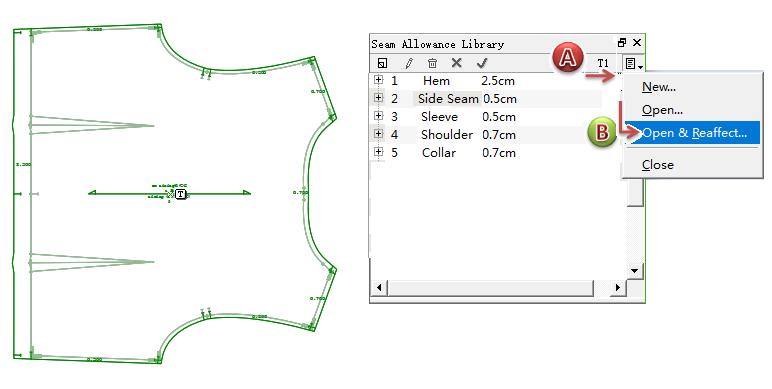
Open&Reaffect… : Open other seam allowance library, and replace allowance evolution of current pieces with the new allowance library;
Note
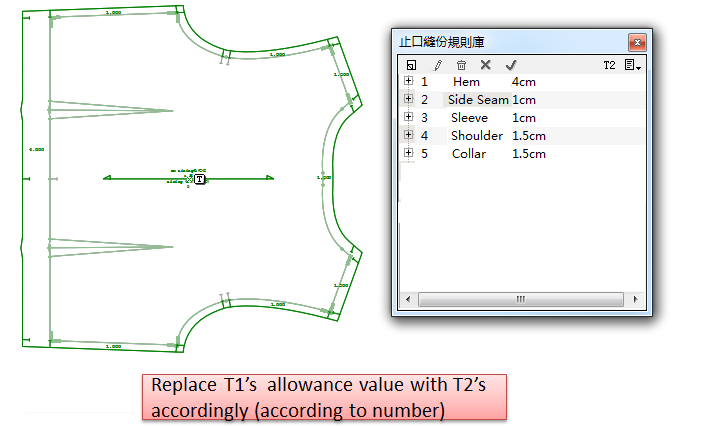
It replaces the seam allowance library according to the number. For example, the seam allowance library T1 applied in the current file has seam allowance with number 1,3,4,8. Now click [Open & Reaffect…] to open seam allowance library T2, then T2’s seam allowance with number 1, 3, 4, 8 will be replaced by T1’s and applied in the current file directly.
Close: Close the current seam allowance library.
Introduction of the buttons of Seam Allowance Library
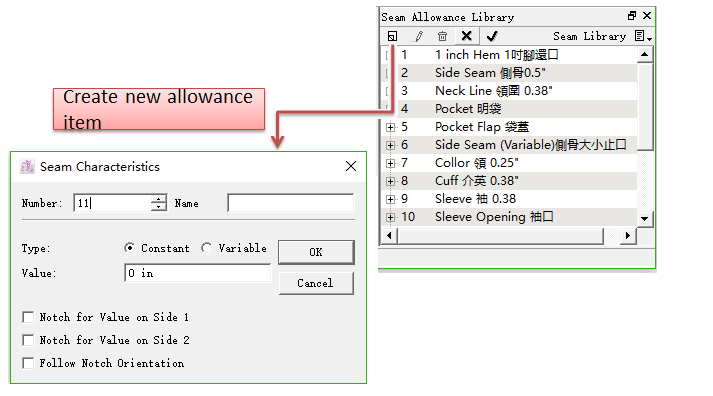
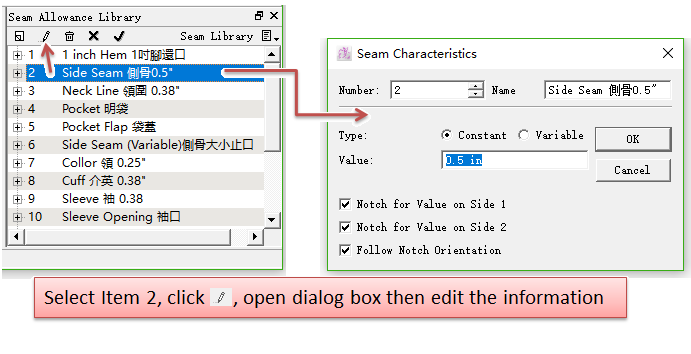
New : Add new seam allowance item in the library;
Edit : Edit an allowance item;
Choose desired item, click this button, (or double-click the desired item),open the [Seam Characteristics] Dialog box, edit desired item.
Delete : Remove the selected item;
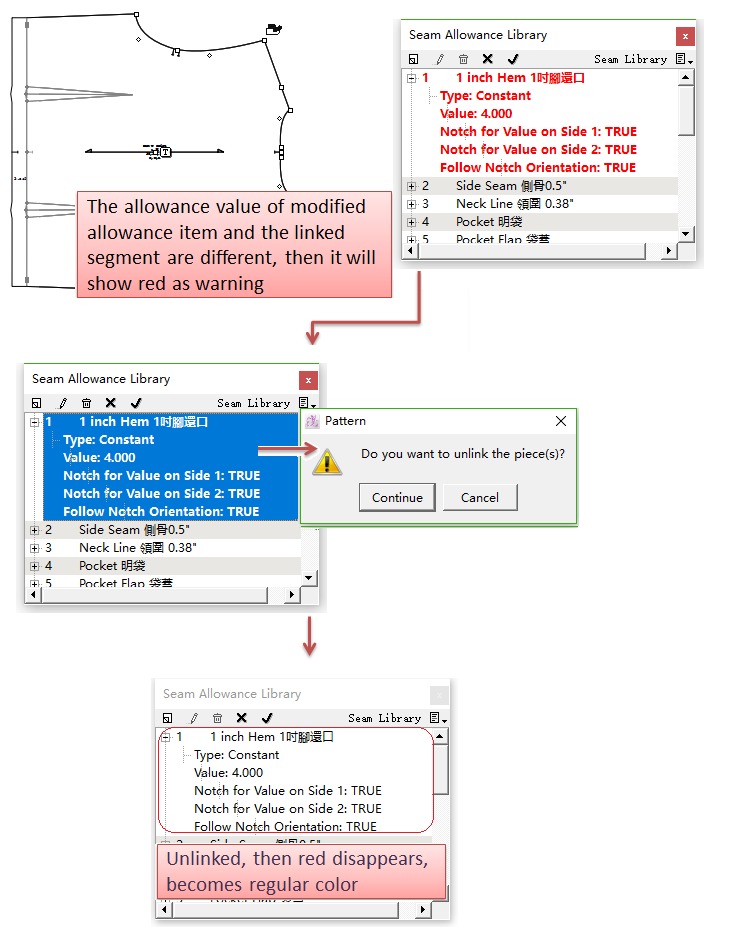
Cancle: Cancle the connection between red allowance item and the segment.
Note
What is Red Allowance Item: some allowance of a segment in a certain piece is added by applying the Seam Allowance Library. If the seam allowance item or the allowance of the segment has been modified, this seam allowance item and the segment’s allowance will be different, then it will be shown in red as a warning in the window.
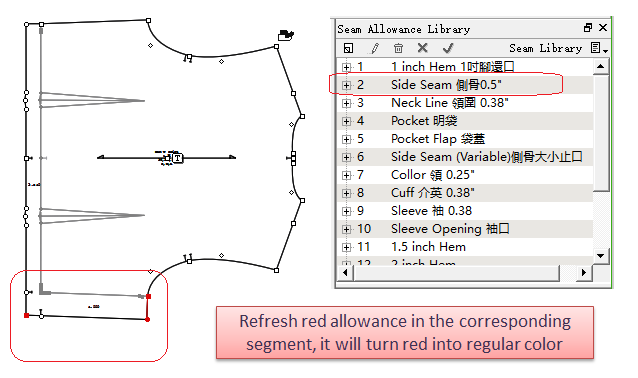
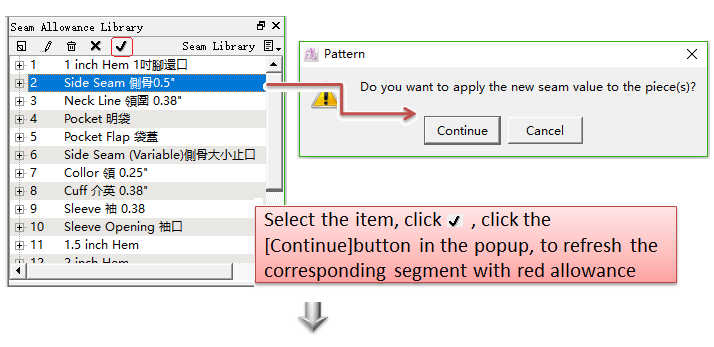
Apply : refresh allowance of segment
In Seam Allowance Library, if the allowance item is in red, then select it, and left-click
How to Create Seam Allowance Library
Open the pull-down menu in the Seam Allowance Library window and click New…;
Dialog box appears, enter name, click Save;
Left-click
Note
It will save the seam allowance item automatically, no need to save manually.
How to open Seam Allowance Library File (.seam) and apply it
Open the file (.seam)
Click Open… in the pull-down menu of Seam Allowance Library;
Choose the specific path in the [Open] Dialog Box, select the desired seam allowance library and click [Open].
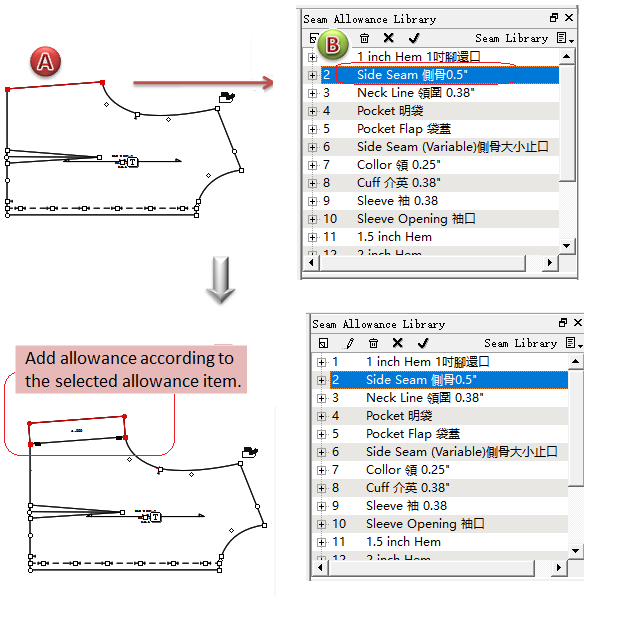
Apply Seam Allowance Library
Choose the segment needs to add allowance;
Left-click seam allownce item, now the allowance has been added into the segment already.
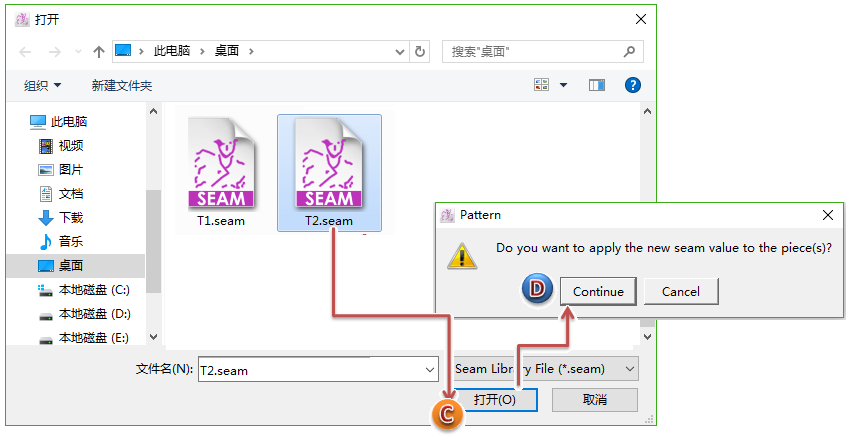
Open new library to replace current one, and apply it in the current file
For example, here are two seam allowance libraries T1 and T2. A pattern file apply T1 to add allowance. Now a user wants to use T2 to apply in the current pattern file.
How to do:
Click Open&Reaffect… in the pull-down menu of Seam Allowance Library;
Select T2.seam allowance file from correct path, and click [Open];
Dialog box appears to ask, then click [Continue].