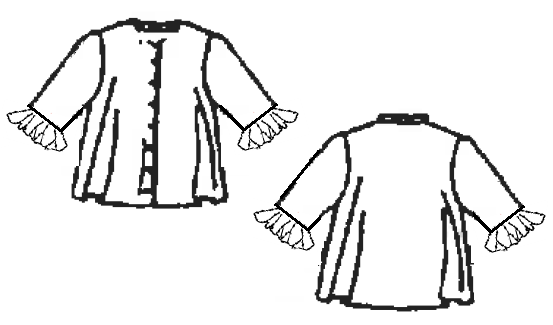
6700 T Shirt Lotus leaf sleeve
The below steps are detailed for the V7.0 version. If you are using V6.0, the steps will be slightly different.
Use the BLK M.T.shirt pattern as the basic block to draw this shirt, pls finish drawing the BLK M.T.shirt pattern first.
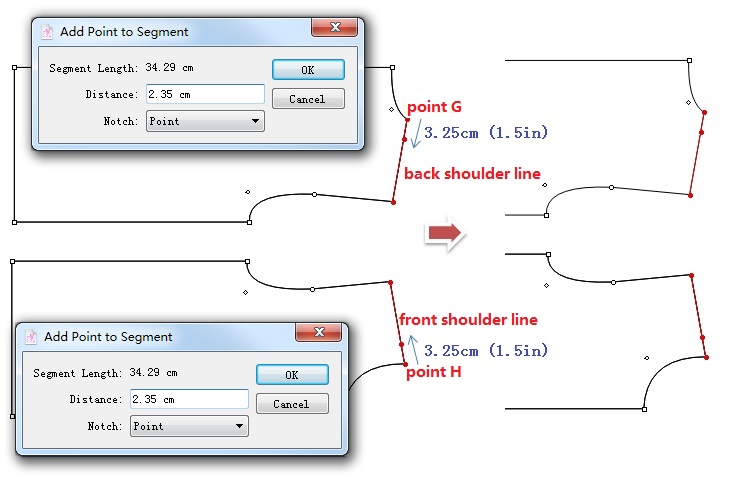
Edit the neck width of the back piece.
use
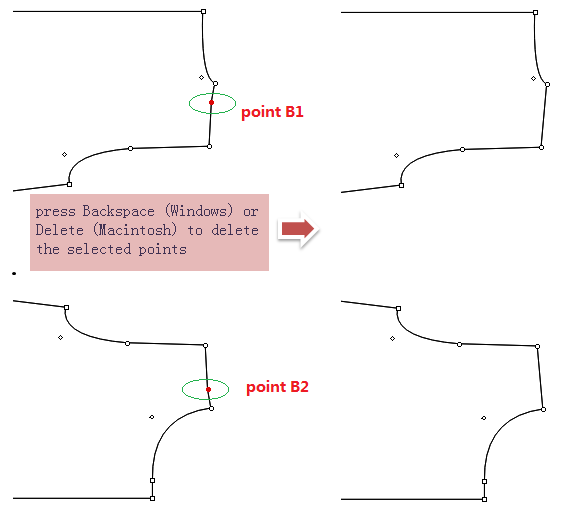
Pointer tool to select the back shoulder line, click
Add Point to Segment tool, left click the point G, enter value in the dialog box and click “OK”, then you can get a new point.
Repeat the same steps in the front piece.
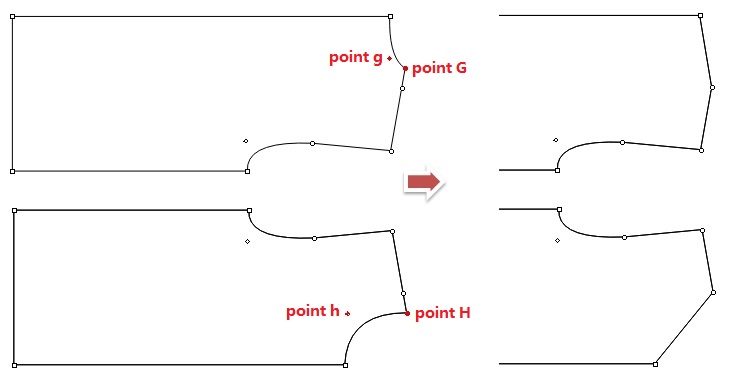
Hold down Shift key and click
Use
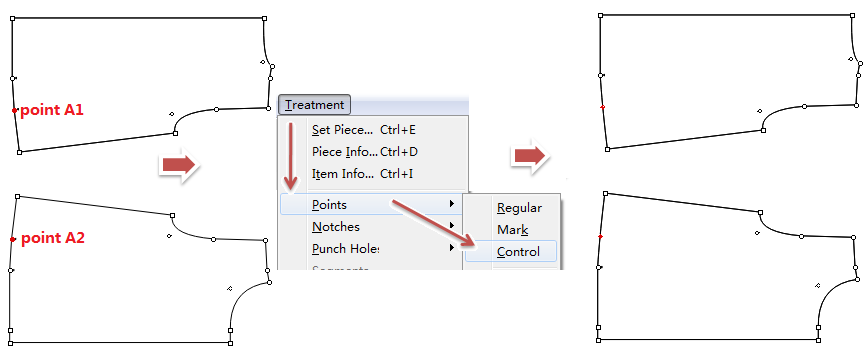
Curve tool to adjust the neck line: active the piecem (use pointer tool to left click one segment of the piece), select
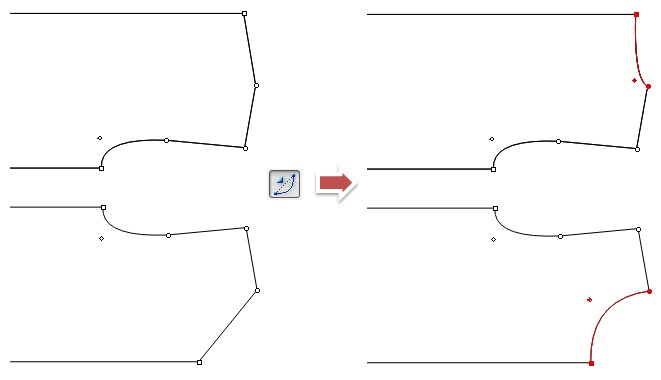
Note
If the curve is not smooth enough, you can add more points on the curve by using
Add Point Tool to adjust the curve.
Draw button stand
Use
Parallel Line tool, left click the selected line, move the cursor, enter the values and select “permanent”, finally click the blank area or press “Enter” key to finish the operation.
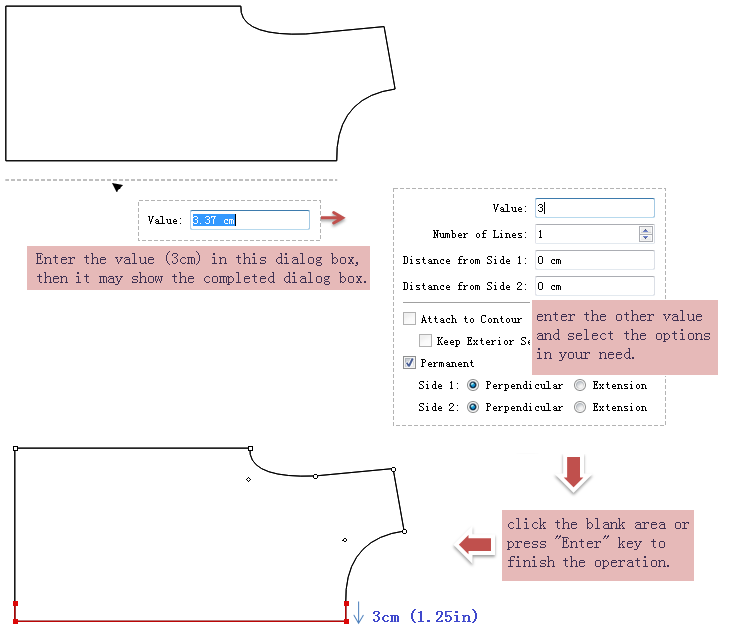
Draw the hem
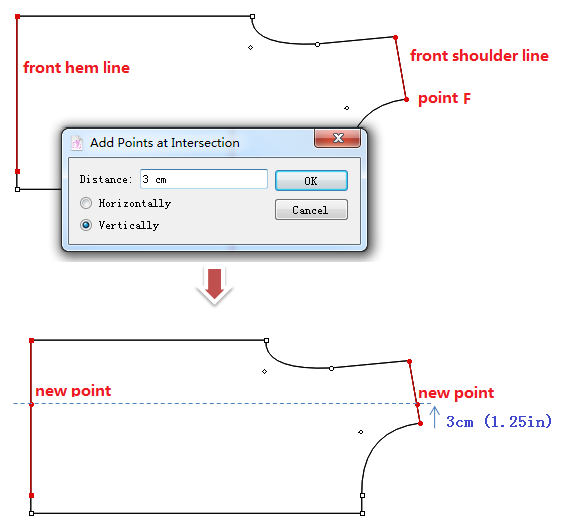
Use Pointer tool to select the front shoulder line and front hem line, click
Intersection Point tool, hold down Alt (Windows) or Option (Macintosh) or Alt+Windows (Linux) key, the cursor turns in to a cross, click point F, enter the vuales and select “Vertically” then click the “OK” button, you can get two new points.
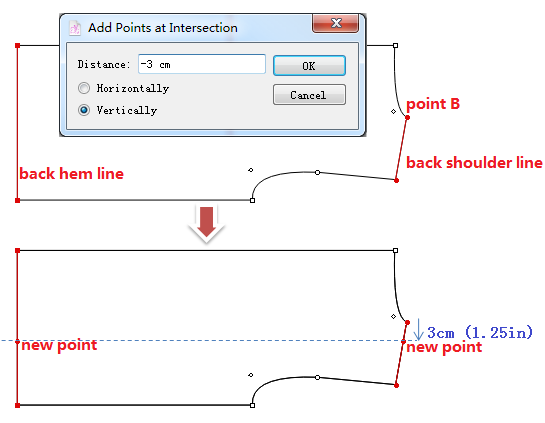
repeat the above steps on the back piece
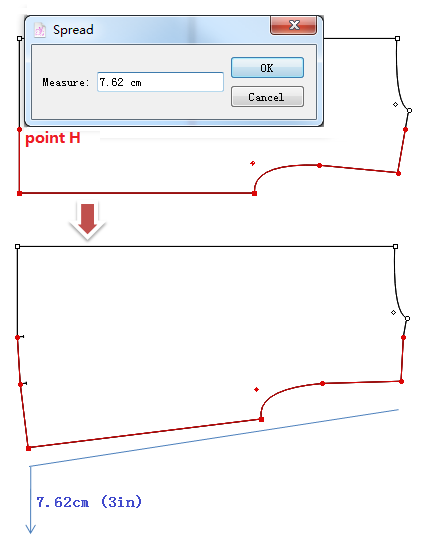
Use
Segment Angle tool, hold down Alt (Windows) or Option (Macintosh) or Alt+Windows (Linux) key and left click point H (the new point of hem), enter the value, click [OK] button to finish the operation.
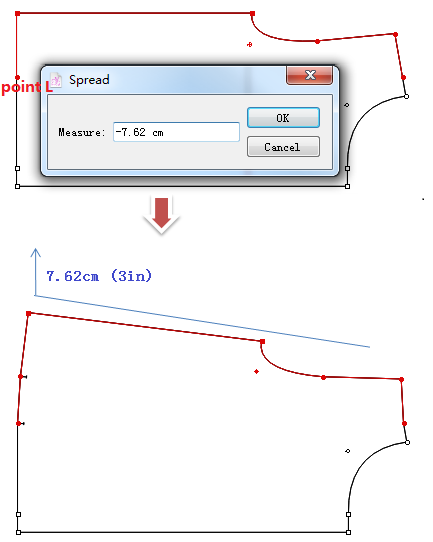
repeat step ¨2〃 on the front piece
Use
Use
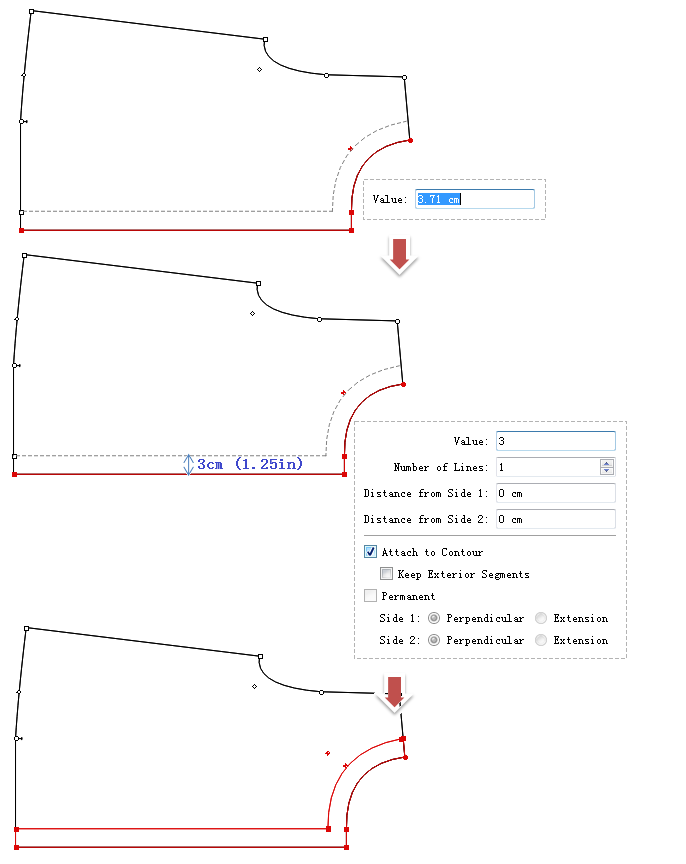
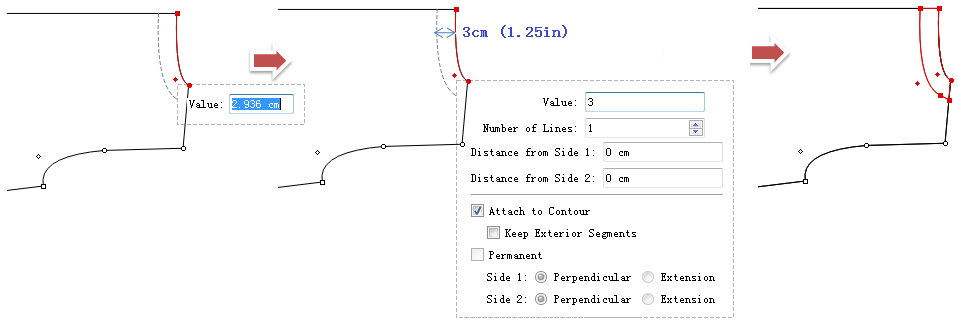
Draw collar inner facing and front inner facing
Use
Parallel Line tool, left click the selected line, move the cursor to the inner side, enter the values and “attach to the contour”, click the blank area or press “Enter” key to finish the operation
Repeat the above step on the back piece to draw the back collar inner facing:
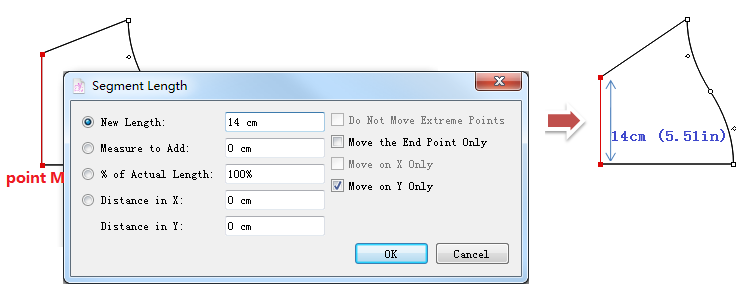
Cuff change to sleeve opening
Edit the cuff width: use
Segment Length, left click the Mid point of the cuff (point M), enter the value and select the option in need, click the [OK] button to finish the operation:
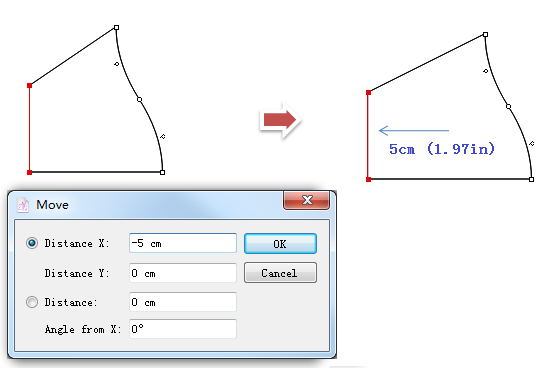
Edit the sleeve length use
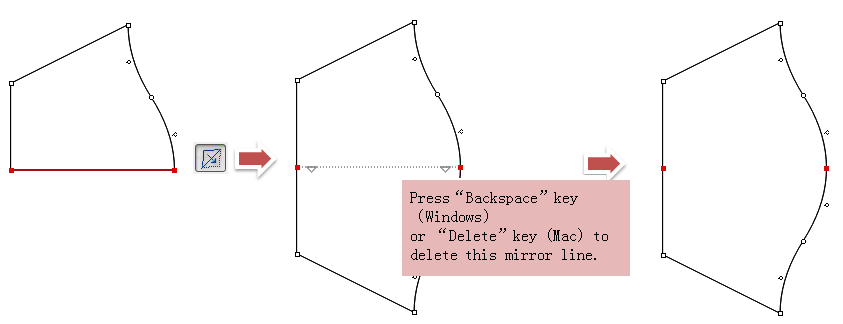
Symmetry the sleeveuse
Mirror tool, left click the selected line, then the sleeve piece be opened to the complete piece. Press the Backspace (Windows) or Delete (Macintosh) directly to delete the mirror line
Draw a flounce on the sleeve
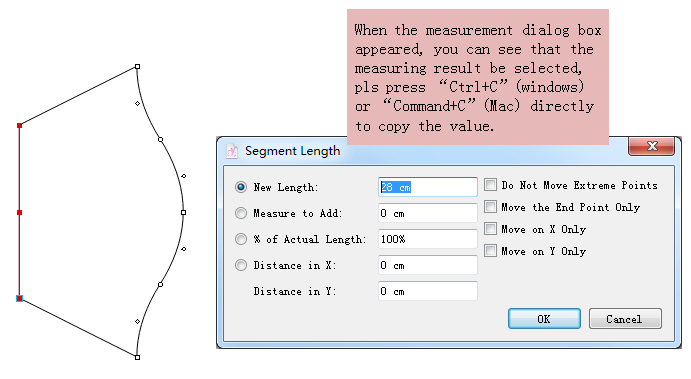
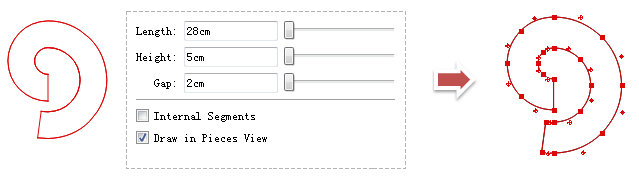
1measure the length of the cuff and copy it’s value: use
2 Use Ruffle tool to the flounce: click
Ruffle tool, Left-click on the desired location, Dialog box appears, press Ctrl+V (Windows) or Command+V (Mac) to paste the value to the ¨Length〃 colum, tab to next column the input “Height” and “Gap” value , click the blank area or press ¨Enter〃 key to finish the operation:
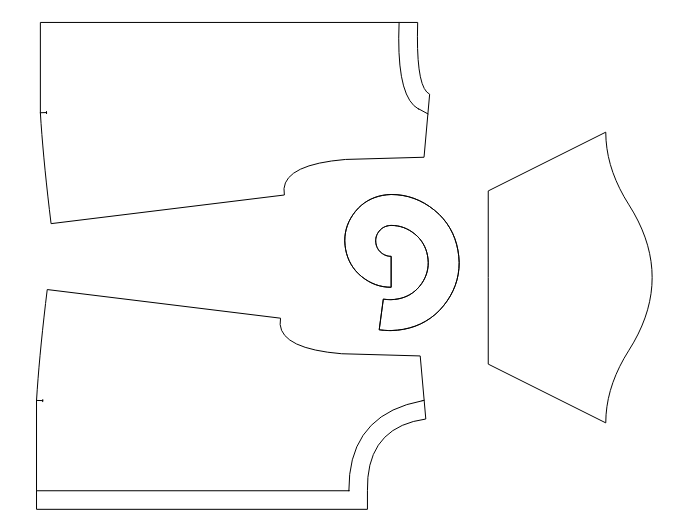
Now you’ve finished the preliminary pattern of 6700 T Shirt
The left setps are unfold the piece/ setting pieces/ add seam allowance in need.
Pls look at the manual to learn how to use the Mirror tool to unfold the piece, how to set pieces, how to add seam allowance.
1.How to set pieces: http://www.padsystem.com/en/assets/documents/en/pattern/pattern_design_en_ch2_treatment_detail.html
2.How to add seam allowance: http://www.padsystem.com/en/assets/documents/en/pattern/pattern_design_en_ch3.html#tool-image163-seam-allowance