Bra basic block
The below steps are detailed for the V6.0 version. If you are using V7.0, the steps will be slightly different.
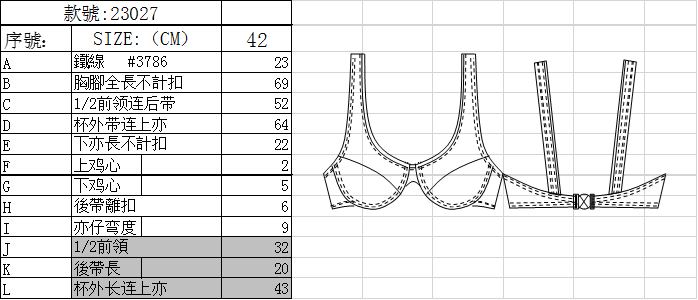
Measurement chart:
Draw the under cup piece
Open Pattern Design software and create a new file, then click menu [Options]-[Preference], select the unit (in/ cm / mm) in your need.
Select 25% display scale on the bottom left corner.
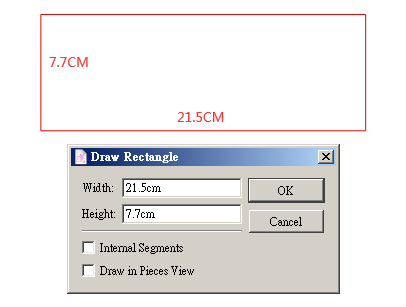
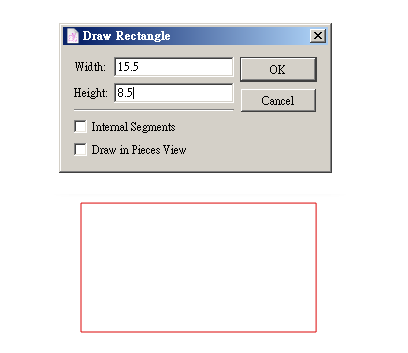
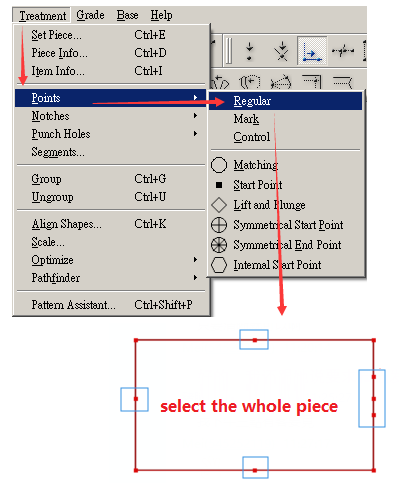
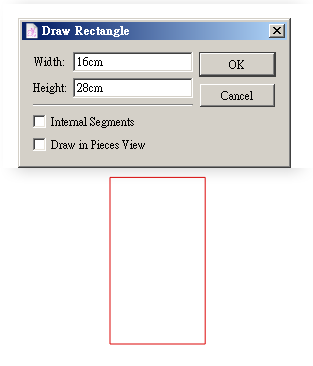
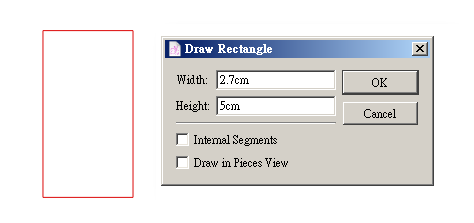
Select
tool, hold down the “Alt” (Windows) or “Option” key, left click the mouse and the dialog box appears. Enter the value: Width:15.5cm (6.1in), Height:8.5cm (3.35in), click “OK” to create the rectangle:
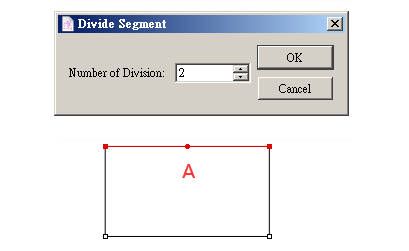
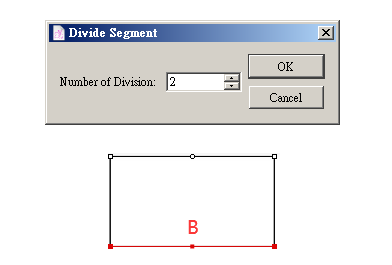
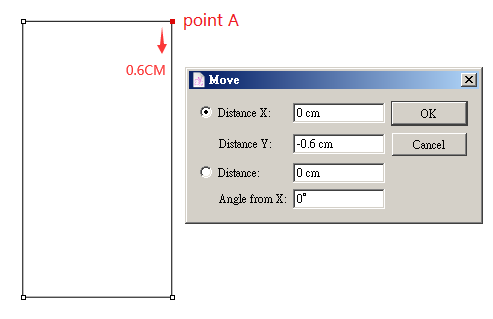
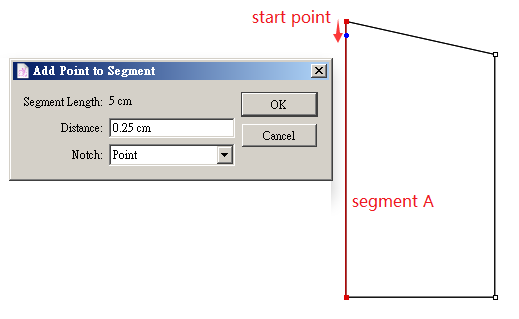
Use
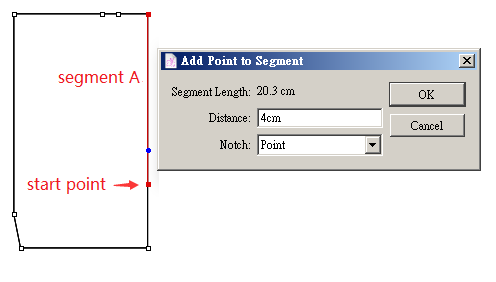
tool to select segment”A”, select
tool, left click the selected segment, enter the value: 2 in the appearing dialog box, click “OK”, then you can get the equal diversion point “A”:
Use
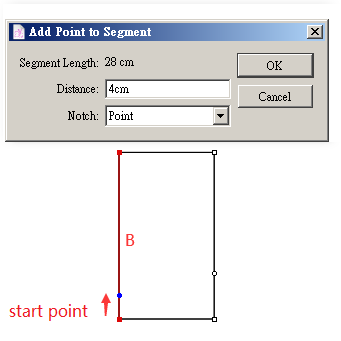
Use
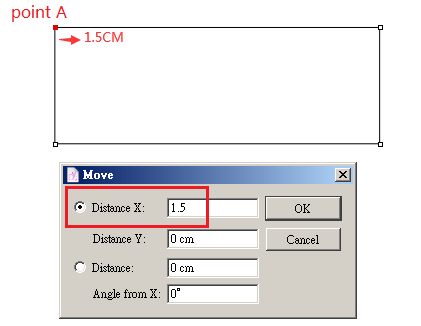
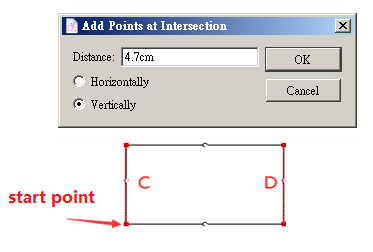
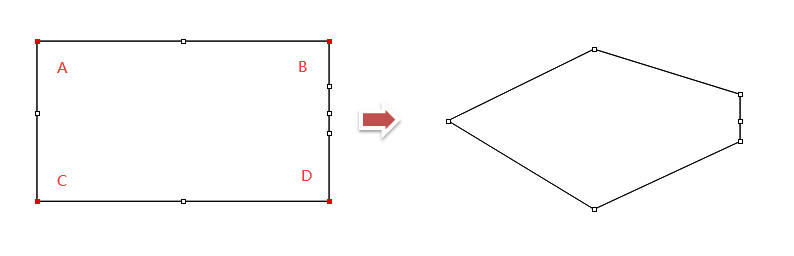
tool, hold down the “Alt”(Windows) or “Option” (Macintosh) key, left click the start point, then the dialog box appears, select “Horiontally” and input the value 4.7cm or 1.85in, click “OK” to get point “C” and “D”:
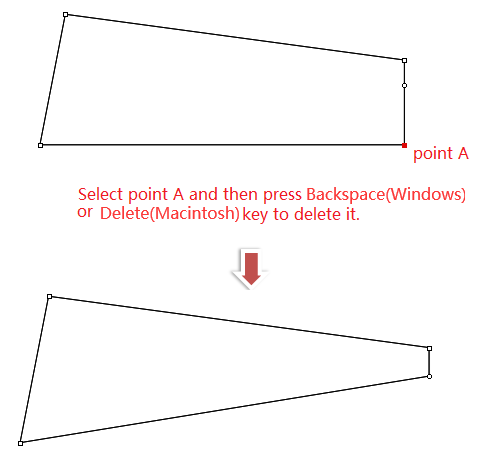
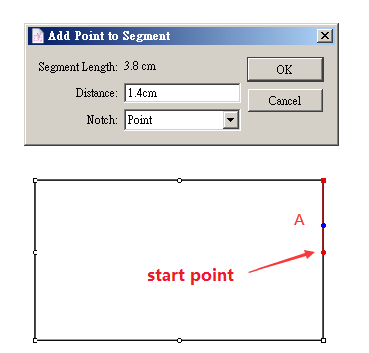
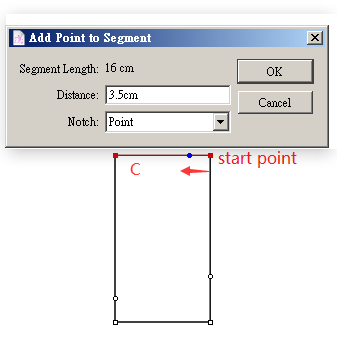
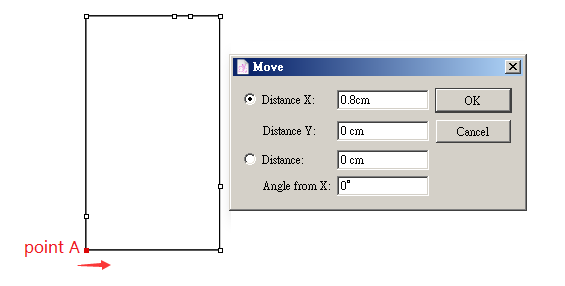
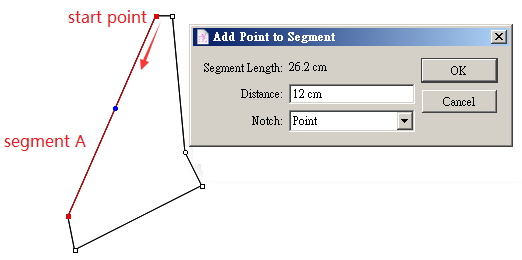
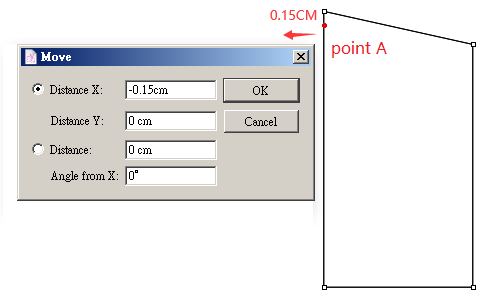
Use
tool ,left click the start point, the dialog box appears, input the value 1.4cm or o.55in in the “Distance” column, click “OK” to create new point “A”.
Use
Use
Select
Use
Use
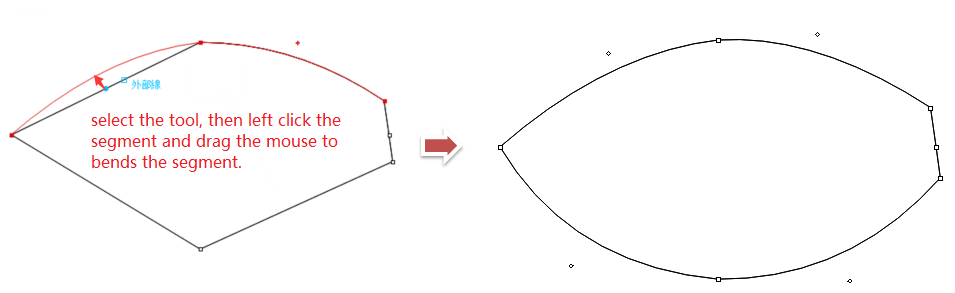
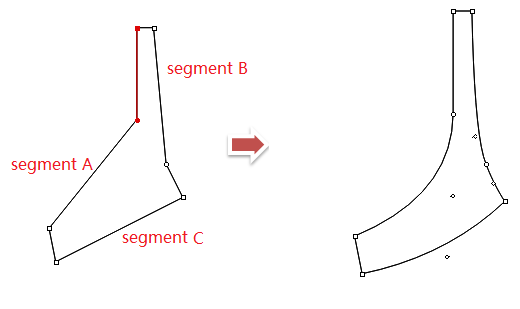
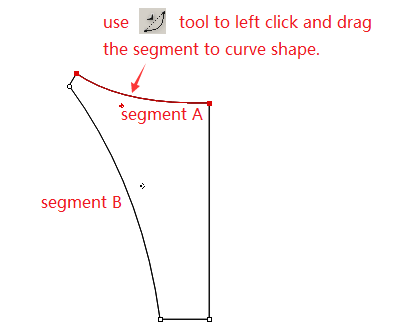
Select
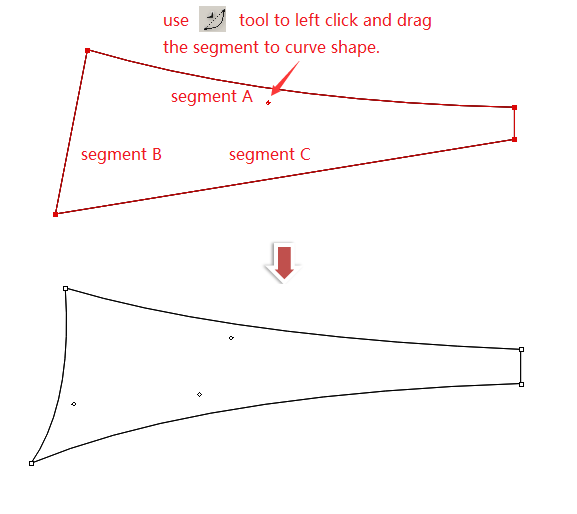
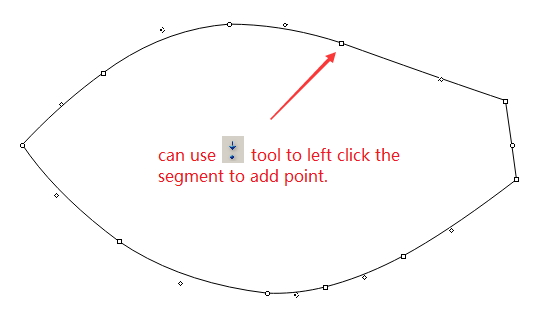
tool to bends the four segments separately: left click the segment (hold on and do not release) drag the mouse to cruve shape.
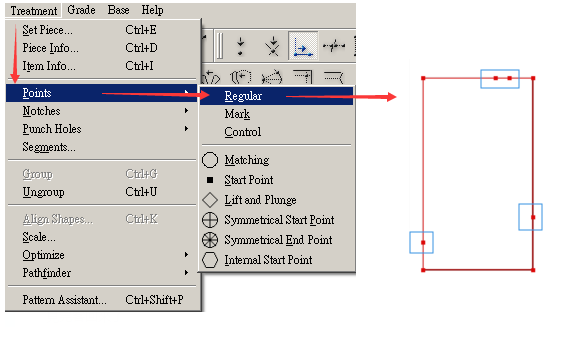
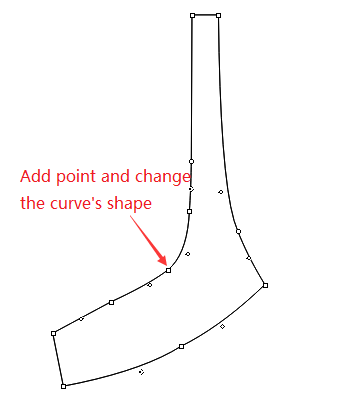
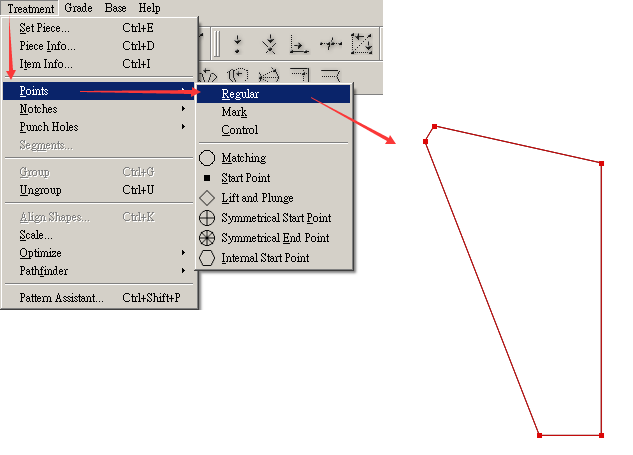
Select
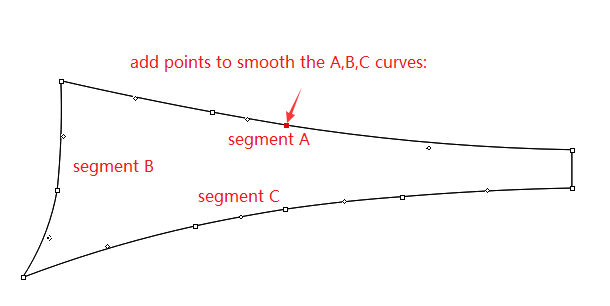
tool, left click the cruve (left click the position on the curve where you want to add point), then the regular point be added and the cruve be segmented. You can use
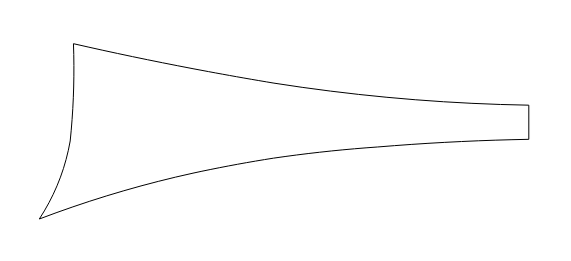
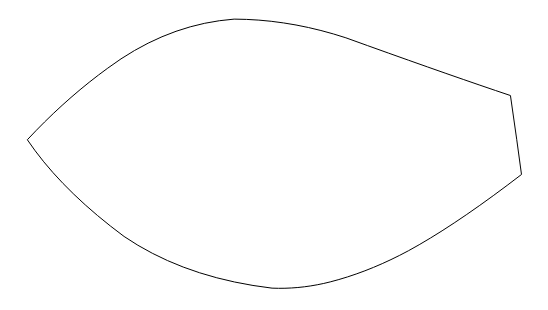
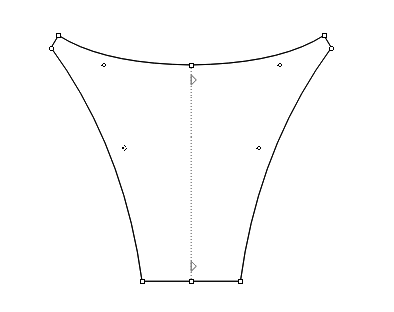
The under cup piece be finished with the above steps:

Draw the uper cup piece
Select
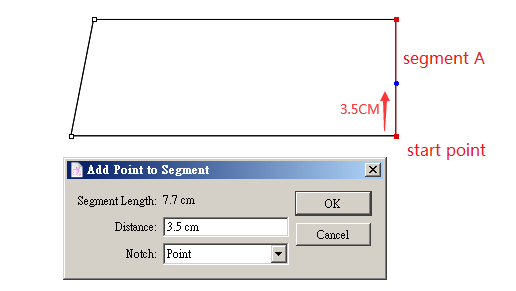
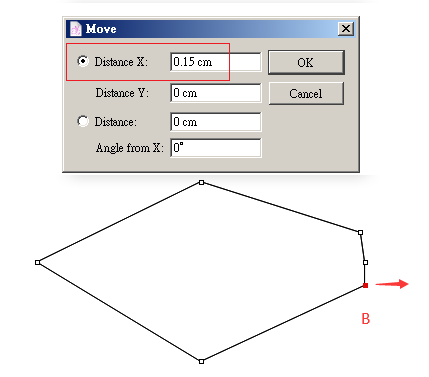
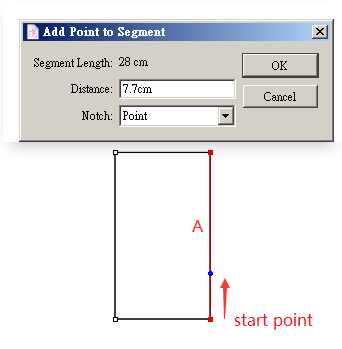
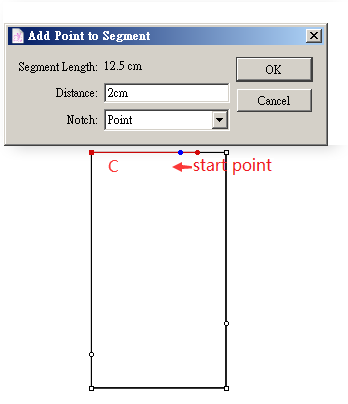
Use
, left click the start point, the dialog box appears, enter the value “7.7cm or 3.03in” in the “Distance” column, click “OK” to get the new point:
Use
Use
Use
Use
Use
Use
Use
Use
Use
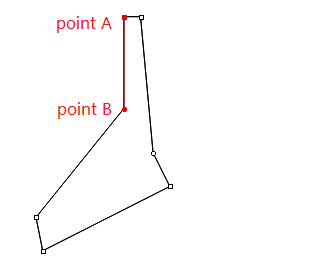
Select
tool, click point “A” and “B” one by one, then point “B” aligned to point “A”:
Select
Select
The uper cup piece be finished with the above steps:
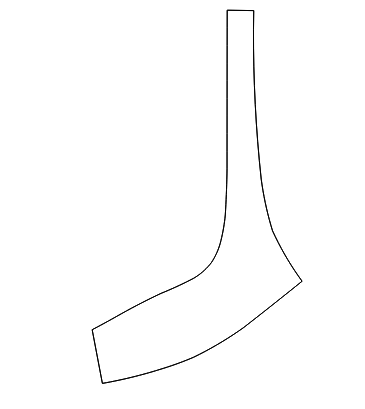
Draw the Center Front piece
Select
Use
Use
Use
Use
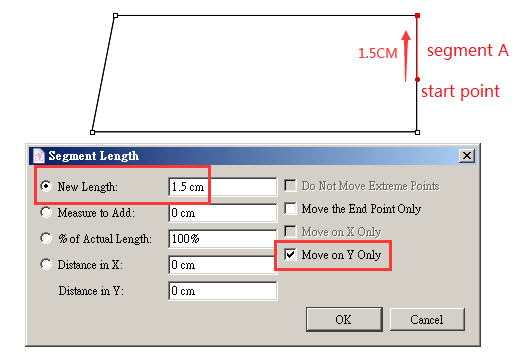
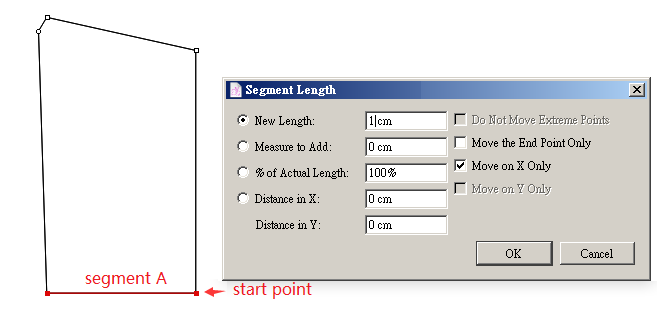
tool, left click the start point, the dialog box appears, enter the value “1cm or 0.394in” in the “New Length” column, check “Move on X only” item, click “OK”:
Use
Select
Use
tool, left click the selected line to unfold the center front piece:
Finish the center front piece with the above steps:

Draw the Back piece
Select
Use
Use
Use
Use
Use
Select
Select
Finish the back piece with the above steps: